Idrive Micro Base Station Download Point Installation Guide
Copyright information
This document contains proprietary information that is protected by copyright. No part of this document may be photocopied, reproduced, or translated to another language without the prior written consent of Idrive Inc.
Copyright © 2018 Idrive Inc.
This product incorporates copyright protected technology. Use of this copyright protected technology must be authorized by Idrive Inc. Reverse engineering or disassembly is prohibited.
The information in this document is subject to change without notice.
Idrive Micro Base Station Download Point Basic Components
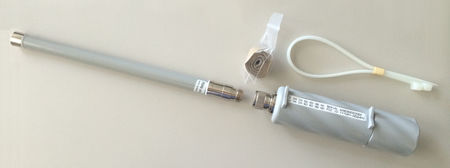
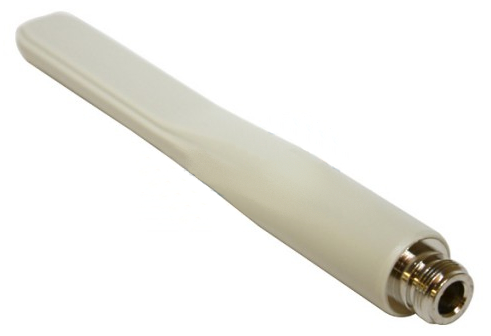
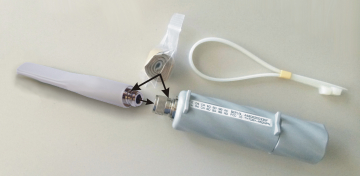
NOTE: As of October 2014 idrive has been shipping the shorter Maxxwave Antenna that attaches to the "Groove" Access Point rather than the longer antenna shown above.
This new Maxxwave Antenna will allow for multiple bands of operation on the same Access Point.
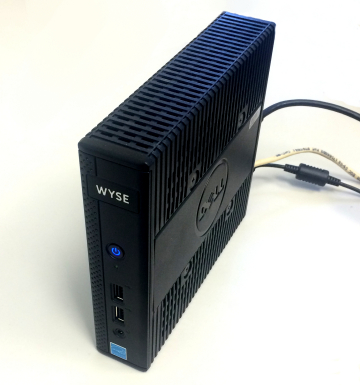
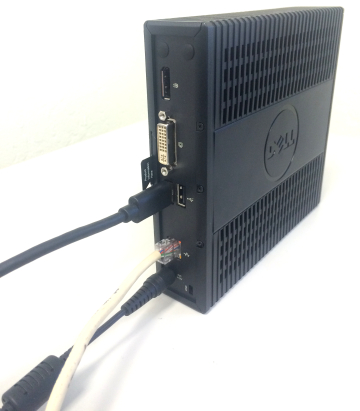
The Basic Idrive Micro Base Station Download Point is delivered to you pre-configured for your use. The system consists of a Micro Base Station Download Point computer with the Idrive software installed. The computer has two network interfaces that support both the Idrive wireless network and the internet connection (see above).
The primary supplier chosen for the Idrive base station hardware is Dell computers. Dell was chosen for reliability and “server grade” operation and support.
About the Idrive Micro Base Station Download Point
Your Idrive Micro Base Station Download Point is the small form factor (7.17" x 1.4" x 6.93") Windows 8 operating system that gives you autonomous downloading and automatic transfer operation at remote locations. All you require is a stable internet connection and a secure place to locate the Micro Base Station Download Point and mount the Access Point.
The operation of the Idrive Micro Base Station pre-supposes the existence of a Central Idrive Base Station where all events will be transferred to
After downloading events and data, the database points the system to transfer this data (shortly after it arrives) to your Idrive Target Point Base Station for permanent storage and review. The controls for your configuration and management of the Idrive devices in your fleet are all done at the Central Idrive Base Station (also known as the Target Point and located at a alternate/central client location). All data that is to be sent to the remote cameras is synced with remote Micro Base Station Download Points, and handed out when a device connects.
The Wired Internet Connection
The wired internet connection is used to communicate with the Idrive Central Base Station and the Global Center as well as to allow for system updates and remote support. This
connection should always be active. There are several non-standard ports that are used for communication as well as minimum bandwidth requirements. As a result Idrive does not require a dedicated internet connection however one is recommended.
Make the Internet Connection using an Ethernet cable from the client router to the internal Ethernet Port on the back of the Micro Base Station
The Idrive Access Point Wireless Network (WiFi)
The Idrive Micro Base Station Download Point communicates with the Idrive devices in your fleet via an 802.11G WiFi Access Point (seen above). The basic WiFi configuration delivered with the Idrive Micro Base Station Download Point is one omnidirectional access point. Several factors may necessitate the addition of more WiFi Access Points. Examples may include; location's physical layout, local noise sources and number of devices to be downloaded.
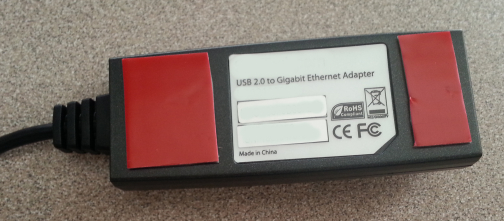
Make the Idrive WiFi Access Point Connection using an Ethernet cable from the provided Access Point PoE (LAN side of the PoE) to the to the external USB Ethernet Port on the back of the Micro Base Station
- the External USB Ethernet port is specifically programmed with a fixed address to directly communicate with the Access Point
- And is pre-programed to accept only those WiFi communications from the cameras through the Access Point.
Note: After making the connections for the USB Ethernet Adapter to the Micro PC, peel the self adhesive from the back of the USB Ethernet Adapter and stick it to the Micro Base Station case in such a manner that will not block any ports or air vents.
Setup of the Idrive Micro Base Station Download Point Computer
As with any computer ensure that you choose a setup location that provides good ergonomic conditions for the user.
Computer setup:
- Set up the Access Point and run an Ethernet cord from the provided PoE (LAN side) back to the Micro Base Station Download Point and plug it into the USB Ethernet adapter
- Connect the internet network connection (Labeled on the back of the system) to your internet connection.
- Plug the computer into an uninterruptible power supply (UPS)
- Power on; (although provided, no keyboard, mouse or monitor is needed) your system should be fully active when powered up and connected to the internet.
NOTE: After installation procedures outlined above are complete;
- Contact Idrive Support to remotely sign in and check the configuration of the Access Point
- Verify overall health of the Internet connection and its relation to the Access Point IP addresses
- Verify all necessary ports are open from the client ISP to the idrive Servers
After this final health check the Idrive Micro Base Station is now ready to begin receiving downloads and transferring them to a Idrive Base Station Target Point
Setup of the Wireless Access Point(s)
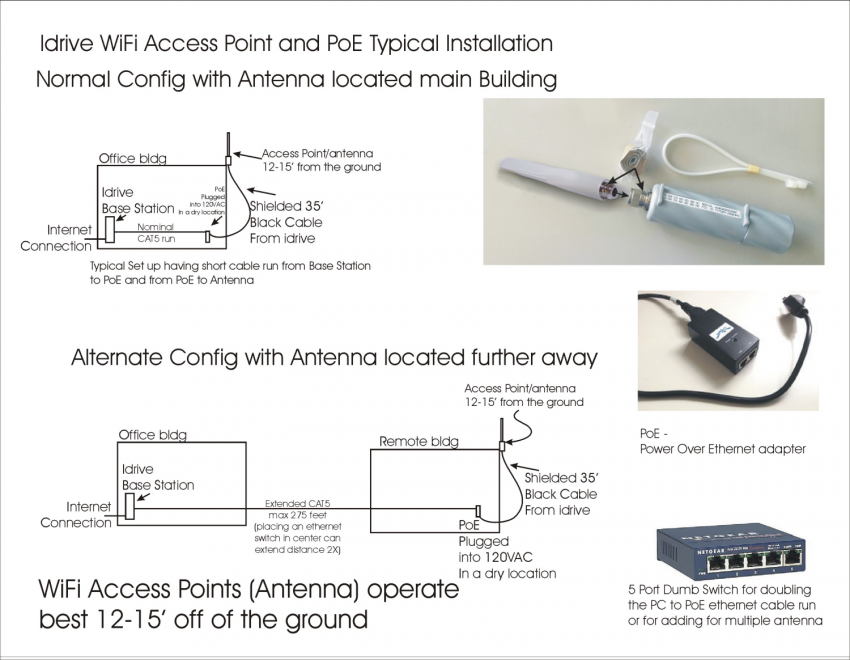
Each Access Point (AP) is a powerful CPE (Customer Premises Equipment) configured as a omnidirectional Access Point. It comes with an antenna that screws directly onto the AP. It should be mounted in a suitable location typically no more than 12 - 15 feet off of the ground and at least a foot away from the wall. If operating an outdoor lot the device should be mounted outdoors. If you have an indoor garage area this device can be mounted indoors.
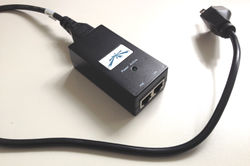
The AP receives its power over the shielded network cable supplied with your Idrive Base Station. The power is provided to the AP by the PoE (Power Over Ethernet) injector.
The AP will be delivered to you pre-configured to work with your Idrive system.
Water proofing and Wireless Access Point connection:
1) Attach the Antenna to the Access Point (AP) prior to applying power to the device via the PoE. Wrap the coupling where the antenna screws to the AP (not where the cable goes into it) with the supplied Butyl tape to waterproof the connection, follow instructions below:
- Start wrapping the supplied Butyl tape a single width of the tape above the joint and overlap each turn half way over the previous turn, slightly stretching the tape as you wrap
- Use the entire piece to seal the joint between the Antenna and the AP
- When finished cover the entire butyl wrapped joint with black electrical tape suitable for outside usage (not supplied)
- Start above the Butyl tape and finish each turn overlapping 1/2 the tape width until the entire Butyl tape is concealed
2) Mount the AP vertically and at a height 12 - 15 feet (typical). Chose a location which has a good view of the area to be covered. The antenna should be able to look over any vehicles that may block those that are parked behind it. (Additional or alternate equipment may be required depending on your location)
3) Depending on the Access Point and Antenna combination;
- Either attach mounting hardware to the metal base of the antenna with provided U-clamp, plate and U-Bolts or
- If directed, attach the AP to a mounting pole or other cylindrical pipe securing it with supplied heavy duty tie-wraps
4) Use the supplied foil wrapped Ethernet cable to plug into the bottom of the AP. Screw the bottom cap tightly to the AP and plug the opening for the cable with the supplied split grommet
5) At the Idrive Micro Base Station, connect a regular Cat 5e Ethernet Cable (not supplied) from the USB Ethernet port labeled idrive wireless on the back of the Idrive Micro Base Station to the LAN port on the PoE injector. (do not exceed 250 feet direct run)
6) Connect the PoE injector's PoE port to the AP’s Cat5 port using only the ”FTP” (Foil Wrapped Twisted Pair) style Cat5e cable supplied. Do not use any other type of Cat5 cable for this connection.
7) Connect the POE power plug into a grounded 120VAC electrical outlet.
Note: Diagram shows typical PoE and Access Point Installation, contact Idrive Support for suggestions and/or modifications: support@idriveglobal.com
