Stonkam D8 Installation Guide
Stonkam D8 Installation Guide
Packaging
All components for a specific individual vehicle will be in one box. This way the DVR will be set up for the exact vehicle and configuration.
System Components
Idrive D8 DVR
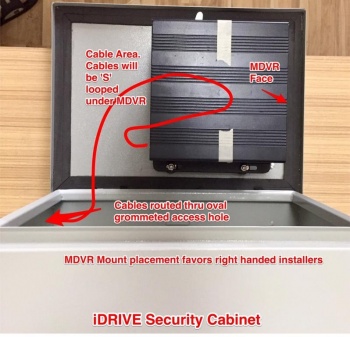
Security Box
Cables
Cameras
4 Channel Video Splitter (Cranes only)
Idrive D8 DVR
- DVR with SSD & SIM card installed and configured for specific vehicle
- Power Cable and Fuse
- *Camera cables - fix this
- *External GPS Module (demo does not have it. Will we be ordering it?)
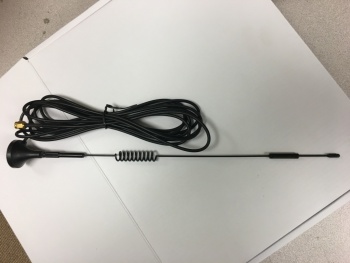
- 3G/4G Antenna
- define/confirm for Stonkam *Video Monitor Cable
- Keys
- Remote Control (Batteries Installed)
Video Splitter (4 channels)
For use in Cranes only to route the video from the existing 4 camera monitor system to the DVR.
- Video Splitter (4 Channels)
- Four 3 meter cables (from Splitter to DVR)
Camera Types
- Waterproof
- Dome (No Audio)
- CAM8165 - 155 degree view
Connections
Before Installations on cranes verify that the existing installed equipment is functioning. Idrive is not responsible for the 4 installed cameras or monitor system on cranes.
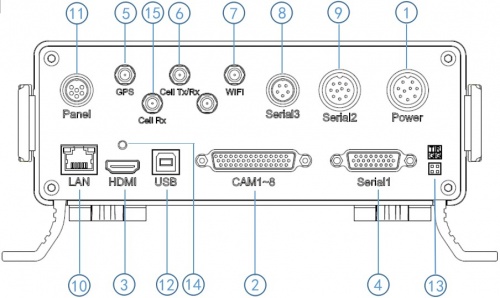
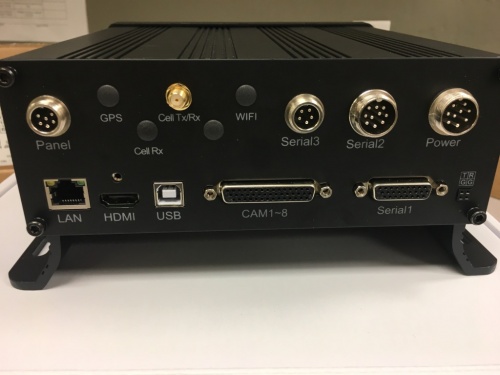
Back Panel Diagram
| Back Panel Connections | |
|---|---|
| 1) Power input (12-32V) | 9) Panic button, external GPS module connector |
| 2) Camera cable input | 10) Ethernet(RJ45) |
| 3) HDMI output | 11) 6pin CVBS video monitor output |
| 4) Alarm input/output | 12) USB 2.0 input |
| 5) GPS Connector | 13) debug |
| 6) Cellular Connector, TX/RX | 14) HDMI cable fixing hole |
| 7) Wifi Connector | 15) Cellular Diversity Connector, Rx |
| 8) Can input/output, External temp.sensor input |
Change Picture when we get the model with the GPS
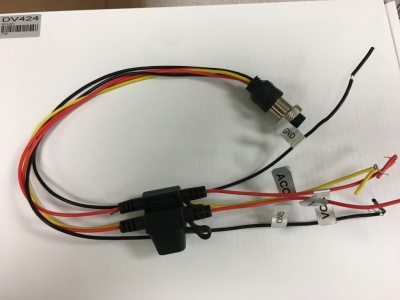
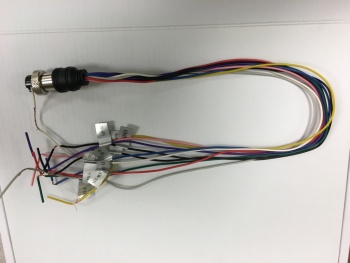
Power Cable
- *Red +12volts
- *Black GROUND
- *Yellow Ignition
Pin 1 : VCC
Pin 2 : VCC
Pin 3 : IGN
Pin 4 : NC
Pin 5 : NC
Pin 6 : GND
Pin 7 : GND
Pin 8 : NC
Pin 9 : NC
Fuses are 5 AMP
Power Connections
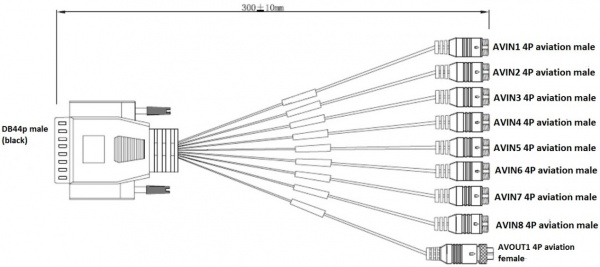
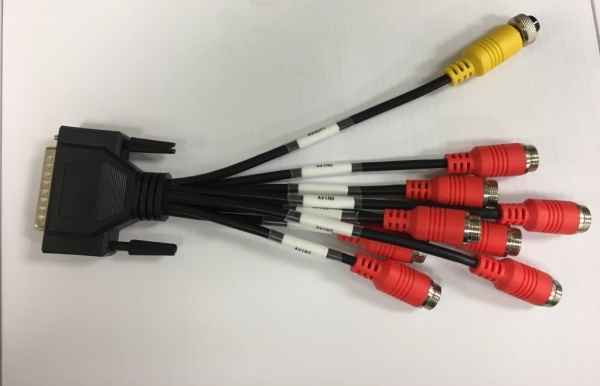
44 Pin Cameras Cable
Camera Connections
| Camera Connections | Cam#/Type/Cable | ||
|---|---|---|---|
| Connector | Side Loader | Chassis Handler | Crane |
| AVIN1 | #1 /Dome/ 5m | #1 /Dome/ 5m | #1/Dome/5m |
| AVIN2 | #2 /WP/ 10m | #2 /WP/5m or 10m? | #2/WP/10m |
| AVIN3 | #3 /WP/ 10m | #3 /WP/ 10m | #3/WP/10m |
| AVIN4 | #4 /WP/ 10m | #4 /WP/ 10m | #4/8165CAM/65m |
| AVIN5 | N/A | N/A | #5 /Splitter CH1/ 3m |
| AVIN6 | N/A | N/A | #6 /Splitter CH2/ 3m |
| AVIN7 | N/A | N/A | #7 /Splitter CH3/ 3m |
| AVIN8 | N/A | N/A | #8 /Splitter CH4/ 3m |
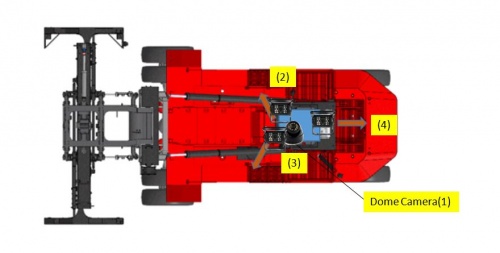
Side loader Camera Locations & Mounting
- #1 Dome Cam mounted above and to the Left of driver
- #2 Waterproof Cam mounted where
- #3 Waterproof Cam mounted where
- #4 Waterproof Cam mounted where
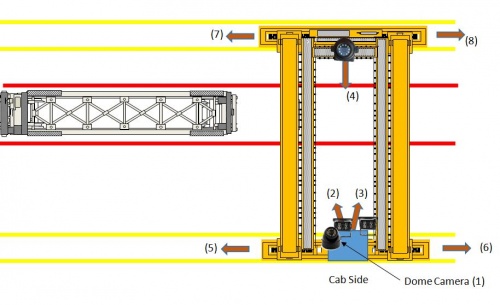
Crane Camera Locations & Mounting
- #1 Dome Cam mounted above and to the Left of driver
- #2 Waterproof Cam mounted where
- #3 Waterproof Cam mounted where
- #4 8165 Cam mounted where
- #5 - #8 Existing installed cameras
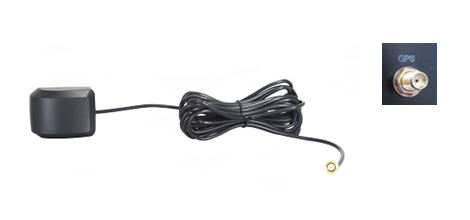
GPS Puck
- *Mounting location instructions here
3G/4G Antenna
Mounting location instructions here
Anti-Tamper Security Box
Install it - real pictures are coming
Extra Cables Not used
GPS and Panic Cable
Video Monitor
Touch Screen Monitor
Model HD297 touch screen Monitor has two video inputs, HDMI & 6 Pin Aviation - use the Monitor's Remote (Not DVR Remote) to change the input between HDMI and 6 Pin
① HD293 power button, LED red for stand by mode, and green for working mode
② HDMI connector
③ HDMI cable
④ HD293 6pin aviation cable connector, with Power and Video/Audio pin.
HD293
Description HD 10.1"Color monitor
Features used for HD DVR
Resolution 1024 x 600 (RGB)
Maximum Number of Cameras 1
Audio input 1
Audio output (loudspeaker) 1W
HDMI input 1
VGA input /
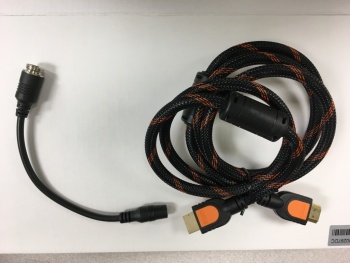
HDMI Cable
Comes with touch monitor. We do not need this.
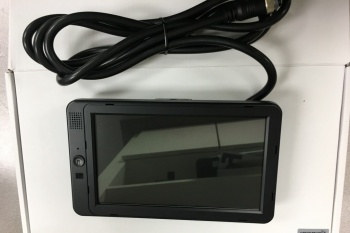
7" Monitor
Most configuration is done at Idrive. Use a regular monitor at customer location since they will not be doing much configuration only
No touch function
Plug into Video Out (Yellow 4 Pin Connector) on the 44Pin Cameras cable
Functional Test and Sign Off
- Connect Monitor to system
- Power On system
- Verify video for all channels is working (4 channels for loaders, 8 channels for cranes)
- Contact Idrive Support 805-273-4196 to confirm the DVR is registered on the server
- Verify GPS
- Verify Cellular conection
- Verify Video Loss Alarm
- Disconnect one camera to verify Alarms emails are working. Reconnect camera
- Turn Keys and Remote control over to terminal manager
- Manager sign off sheet for installation complete We need to create one.
