Difference between revisions of "RMA Processing Policy and Procedures"
| Line 12: | Line 12: | ||
<br/><br/> | <br/><br/> | ||
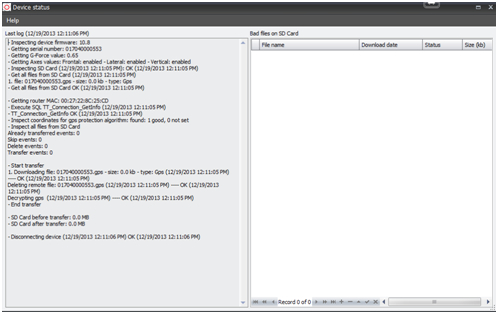
| − | [[File:device status.jpg| | + | [[File:device status.jpg|500px|]] |
===Visual Inspection:=== | ===Visual Inspection:=== | ||
Revision as of 17:37, 20 May 2013
RMA Processing
Receiving
1) verify package condition and packaging
2) In RMA log, record the date the RMA was received
3) In admin center, change status of device to “In Factory-not repaired”
Visual Inspection:
1) Verify condition of plastics/H-bracket (if included)/GPS pod
2) Open X1 case and verify condition of motherboard (lenses fixed in place)
3) Check the wireless bracket for signs of overheating or melting
- If melting of the bracket is seen, replace bracket
- If an older style antenna is being used, replace with newer antenna
4) Remove internal battery (if present)
5) Apply ziptie to GPS cable for stress relief
6) Neatly wrap GPS cable and tie with ziptie
7) Apply double-sided tape to GPS pod and H-bracket (if included)
Issue Verification:
1) Turn on the Idrive Factory Device Tool
2) Plug the X1 into the second test station and turn on power to allow for boot-up
- if boot up does not proceed to green/green (stuck red/green) there is likely an issue with the wifi
- if LED boot up cycles constantly (amber/redgreen/redamber/red) the SD card is likely at fault and should be reformatted/replaced
- if improper LED behavior is observed (flickering or unusual LED color) or if there is no LED behavior (no power) there is likely a motherboard issue and it should be replaced
3) Once booted up (green/green) shut off power to push the X1 to connect to wifi
- if the LEDs remain green/flashing amber the wifi is not connecting to the AP. Verify the wireless clients on the router (192.168.0.1) to ensure that it is indeed the wifi at fault
- if the camera connects to the AP but with an incorrect MAC ID, there is an issue with the wifi module and it will need to be replaced.
3) Unplug the camera and turn off power to the test board
Firmware Loading and Image/GPS Test
1) Plug the X1 into the first test station and attach the serial adapter to the motherboard
2) Turn on power to the board and when the Idrive Programming Tool displays a green check, flip the ignition.
- if the Programming Tool gives a “Board not found”, check the seating of the serial connection
3) Allow programming to run until completion
4) Turn off ignition and power to the board
5) Open Reglaj program and select “front camera” tab as starting point
6) Turn on power to the board, flip the test switch and then turn on ignition
-if board does not boot up and enter video mode after some time, turn of power and check seating of serial adapter on the X1 board
7) Upon entering video mode, verify the quality of image for both front and back cameras by navigating the tabs
- make lens adjustments where needed
8) Switch to the “debug events” tab to verify GPS functionality
- should get a green “OK” next to the GPS title as well as a dynamic feed of information at the bottom of the screen. If not, the GPS likely needs replacement
Testing
1) Plug the X1 back into the second test station and turn on power
2) Allow the X1 the boot up (green/green) before turning off ignition to connect with AP
- if the camera connects properly the serial will be saved to the server (displayed in Factory Device Tool)
- if the camera does not connect or connects with an incorrect serial number, the wifi will need to be replaced (see Wifi Replacement section)
3) After successful connection, turn ignition back on and allow for proper boot-up
4) Once LEDs are green/green, test each event (door, shock, panic, wireless panic, and alarm) and verify the LED behavior corresponds with a “record” state (green/red)
- if the events do not record successfully or if LED behavior is abnormal, the motherboard will likely need replacement
5) Once all events have been triggered and the LEDs have returned to green/green, shut off ignition to allow for event transfer
-upon transferring, a progress indicator is displayed in the Factory Device Tool
6) Verify the videos in the control center under “New Events” tab
Returning Refurbished Devices to Customer:
Finacial Process
1. do this
2. do this next
Repair Costs
| Item | Cost |
|---|---|
| Main Board | $67000 |
| Wifi | $8000 |
| ETC | amount |
