D4 DVR CoreBoard replacement (NAND-NOR Flash Conversion)
Units affected
Shipped prior to July 2013. Verify by checking FW Version of V4.3-S8R15-20130701-W/2
<br\><br\>
Reason(s) for replacement
What is the cause of the flash block failures?
From EZStore 9/1/13 - "We used NAND flash as on board program storage. NAND flash is a big volume storage device, it must have bad blocks in production (http://en.wikipedia.org/wiki/Flash_memory). There are two type bad blocks in NAND flash, initial bad block and runtime bad block. We can try to avoid initial bad block, but it's relatively difficult to handle runtime bad block. The effective effort for bad block is ECC on flash controller in mainchip, the MG3500 (our main chip) we used does have ECC correction function, but if the bad bits in NAND flash is more than the number it can handle, then the system will be down."
<br\><br\>
Resolution of the issue (changed from NAND-FLASH to NOR-FLASH)
Swap the existing “DVR_CoreBoard” with one that has the NOR-FLASH incorporated on it. We can then swap out this Module on the returned DVRs here and eliminate the cost and time to return them, have them repaired and sent back to us. At some point when (if) we have enough we will return the failed module to you. If we run low on modules we would need you to send us more if the failure rate warrants this.
<br\><br\>
Replacement process
Remove back Panel
- remove the 4 torx fasteners
- Do Not remove the ribbon cable to the back panel from the main board
Remove ribbon Cable to the Hard Drive enclosure
- slide the main board and back panel part way out until you can reach the Hard drive ribbon cable
- remove the cable from the main board and slide the main board out of the enclosure
Remove front panel
- remove the 4 torx fasteners
- Unplug the cable that goes to the lock switch
Remove the main board from the chassis
- Slide the board and rear panel out the back of the unit
Remove “DVR_CoreBoard”
- Remove the 6 screws securing the Core Board to the Main board
- Gently pry up on each end of the core board to remove it from the two board inter connects
Install the NOR-FLASH DVR_Coreboard
- Gently press the replacement Core board onto the main board connectors - VERIFY the Correct Orientation! This Can be Installed backwards!
- Replace the 6 screws securing the Core Board to the Main board Do not tighten the center screws enough to bend the board. There is no support under these two screws
Reinstall Main Board into enclosure
- Slide main board into the enclosure far enough to allow the Hard Drive Ribbon Cable to be reconnected
- Reconnect the Hard Drive Cable
- Slide the Main board in far enough to allow connection of the front pane to the connector
Replace the front Panel
Replace the Rear Panel
Verify Firmware version
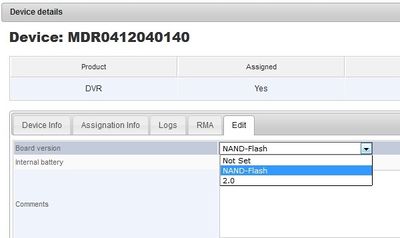
Document Board Replacement in Admin Center
- Set the Board Version to "NAND_FLASH"
Configure DVR per Normal Process
[D4 Initial Configuration and Setup]
<br\><br\>
