Stonkam D8 Initial Configuration and Setup
Routine Setup
Login
Default user name admin
Default password 123
Format SDD
Install SSD
Click on the Floppy Disk Icon on main display
Format SSD (15 seconds for 500GB)
Firmware Upgrade via SD
Insert the SD card with the appropriate upgrade files in its root directory.
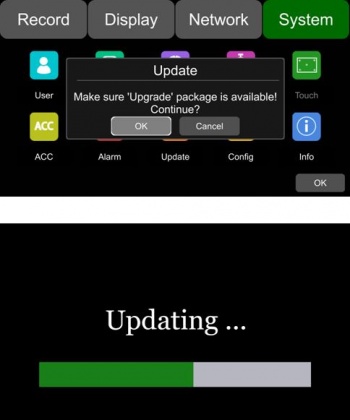
Navigate to Menu -> Setup -> System -> Update
Hit OK
Wait for Update Success!
Note: To make sure the update was a success reboot the device and navigate to
Menu -> Setup -> System -> Info
Compare the current version to the desired version.
Config Import via USB
First insert the USB with the appropriate configuration file in its root directory
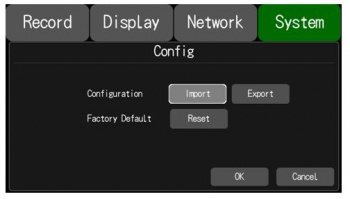
Navigate to Menu -> System -> Config
Select the import button
Hard Disk Installation
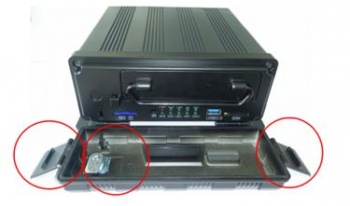
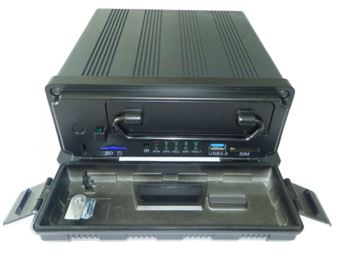
Step 1: Unlock the device with its key, and open the two side flaps on the front panel. Pull the front plate from the top down as shown in the photo below
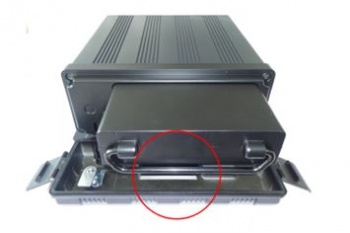
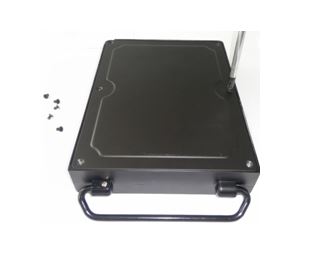
Step 2: Pull the hard drive sled out by its attached ring as shown in the image below
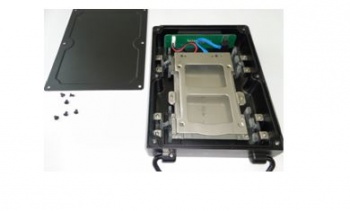
Step 3: Remove the six screws that hold the hard drive sled together carefully with a screwdriver.
Once these screws are off the whole bottom plate should be removed.
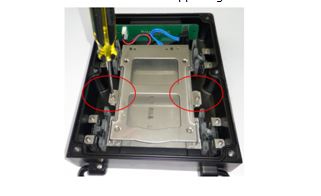
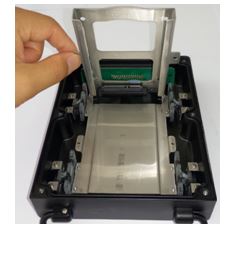
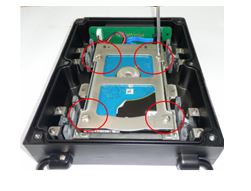
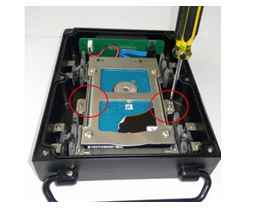
Step 4: Remove the two screws on the silver hard drive support shelf as shown below. Once these are removed pull the top of the shelf up as illustrated.
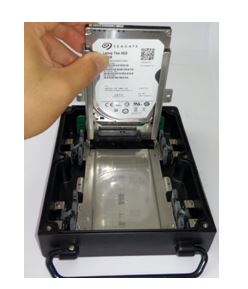
Step 5: Slide the new hard drive into the enclosure making sure a solid connection is made with the hard drive ribbon cable.
Step 6: Fold the hard drive shelf back down into its resting position and secure the 4 hard drive mounting screws in place. These hard drive mounting screws come from the device's accessory pack
Step 7: Lock the hard drive shelf into place with the 2 securing screws from step 4 as shown in the image below
Step 8: Reinstall 6 Hard drive Sled screws that secure its bottom panel.
Step 9: Slide hard drive sled back into the D8 securely
Manual Configuration
Enter Setup Mode by pressing the cog button on the main menu.
Record
- Power On Rec
- Cyclic Rec. - Overwrite?
- Event Rec.
- Video Quality
- Record Channel
- Event Duration
- File Length
- Motion Sensitivity
- G-Force Sensitivity
- File Type
Display
Camera
Cam Name
Language
Audio Out
OSD
Menu On
Speed
GPS
Mirror
Network
LAN
Defaults:
- IP Address 192.168.100.188
- Mask 255.255.255.0
- Gateway 192.168.100.1
MAC Add: 7e:97:15:xx:xx:xx
WiFi
N/A - Optional
Cellular
Status
Server
FTP
System
User
Device
License No. - Default:(AAAAAA)
Device ID - Default:(BBBBBB)
Path No. - Default (CCCCCC)
Date & Time
Schedule
Touch
ACC
Alarm
Update
Config
Info
