Difference between revisions of "Configure VPN Server"
| Line 119: | Line 119: | ||
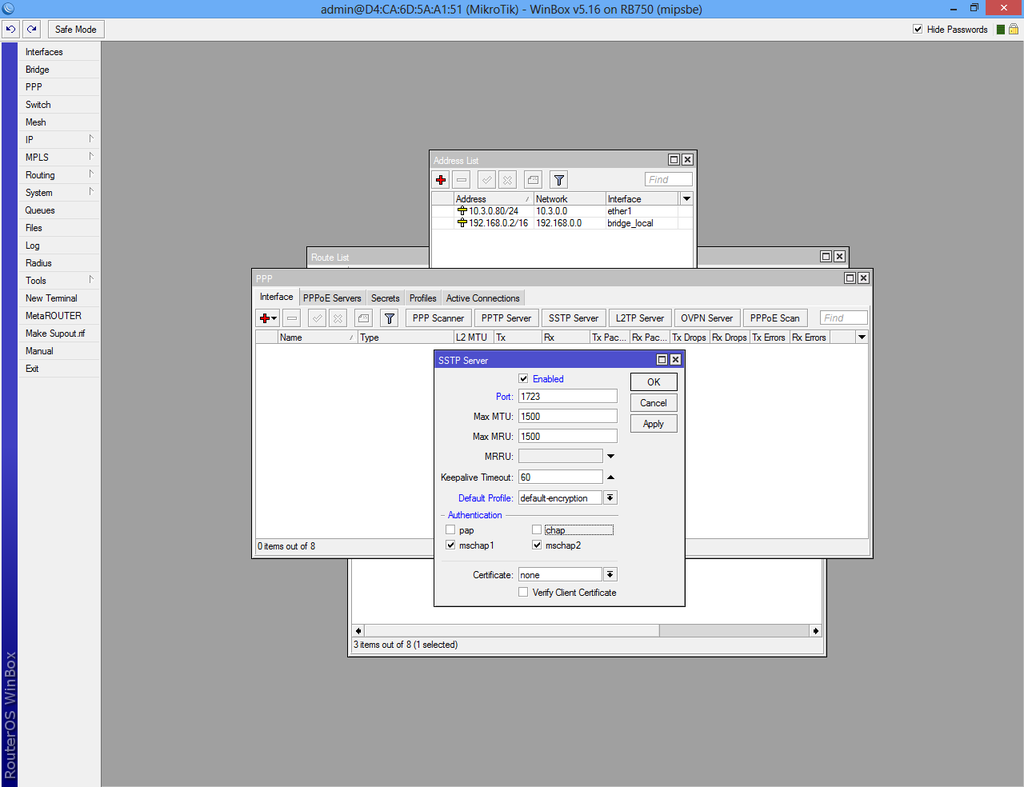
| − | Select "SSTP Server" from PPP->Interface, check 1723 port, select "default- | + | Select "SSTP Server" from PPP->Interface, check 1723 port, select "default-encryption" and uncheck "pap" and "chap" authentication. |
[[File:Mikrotik20.png|1024px|center]] | [[File:Mikrotik20.png|1024px|center]] | ||
| + | |||
| + | |||
| + | If the VPN client is configured the connection will start automatically. If the VPN client is not configured, check [[Configure VPN Client]]. | ||
| + | |||
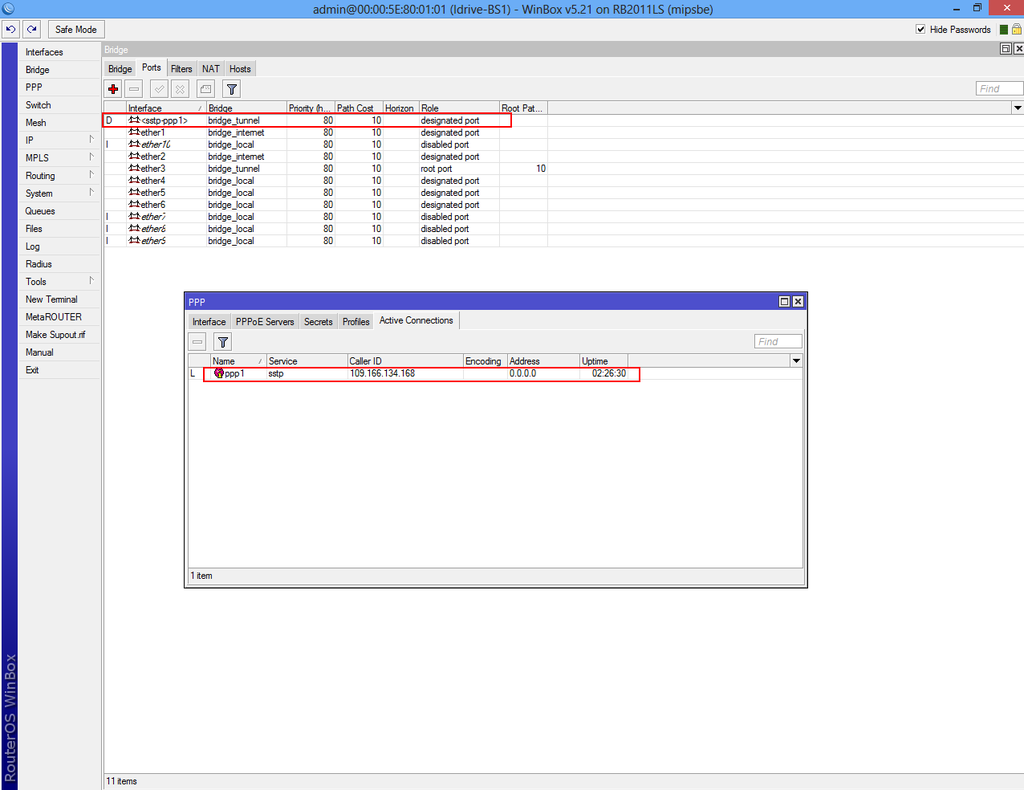
| + | To check active connection select PPP->Active Connection or Bridge->Ports. | ||
| + | |||
| + | |||
| + | [[File:Mikrotik22.png|1024px|center]] | ||
Revision as of 14:19, 3 June 2013
Before start configure VPN server download the Configuration tool for RouterOS.
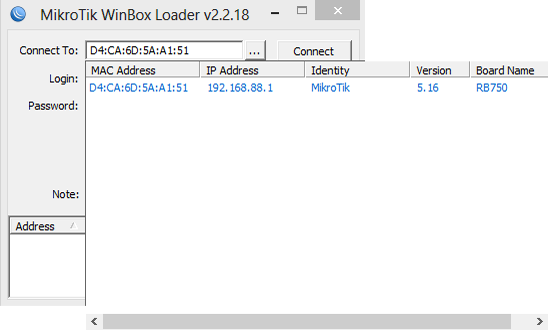
Run Winbox.exe and wait 5-10 sec. until the IP and MAC adress will apear.
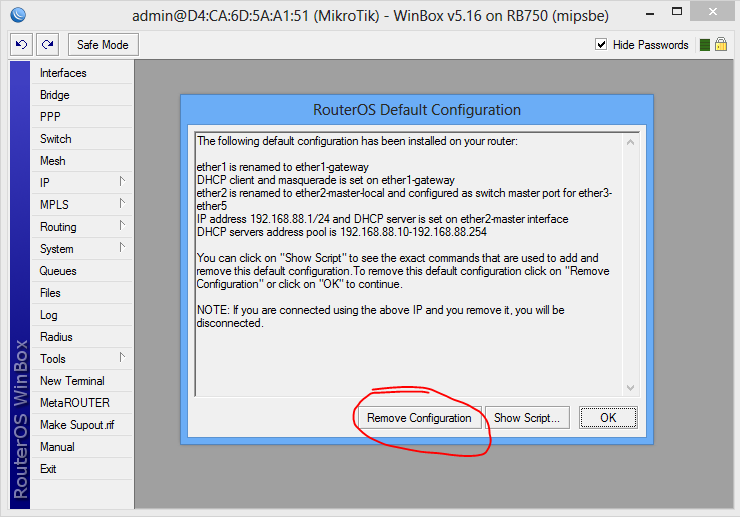
A pop-up window will apear and choose "Remove Configuration" otherwise the router will create a default configuration.
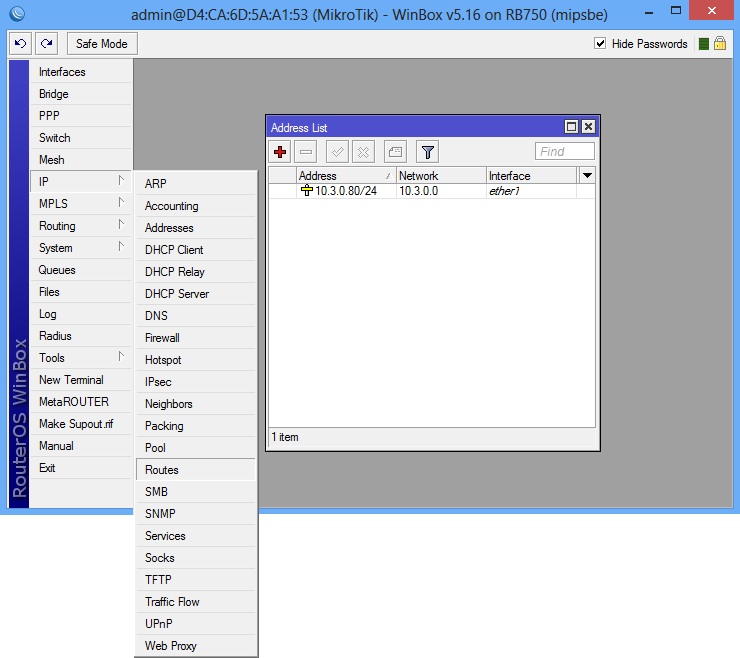
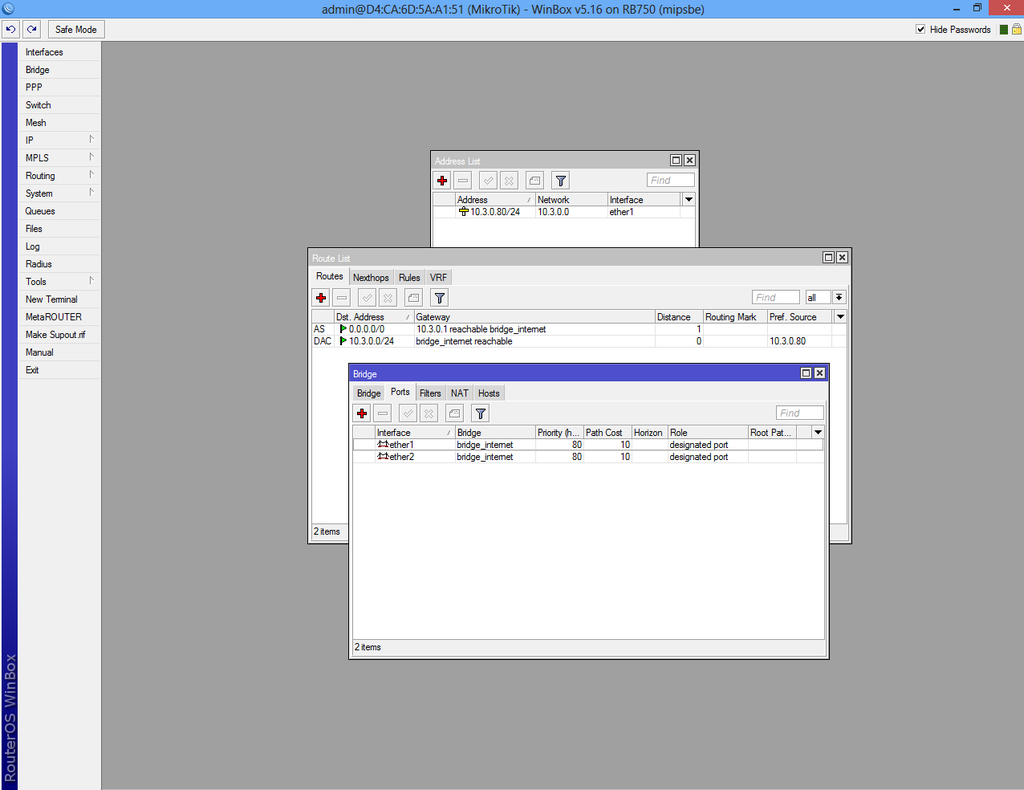
First step is to create a static IP for your internet connection.
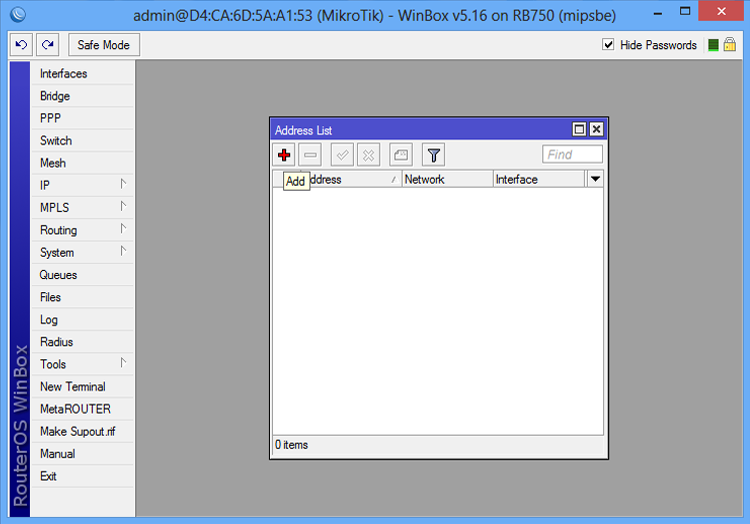
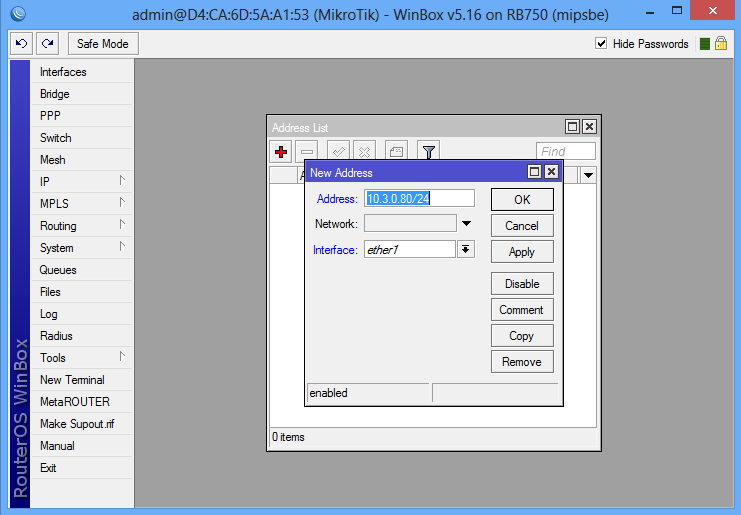
Select "Addresses" from "IP" and click the plus sign.
We used IP 10.3.0.80 which is a local IP from the main router IP Pool and
we have forwarded the 1723 port.
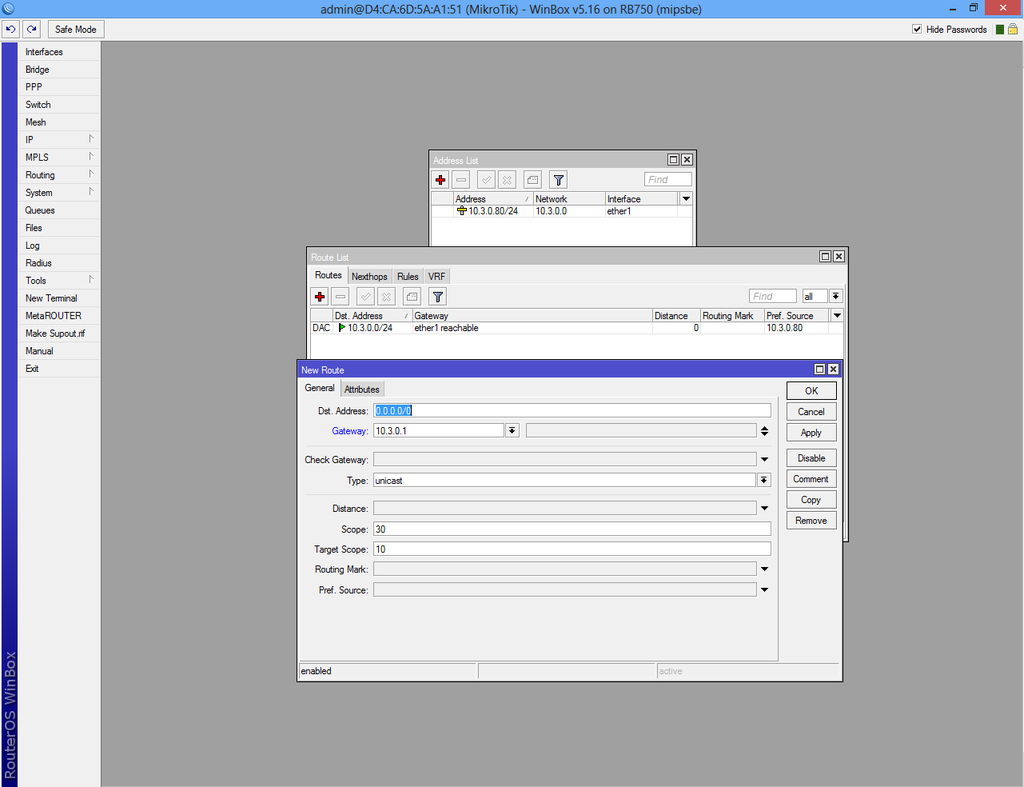
Route IP for internet access.
Add IP 0.0.0.0/0 in "Dst. Address:" box. In "Gateway" box add your ISP gateway.
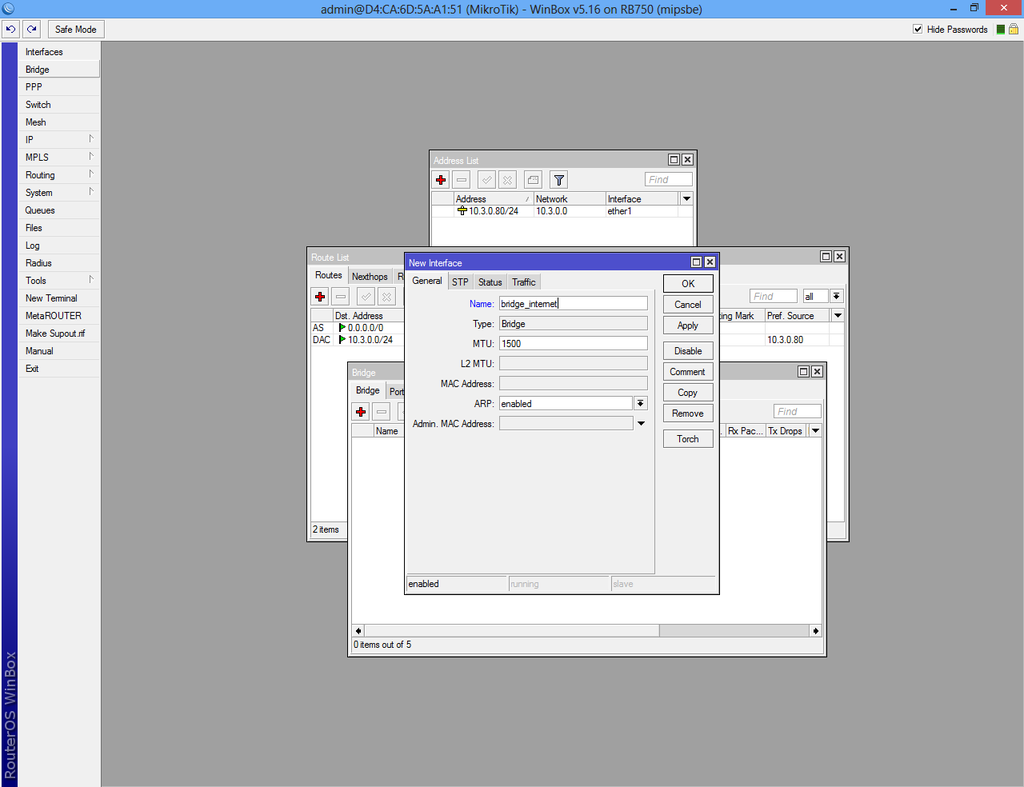
Select "Bridge" from the left menu and add new bridge.
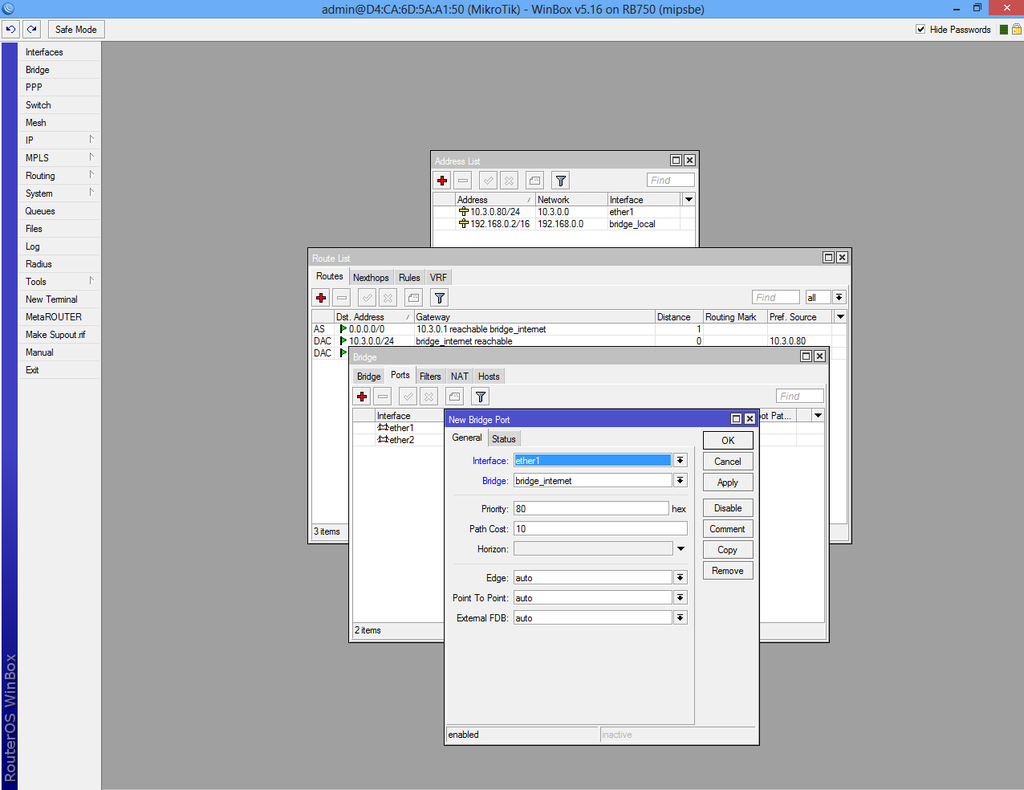
From the same interface select "Ports" tab and add interfaces ether1 and ether2 to "bridge_internet"
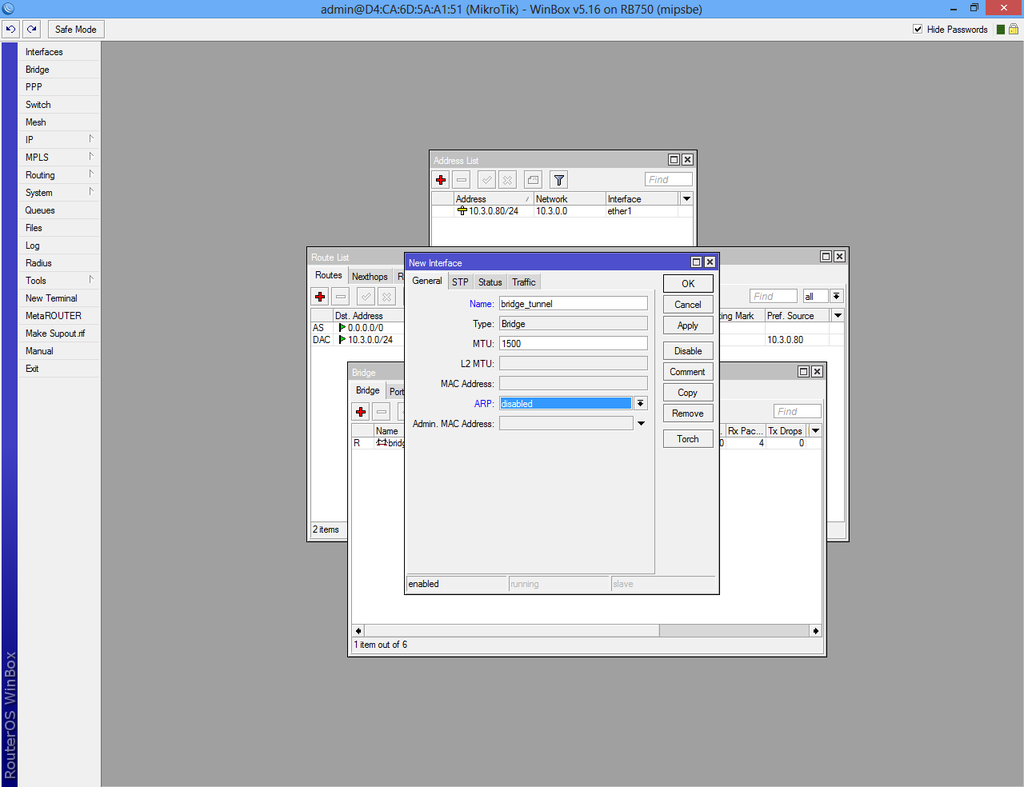
Now repeat the step above and create a new bridge.
Make sure the "ARP" is disabled!
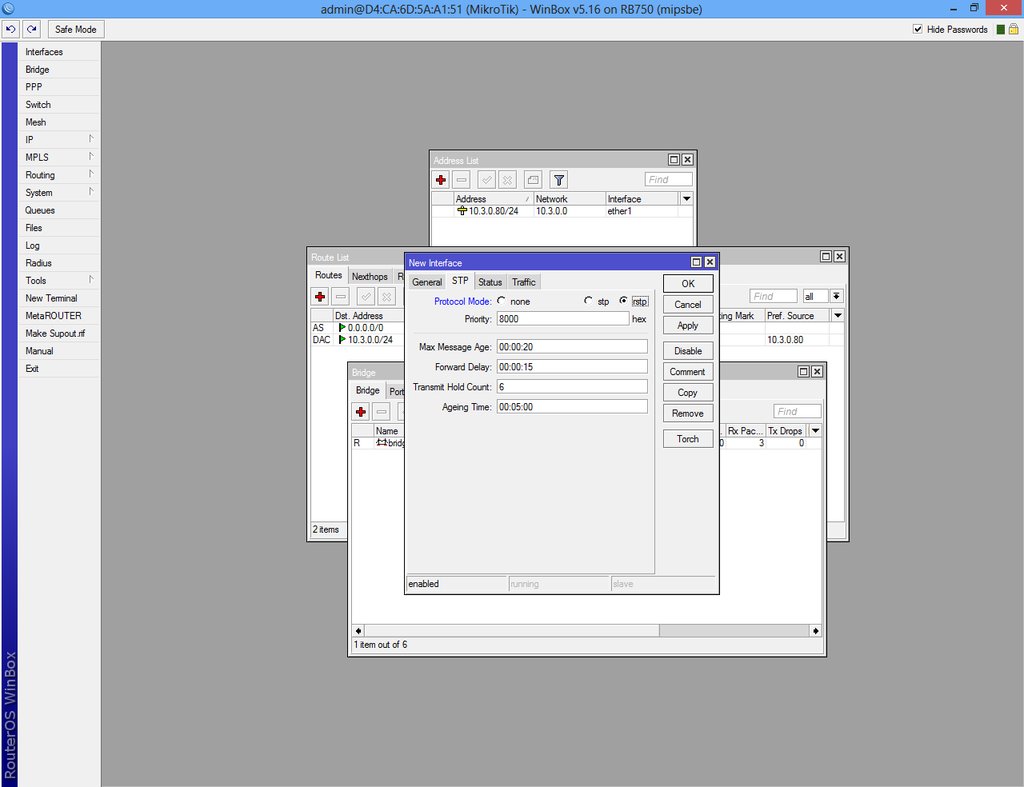
From the same interface click on "STP" tab, check "Protocol mode: rstp" and apply.
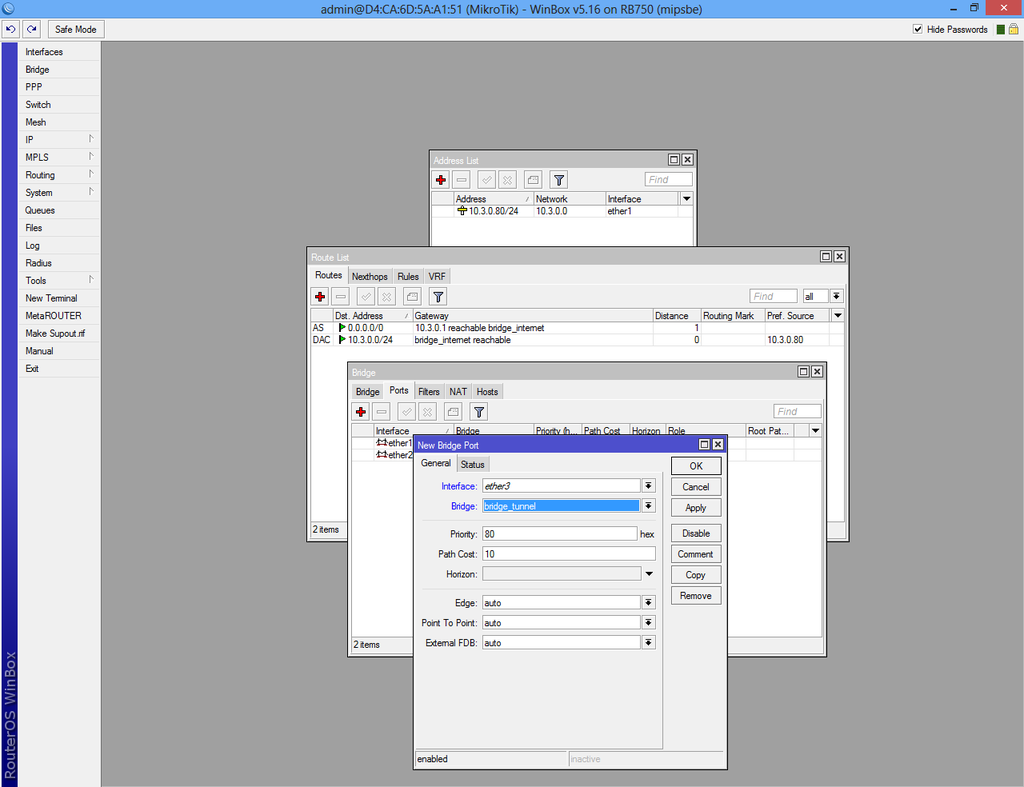
Select "Ports" tab from the "Bridge" interface and add new bridge port.
Select "ether3" and "bridge_tunnel" from the drop-down list.
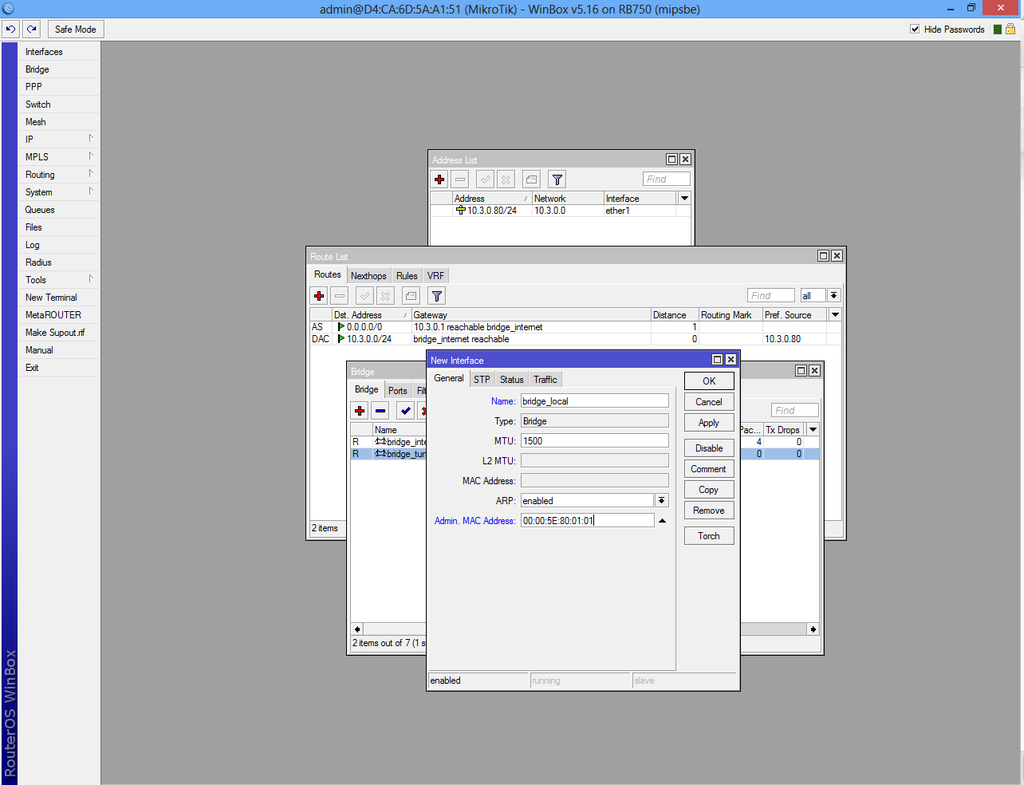
Create a third bridge, "bridge_local" with "ARP" enabled and add MAC Address: 00:00:5E:80:01:01.
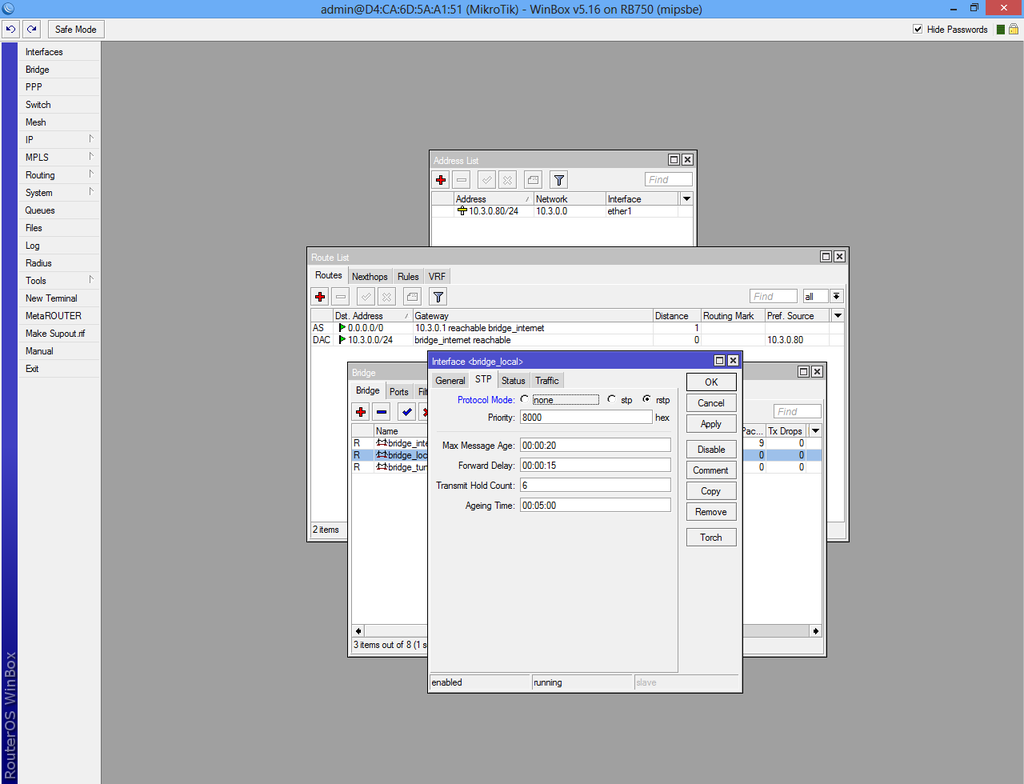
Select "STP" tab, check "Protocol mode: rstp" and apply.
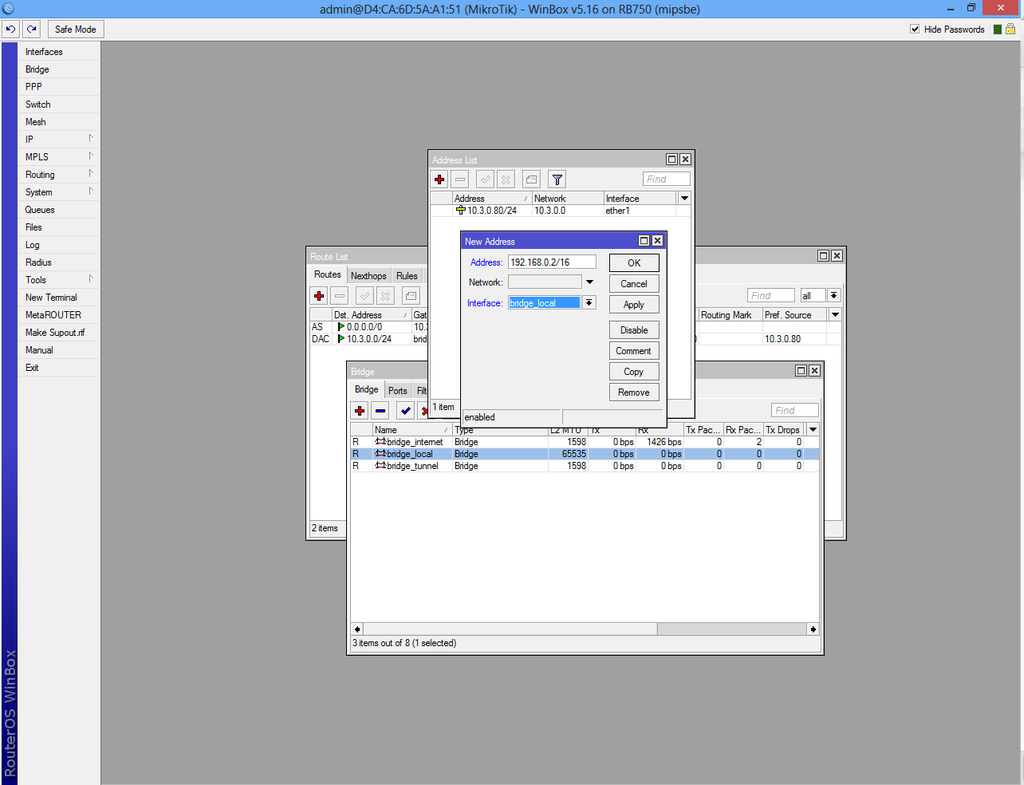
Return to the IP->Address List interface and add "192.168.0.2/16" to "bridge_local".
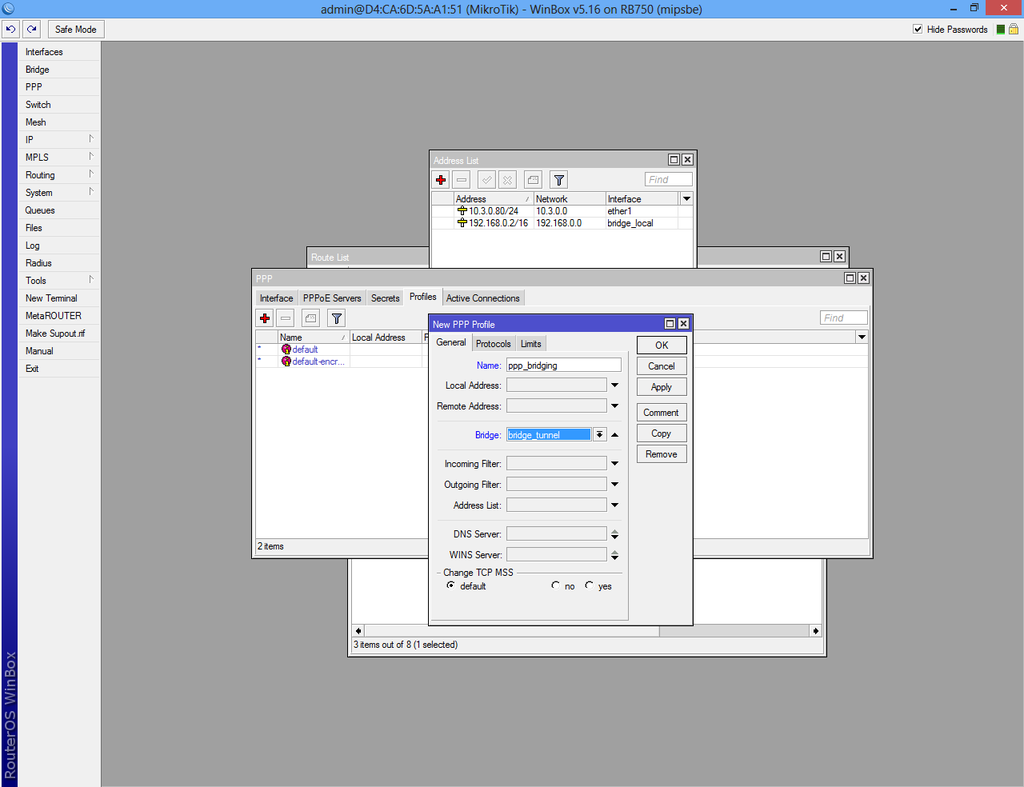
Select "Profiles" tab from PPP interface add new profile.
From the "General" tab fill the new profile name and select "bridge_tunnel" from drop-down list.
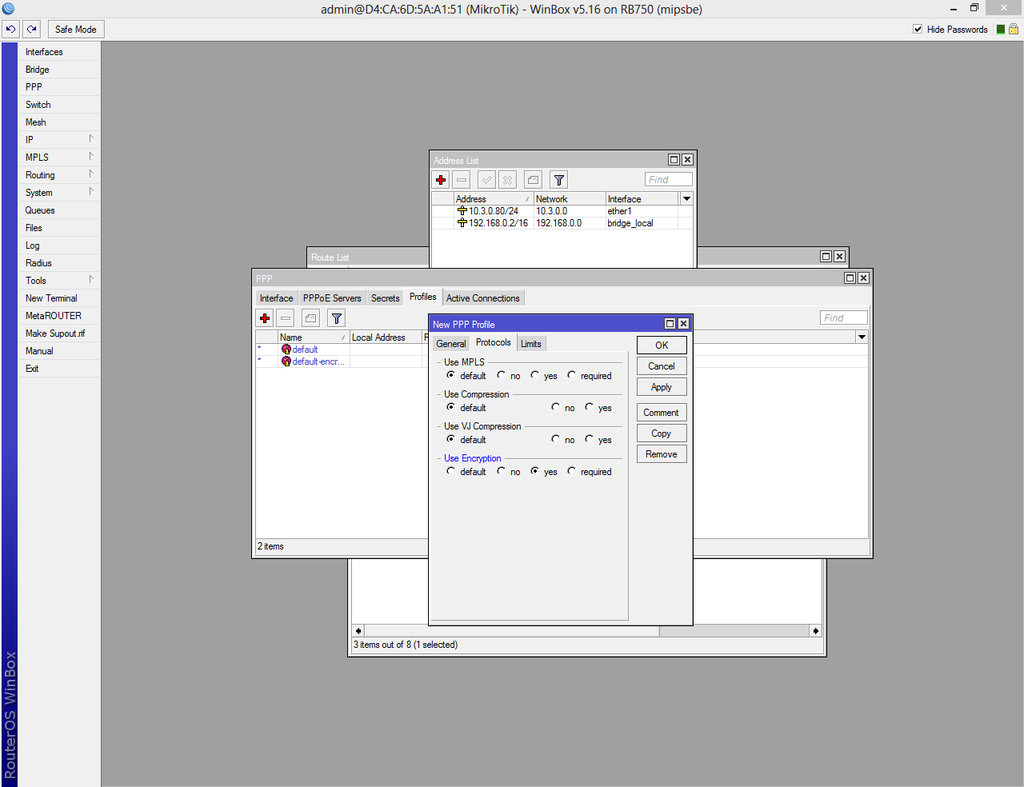
Select "Protocols" tab and check "yes" from "Use Encryption".
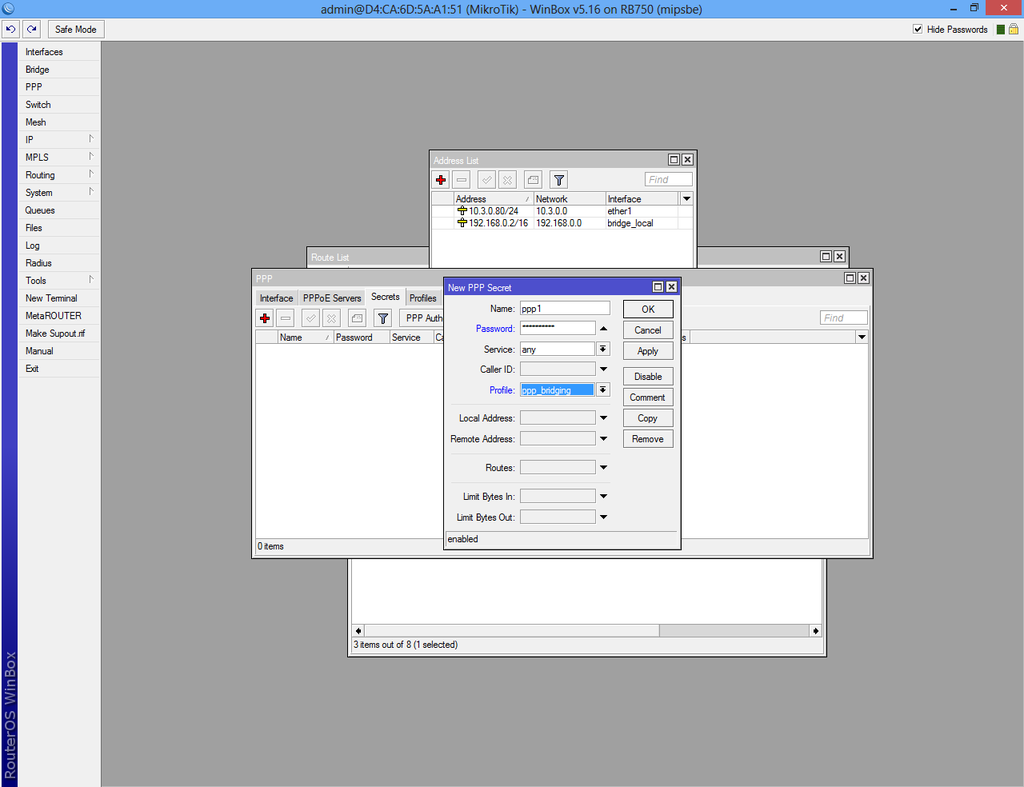
From PPP interface select "Secrets" tab and create new secret.
Fill with the name and password and select the profile you have created above.
Select "SSTP Server" from PPP->Interface, check 1723 port, select "default-encryption" and uncheck "pap" and "chap" authentication.
If the VPN client is configured the connection will start automatically. If the VPN client is not configured, check Configure VPN Client.
To check active connection select PPP->Active Connection or Bridge->Ports.
