Difference between revisions of "New D4M (4/17/19) Initial Configuration and Setup"
Jump to navigation
Jump to search


| Line 232: | Line 232: | ||
Each channel set separately | Each channel set separately | ||
| − | ::1)* | + | ::1)*Motion Zone Settings <span style="color: blue"> '''All Clear''' |
| − | ::2)* | + | ::2)* Enable Adaptive Bit rate <span style="color: blue"> '''Default''' |
| + | |||
| + | ::3)* | ||
<span style="color: red"> '''Copy To, Apply, Return Buttons''' not shown in AMCAP | <span style="color: red"> '''Copy To, Apply, Return Buttons''' not shown in AMCAP | ||
Revision as of 22:36, 25 April 2019
Idrive D4M Configuration
Record Serial Number

Serial number is located on the bottom of the D4M.
- Remove D4M from the Security Box
- Record Serial number

- Print Label and afix to the top of the D4M
- Enter Serial Number into Admin Center.
- AC> Manufacturing >D4-DVR Production Tab
- Click on ADD and enter the S/N
- Select Item Type IDRDVRD4HD
Install Hard Drive/SSD

Use the 4 screws in the plastic bag with the keys to secure the SSD in the carriage
Install the Hard Drive Sled into the D4M
Setup the D4 for configuration
- Plug in the Power Cable
- Plug in the Monitor Cable
- Plug in the Camera Cable
- Plug in a Mouse (no Remote Control with the D4M)
- Turn power supply ON
- Turn Key ON
- Select Main Menu
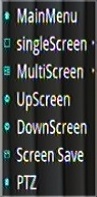
Click the Right Mouse Button For Options

- 1)*Main Menu - DVR Configuration Options
- 2)*SingleScreen - Display one Camera on the Monitor
- 3)*MultiScreen - Display all 4 cameras on the monitor
- 4)*UpScreen - Figure it out
- 5)*DownScreen - Figure it out
- 6)*Screen Save - Save the current screen configuration as Default
- 7)*PTZ
Verify Correct Firmware version
Main Menu> System> System Info
Current Release V206-2019/4/12-10:11:124
Upgrade Firmware if needed
- Obtain Latest Firmware Version from AdminCenter (if we receive one)
- Place the Firmware on a SD Card (USB Port is in use for the mouse)
- Insert the SD card into the DVR
- Main Menu> System> System Upgrade> Browse and select file and click OK
Import Idrive Default Configuration
- Obtain Latest Config File from AdminCenter (if we receive one)
- Place the Config File on a SD Card (USB Port is in use for the mouse)
- Insert the SD card into the DVR
- Main Menu> System> Config Operation> Import Configuration Browse and select file and click OK
Verify Config and customize Settings
- Enter the serial number for the D4M into the “LICENSE ID” Menu> Mobile> Motor> License ID
- Set the CUSTOMER's Time Zone Menu> Setting> Date/Time> Timezone
- Set the CUSTOMER's Time Menu> Setting> Date/Time> Set Time
- Set the CUSTOMER's Daylight Savings Time Menu> Setting> Dst Setting> USA
- Note No need to fill in the week day or Hour. USA sets this
- Turn Key OFF
- Remove SD Card
Format the SSD / Hard Drive
- Install the hard drive carriage into the D4M
- Turn the key ON
- Format the SSD/Hard Drive Menu> Storage> Disk Info> Format
- The Format Button is at the bottom but does not display in AMCAP
- Push record and verify that it can write to the hard drive.
- Push stop
- Test all camera ports with a working camera to ensure that they all work.
- Turn the Key and Power supply off.
- Box up unit with serial number on the outside of the box
Main Menu
The Main Menu is Displayed by right clicking the USB mouse .

- 1)**Preview - Camera Setting , Motion Setting
- 2)**Record - words here
- 3)**Storage - words here
- 4)**Mobile - words here
- 5)**Network - words here
- 6)**Setting - words here
- 7)**File - words here
- 8)**System - words here
Preview
Camera Settings
Each channel set separately

- 1)*Video Lost Beep - Enable for beep when video is lost OFF
- 2)* Camera Title - DEFAULT
- 3)*AHD Camera Type - AUTO DETECT
- 4)*Power Line Frequence - ?
- 5)*Frame Rate - DEFAULT (30)
- 6)*FLIP - Mirror hoizontal or vertical OFF,OFF
- 7)*Brightness * DEFAULT (50)
- 8)*Contrast - DEFAULT (40)
- 9)*Hue - DEFAULT (50)
- 10)*Saturation - DEFAULT (50)
- 11)*Audio Volume - DEFAULT (50)
- 12)*Auto Black-and-White - At night switch to Balak and White mode OFF
- 13)*FrameRate Down - lower frame rate at night OFF
- 14)*IR LED Light - Only if supported by the camera AUTO
- 15)*LED Status Indicator - OFF
Copy To, Apply, Return Buttons not shown in AMCAP
Motion Settings

Each channel set separately
- 1)*Motion Zone Settings All Clear
- 2)* Enable Adaptive Bit rate Default
- 3)*
Copy To, Apply, Return Buttons not shown in AMCAP
Record


Storage

Mobile


Network


Setting


File

System


