Difference between revisions of "Idrive Web Site"
| Line 25: | Line 25: | ||
| − | [[Pages]] | + | ==Pages== |
| + | |||
| + | [[File:Page.png|right|700px]] | ||
| + | |||
| + | Company | ||
| + | |||
| + | Copyright and Trademark | ||
| + | |||
| + | Home | ||
| + | |||
| + | Idrive system | ||
| + | |||
| + | Markets | ||
| + | |||
| + | Privacy Policy | ||
| + | |||
| + | Products | ||
| + | |||
| + | Resources | ||
| + | |||
| + | Service & Support | ||
| + | |||
| + | Terms of Use | ||
| + | |||
| + | The "Pages" section contains the most important pages like "[[Home]]", "[[Idrive System]]", "[[Products]]", etc., pages that build our website main menu(see section [[Menus]]). | ||
| + | |||
| + | |||
| + | For the beginning I will choose "Quick edit" from [[Company]] as example. | ||
| + | |||
| + | |||
| + | [[File:quick_edit.png]] | ||
| + | |||
| + | |||
| + | From this section you can quick change title, parent, template, allow/deny comment by check/uncheck the box, makeing the page private, visible just for admin same as comments by checking or unchecking the box. | ||
| + | Also you can change the "Slug", this option will automatically change the URL and will affect external and internal links | ||
| + | |||
| + | |||
| + | [[file:slug.png]] | ||
| + | |||
| + | |||
| + | To avoid changes in the internal links, you can use "Page ID" as URL | ||
| + | |||
| + | |||
| + | [[file:Page_id.png]] | ||
| + | |||
| + | |||
| + | |||
| + | For example, instead of '''<a href="http://www.idrive.pro/wp-new/company/">Company</a>''', you can use '''<a href="index.php?p=20133">Company</a>''', where "20133" is the "Page ID" for "[[Company]]". This will not affect internal links by changeing "Slug" unless you will delete the page. | ||
| + | |||
| + | |||
| + | Next I will choose "Edit" from "[[Company]]". | ||
| + | |||
| + | |||
| + | [[file:edit.png]] | ||
| + | |||
| + | |||
| + | [[File:company.png]] | ||
| + | |||
| + | |||
| + | The first highlighted box it will change the name of the page and below you can edit the "[[Permalink]]" or "Slug"(as I explained above). | ||
| + | |||
| + | Under "[[Permalink]]" we have "[[Media]]" toolbox where we can upload/insert photos, "[[Shortcodes]]", "[[Content Blocks]]" and just below we have an html toolbox which helps to add or edit html code. In the upper right corner of the content area we have two tabs "[[Visual]]" and "[[Html]]". The "[[Visual]]" tab helps to editing the page just by adding photos and text while with the "[[Html]]" we can add html code, insert tables or links. '''Be careful after you write html code and then change the tab to "[[Visual]]", Wordpress will delete some html components like <nowiki><p></p>, <br></br>, html space (  ;)</nowiki>, whitespaces and those changes will can spoil your whole page.''' | ||
| + | |||
| + | |||
| + | In the right side we have three tables, the first table, "Publish" I think is too obvious to be explained like many other Wordpress elements. The "[[Page Attributes]]" tab contains three boxes: "[[Parrent]]", "[[Template]]" and "Order". "[[Parrent]]" box it will change the URL by adding the existing URL of the selected page, for example if we choose "[[Markets]]" then will we have the following URL: <nowiki>"http://www.idrive.pro/wp-new/markets/'''company'''"</nowiki>. This option is effective when we work with "Pages" but mostly we work with "[[Posts]]" and "[[Custom Posts]]". The "Order" box it will help to keep a order in pages by counting them(0 is the first). | ||
| + | |||
==Posts== | ==Posts== | ||
Revision as of 11:13, 28 November 2012
|
|
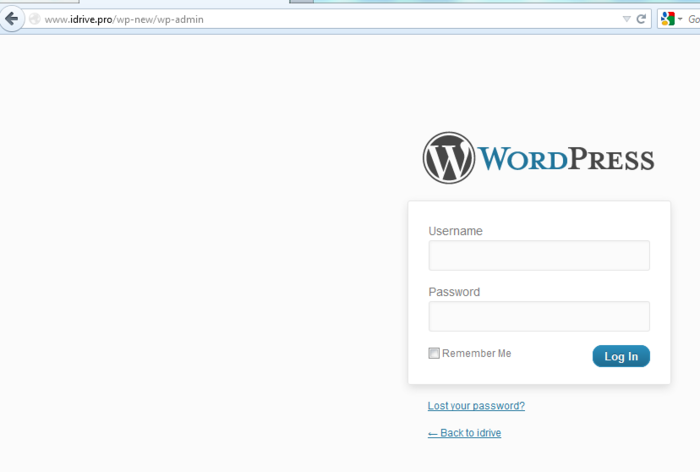
"How to login?"
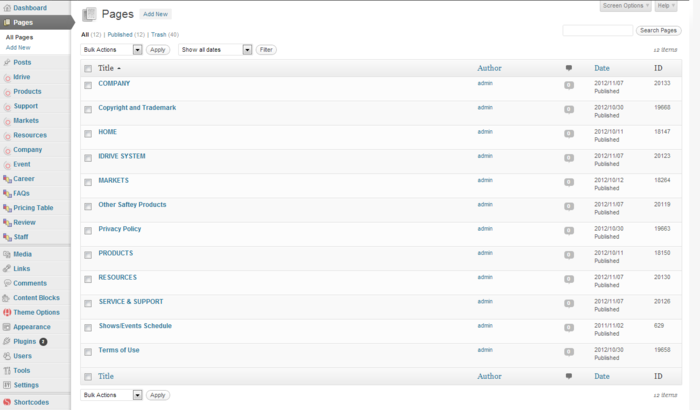
Pages
Company
Copyright and Trademark
Home
Idrive system
Markets
Privacy Policy
Products
Resources
Service & Support
Terms of Use
The "Pages" section contains the most important pages like "Home", "Idrive System", "Products", etc., pages that build our website main menu(see section Menus).
For the beginning I will choose "Quick edit" from Company as example.
From this section you can quick change title, parent, template, allow/deny comment by check/uncheck the box, makeing the page private, visible just for admin same as comments by checking or unchecking the box.
Also you can change the "Slug", this option will automatically change the URL and will affect external and internal links
To avoid changes in the internal links, you can use "Page ID" as URL
For example, instead of <a href="http://www.idrive.pro/wp-new/company/">Company</a>, you can use <a href="index.php?p=20133">Company</a>, where "20133" is the "Page ID" for "Company". This will not affect internal links by changeing "Slug" unless you will delete the page.
Next I will choose "Edit" from "Company".
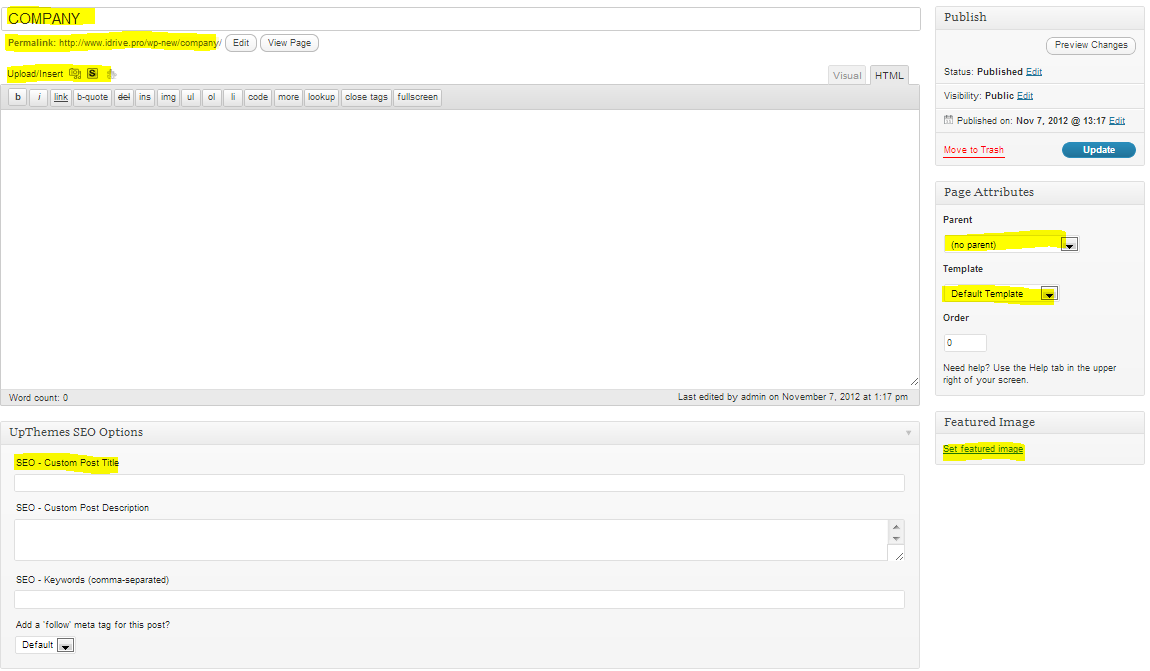
The first highlighted box it will change the name of the page and below you can edit the "Permalink" or "Slug"(as I explained above).
Under "Permalink" we have "Media" toolbox where we can upload/insert photos, "Shortcodes", "Content Blocks" and just below we have an html toolbox which helps to add or edit html code. In the upper right corner of the content area we have two tabs "Visual" and "Html". The "Visual" tab helps to editing the page just by adding photos and text while with the "Html" we can add html code, insert tables or links. Be careful after you write html code and then change the tab to "Visual", Wordpress will delete some html components like <p></p>, <br></br>, html space (  ;), whitespaces and those changes will can spoil your whole page.
In the right side we have three tables, the first table, "Publish" I think is too obvious to be explained like many other Wordpress elements. The "Page Attributes" tab contains three boxes: "Parrent", "Template" and "Order". "Parrent" box it will change the URL by adding the existing URL of the selected page, for example if we choose "Markets" then will we have the following URL: "http://www.idrive.pro/wp-new/markets/'''company'''". This option is effective when we work with "Pages" but mostly we work with "Posts" and "Custom Posts". The "Order" box it will help to keep a order in pages by counting them(0 is the first).


