Difference between revisions of "VPN Diagram"
| Line 53: | Line 53: | ||
For RB751u-2HnD, if the 3G modem is compatible with the equipment you have to set the APN using Winbox under “PPP” > “Interface” > Edit existing connection > General tab > APN and PPP if requires username and password. | For RB751u-2HnD, if the 3G modem is compatible with the equipment you have to set the APN using Winbox under “PPP” > “Interface” > Edit existing connection > General tab > APN and PPP if requires username and password. | ||
| − | |||
| − | |||
Revision as of 23:42, 26 December 2013
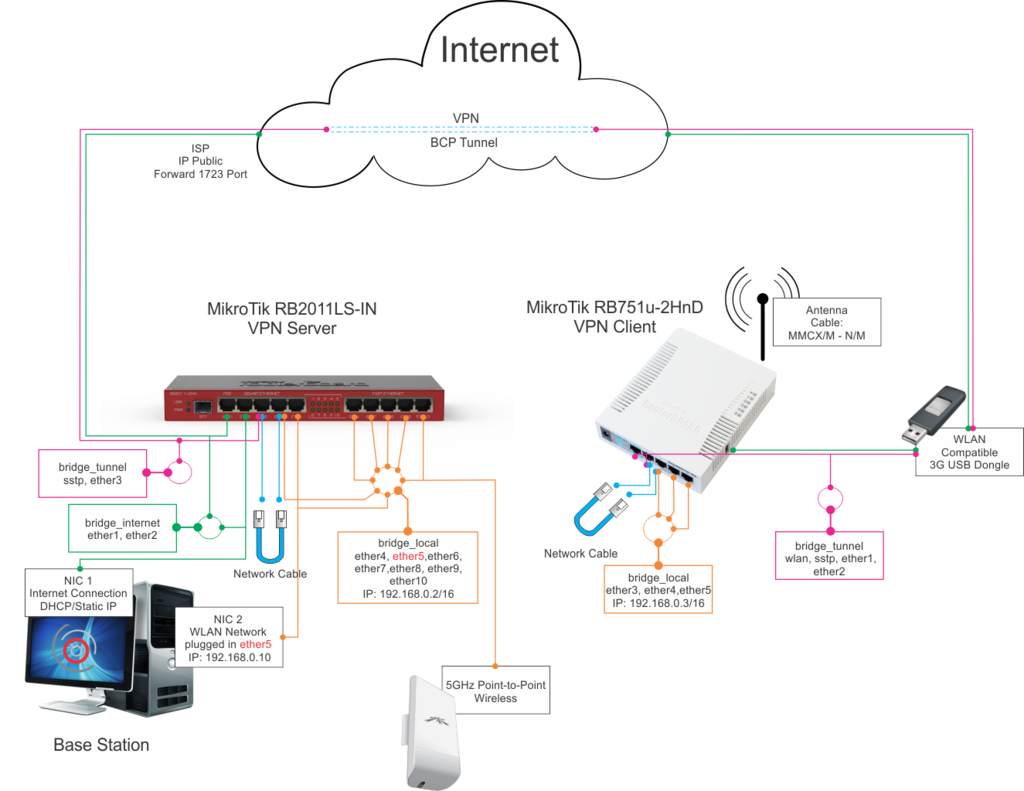
VPN Client with 3G USB internet connection.
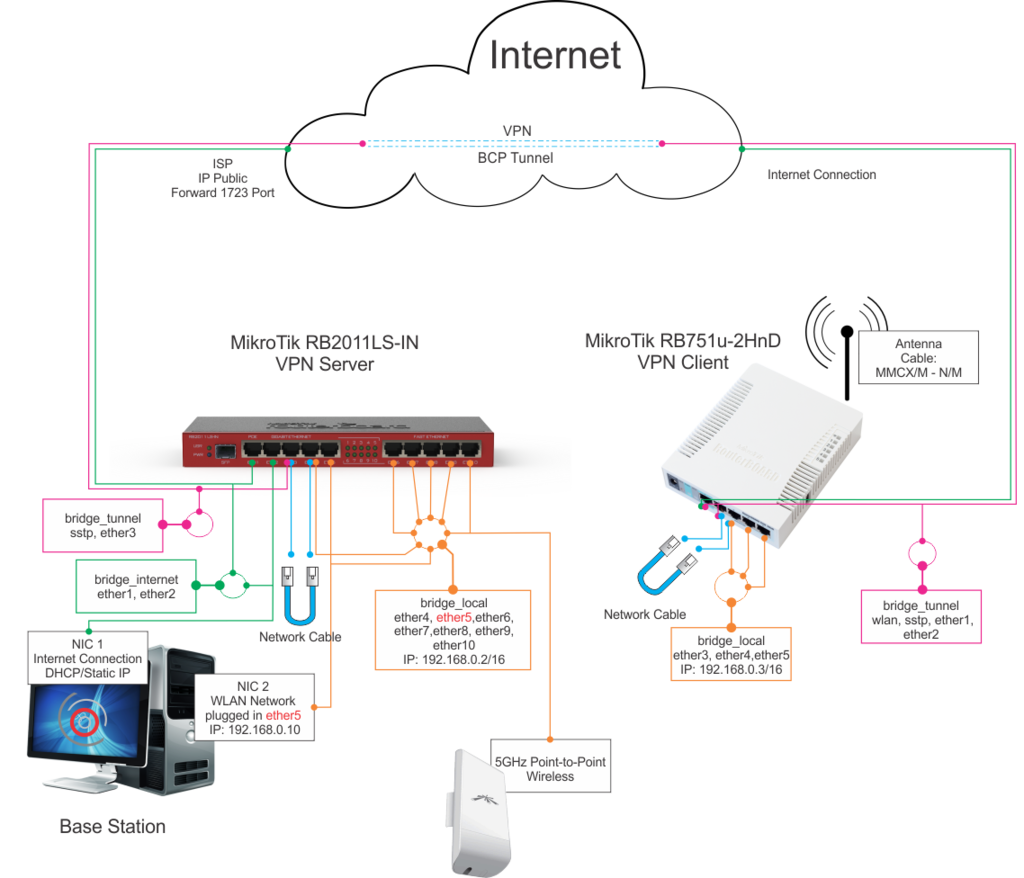
VPN Client with internet cable connection.
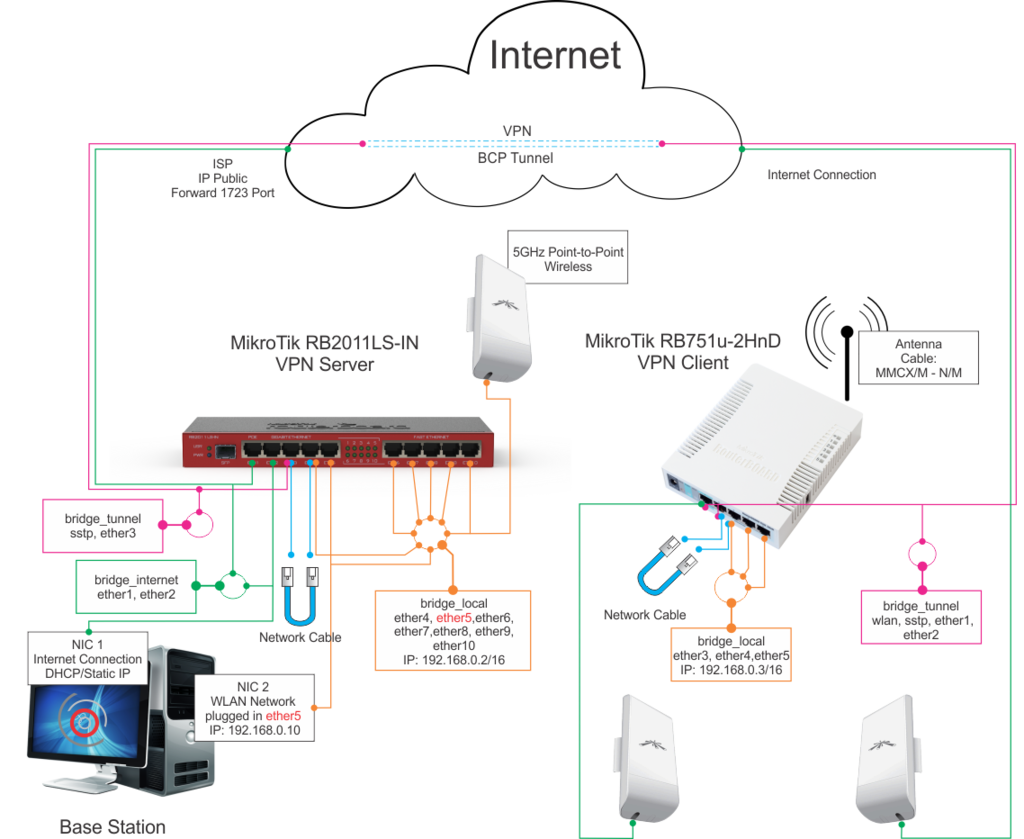
VPN Client with NanoStation connection.
Mark notes - clean up later
Configuration files
Will be much easier for us to make the equipment’s configurations using the backup/restore RouterOS function - only thing that have to be changed, after restore, will be the internet connections settings.
Attached you can find the routers configuration (backup) files from our equipment’s that can be restored to the exact ones that you have.
Idrive-BS1-30052013-0345.backup will be used for RB2011LS-IN, Base station equipment.
Idrive-TP1-02011970-0316.backup will be used for RB751u-2HnD, TP equipment.
To be able to create the VPN a public IP will be called from the transfer point equipment (VPN client), so we need a dedicated IP for Base Station router or can be used “port forwarding” (1723 or 443) to one of the private LAN IP’s.
To restore the configurations
Get winbox.exe application (the configuration tool for RouterOS)
http://www.mikrotik.com/download or
https://admincenter.idrive.pro/wiki/images/c/c2/Winbox.zip
1. Download and install the application to computer;
2. connect the router to computer or through a switch. ( works with cat5 cable)
3. Start the application and click the “…” button, wait for equipment MAC address to be listed, click on it and Connect. Use Login name: admin / empty pass
4. Select “Files” section from left menu, drag the specific .backup file on the files list and click “Restore”. (copy and paste the file from the hard drive and paste if in the routerboard)
After this only thing that needs to be changed is the IP addresses of the Base Station equipment (RB2011LS-IN), port “ether1”, for internet connection, using Winbox under “IP” section > “Addressed” and gateway under “IP” section > “Routes” (0.0.0.0/0 to x.x.x.x).
For RB751u-2HnD, if the 3G modem is compatible with the equipment you have to set the APN using Winbox under “PPP” > “Interface” > Edit existing connection > General tab > APN and PPP if requires username and password.


