Difference between revisions of "Idrive Control Center 3.0 User’s Guide"
| (654 intermediate revisions by 3 users not shown) | |||
| Line 1: | Line 1: | ||
==Copyright Information== | ==Copyright Information== | ||
| − | This document contains proprietary information that is protected by copyright. No part of this document may be photocopied, reproduced, or translated to another language without the prior written consent of Idrive Inc. | + | This document contains proprietary information that is protected by copyright. No part of this document may be photocopied, reproduced, or translated to another language without the prior written consent of Idrive Global Inc. |
| − | Copyright © | + | Copyright © 2023 Idrive Global Inc. |
| − | This product incorporates copyright protected technology. Use of this copyright protected technology must be authorized by Idrive Inc. Reverse engineering or | + | This product incorporates copyright protected technology. Use of this copyright protected technology must be authorized by Idrive Global Inc. Reverse engineering or disassembly is prohibited. |
The information in this document is subject to change without notice... | The information in this document is subject to change without notice... | ||
<br/><br/> | <br/><br/> | ||
| − | ==About the Idrive Control Center 3.0== | + | == About the Idrive Control Center 3.0 == |
| + | (Rev 3.4.4 and up) | ||
The Idrive Control Center 3.0 is the new generation of Professional Event Data Recorder management software which allows you to monitor and control all of the devices in your fleet. It has the capabilities to manage all of the data events, personnel, vehicle documents and scheduling. It performs downloads from the vehicles and can be used to review the events. | The Idrive Control Center 3.0 is the new generation of Professional Event Data Recorder management software which allows you to monitor and control all of the devices in your fleet. It has the capabilities to manage all of the data events, personnel, vehicle documents and scheduling. It performs downloads from the vehicles and can be used to review the events. | ||
| Line 17: | Line 18: | ||
<br/><br/> | <br/><br/> | ||
| − | ==Starting the Idrive Control Center | + | ==Starting the Idrive Control Center 3.0== |
| − | |||
| − | |||
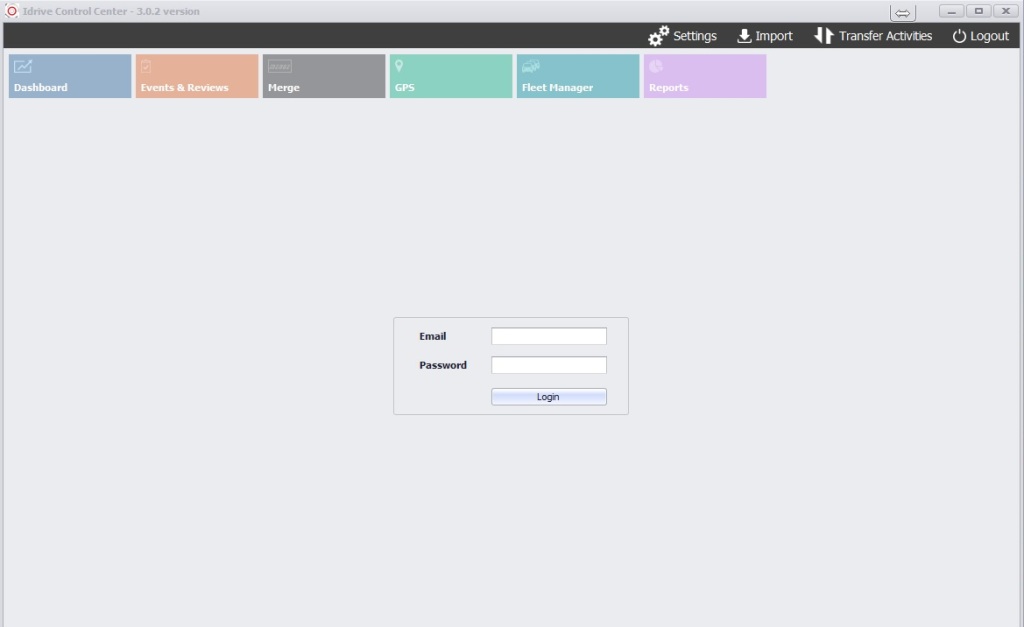
| − | The Idrive Control Center can be opened by double clicking the | + | |
| + | The Idrive Control Center can be opened by double clicking the Idrive Control Center icon on the Base Station desktop or by selecting it from the '''Start> All Programs Menu> Idrive Tools> Idrive Control Center3.0''' | ||
[[File:login_screen_302.jpg|800px]] | [[File:login_screen_302.jpg|800px]] | ||
| Line 31: | Line 31: | ||
This user name and password can be managed along with all of the other users in the Fleet Manager section of the Control Center. | This user name and password can be managed along with all of the other users in the Fleet Manager section of the Control Center. | ||
| − | If you have forgotten or misplaced your log in information please contact the Idrive Support Team at support@ | + | If you have forgotten or misplaced your log in information please contact the Idrive Support Team at support@idriveglobal.com |
| + | <br/><br/> | ||
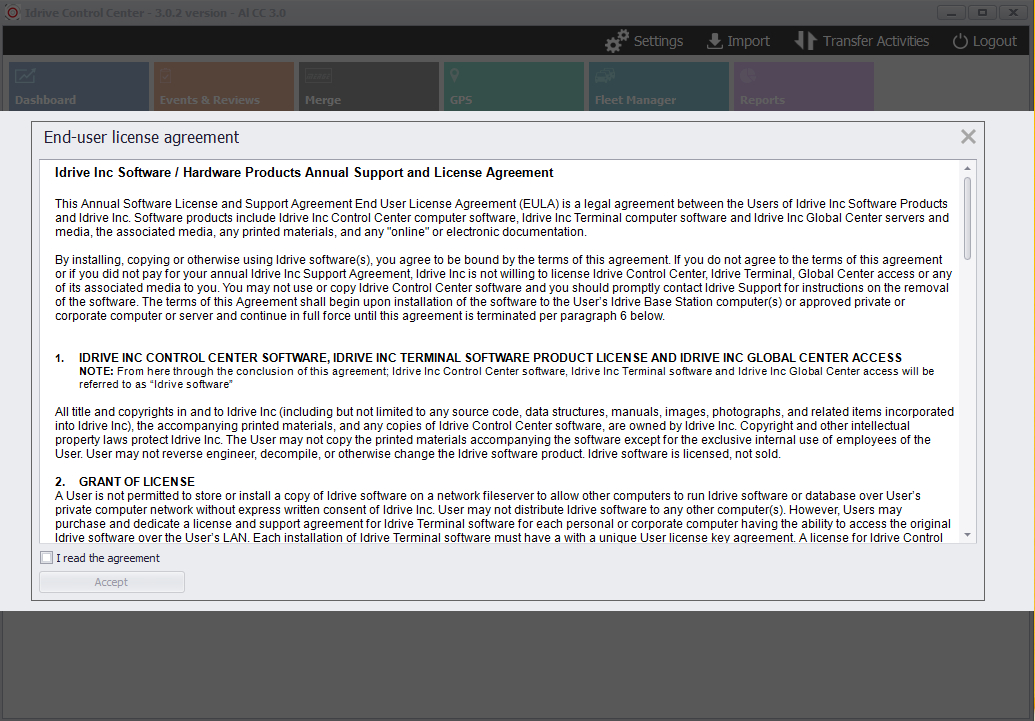
| + | At '''first login''' you will be asked to agree to and accept the End License User Agreement to continue... | ||
| − | |||
| − | + | [[File:03.signin.eula.jpg|left|600px]] | |
| − | |||
| + | <br/><br/><br/><br/><br/><br/><br/><br/><br/><br/><br/><br/><br/><br/><br/><br/><br/><br/><br/><br/> | ||
| − | |||
| − | |||
| − | |||
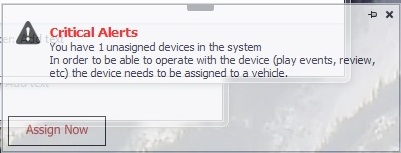
| − | + | At login or any time you access the Dashboard you may receive an alert window informing you that you have unassigned Devices. | |
| − | |||
| + | [[File:login_alert_302.jpg|300px]] | ||
| − | + | You can click the "X" to close this window but until you assign the device to a vehicle you will continue to get this Alert at sign in. | |
| − | |||
| + | The Alert is necessary; '''unassigned devices will not show up in the Events and Reviews section unless they have a Vehicle Name assigned to the Device'''. | ||
| − | |||
| − | |||
| − | |||
| − | + | <br/><br/> | |
| − | + | =='''Control Center 3.0 Dashboard View'''== | |
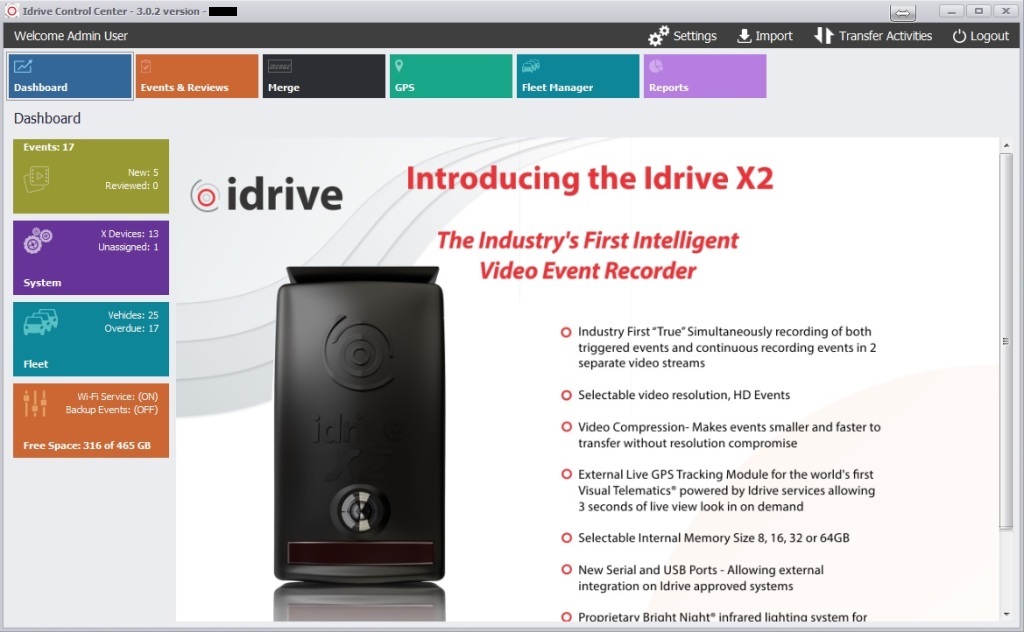
| − | + | [[File:db_main_302.jpg|thumb|700px|Dashboard]] | |
| − | + | After logging into the Control Center the Dashboard view of the control center is opened. This view allows you to quickly navigate to the correct section of the Control Center that your user permissions allow access to. (administrator views are shown in this manual) You can return to this view at any time by clicking on the Dashboard Icon. | |
| − | + | [[File:dashboard_icon_302.jpg|left|150px|]] Clicking this tile when visible takes you right back to the main Dashboard selection page | |
| + | <br/><br/><br/> | ||
| − | + | [[File:events_icon_302.jpg|left|150px|]] Accesses saved Events for viewing and allows Event Scoring and Commenting to be stored in the saved Events [[Idrive_Control_Center_3.0_User’s_Guide#Events_and_Reviews|Click Here]] | |
| + | <br/><br/> | ||
| − | + | [[File:Dvr Icon 302.jpg|left|150px|]] Access to DVR Videos with ability to clip and save into the Control Center software. Afterward you can Review them and save scores and comments. [[Idrive_Control_Center_3.0_User’s_Guide#Merge - DVR|Click Here]] | |
| + | <br/><br/> | ||
| − | + | [[File:filemgr_icon_302.jpg|left|150px|]] Access to previously downloaded GPS data permits tracking a vehicle by Ignition On/Off times, day and speed plus compilation of stored data to build route reports including addresses and travel times. [[Idrive_Control_Center_3.0_User’s_Guide#GPS|Click Here]] | |
| + | <br/> | ||
| − | + | [[File:fleetmgr_icon_302.jpg|left|150px|]] Access to idrive Devices (Cameras), Vehicles (by name, weight, location, etc) and Personnel including those with access to the system and non-access driver's details. [[Idrive_Control_Center_3.0_User’s_Guide#Fleet_Manager|Click Here]] | |
| + | <br/><br/> | ||
| − | + | [[File:Reports_icon_302.jpg|left|150px|]] Access to "on demand" full-color reports based on Vehicles, Drivers, Incidents, Scored Events and specific day. Plus coaching reports for individuals and comparison reports from early system days to present [[Idrive_Control_Center_3.0_User’s_Guide#Reports|Click Here]] | |
| + | <br/><br/> | ||
| − | + | [[File:db_settings_icon_302.jpg|left|110px|]] View active and recent device transfers by vehicle or device; View and manage active settings for cameras and event lengths; and Router Settings (Access Point - Antenna) [[Idrive_Control_Center_3.0_User%E2%80%99s_Guide#Settings|Click Here]] | |
| + | <br/> | ||
| − | + | [[File:db_import_icon_302.jpg|left|115px|]] | |
| + | Import data from sources such as USB sticks, DVRs etc. See the Detailed instructions [[Idrive_Control_Center_3.0_User%E2%80%99s_Guide#Import|Click Here]] | ||
| + | <br/><br/> | ||
| − | + | [[File:db_transfers_icon_302.jpg|left|175px|]] | |
| + | Displays recent transfer activities and transfer log information. See the Detailed instructions [[Idrive_Control_Center_3.0_User’s_Guide#Transfer Activities|Click Here]] | ||
| + | <br/><br/> | ||
| − | [[File: | + | [[File:db_logout_icon_302.jpg|left|100px|]] |
| + | Always Log Out when walking away from the software, as another user might make comments into an Event, and under your credentials that persons comments would be shown that you made them. There is also a Login History that shows your log in dates and times. For this to be accurate, always remember to sign out. | ||
| + | <br/> | ||
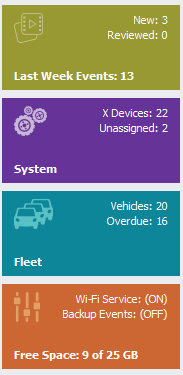
| − | + | The Left hand side of the dashboard view has 4 icons with scrolling information on the status of your fleet, drives and system. | |
| − | + | [[File:04a.dashboard.jpg|left|150px]] | |
| − | + | Quick access to Events [[Idrive_Control_Center_3.0_User’s_Guide#Events_and_Reviews|Click Here]] | |
| + | <br/><br/><br/><br/> | ||
| + | Quick access to system devices such as Cameras or DVRs (one level deeper than just Fleet Manager) [[Idrive_Control_Center_3.0_User’s_Guide#Fleet_Manager|Click Here]] | ||
| + | <br/><br/><br/><br/> | ||
| + | Quick access to your vehicles or personnel (one level deeper than just Fleet Manager) [[Idrive_Control_Center_3.0_User’s_Guide#Fleet_Manager|Click Here]] | ||
| + | <br/><br/><br/><br/> | ||
| + | Admin Settings, At-a-glance system resources such as Hard Drive space, WiFi health and configuration of data backup plus quick access to these settings | ||
| + | (one level deeper than just Settings) [[Idrive_Control_Center_3.0_User%E2%80%99s_Guide#Settings|Click Here]] | ||
| − | + | <br/><br/><br/><br/><br/><br/><br/><br/><br/> | |
| + | =='''Events and Reviews'''== | ||
| − | + | [[File:events_reviews_main_302.png|thumb|700px|Dashboard]] | |
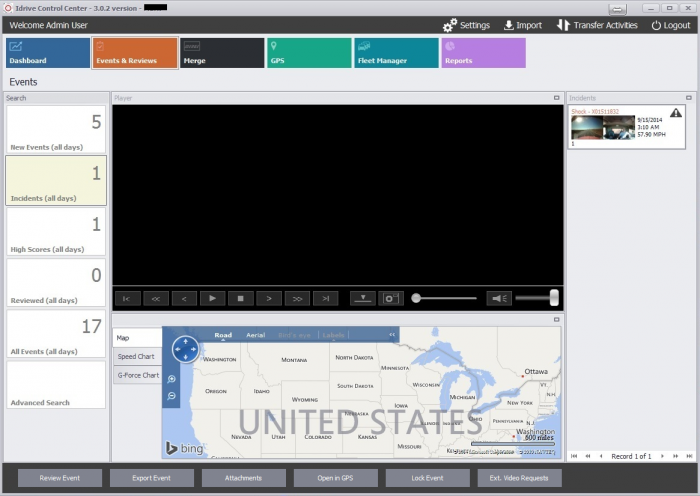
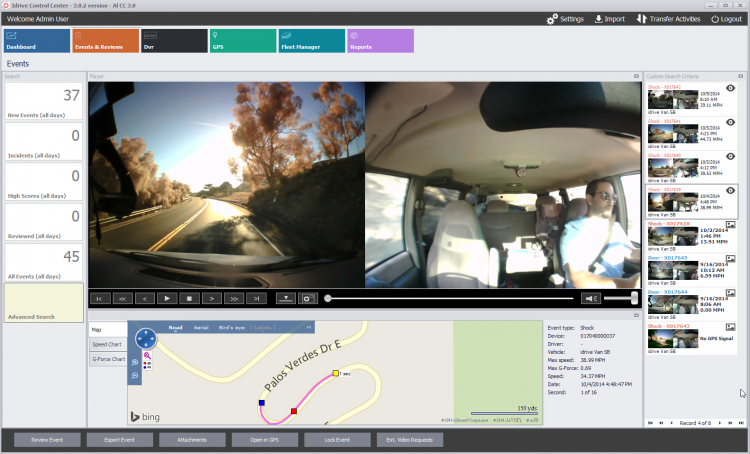
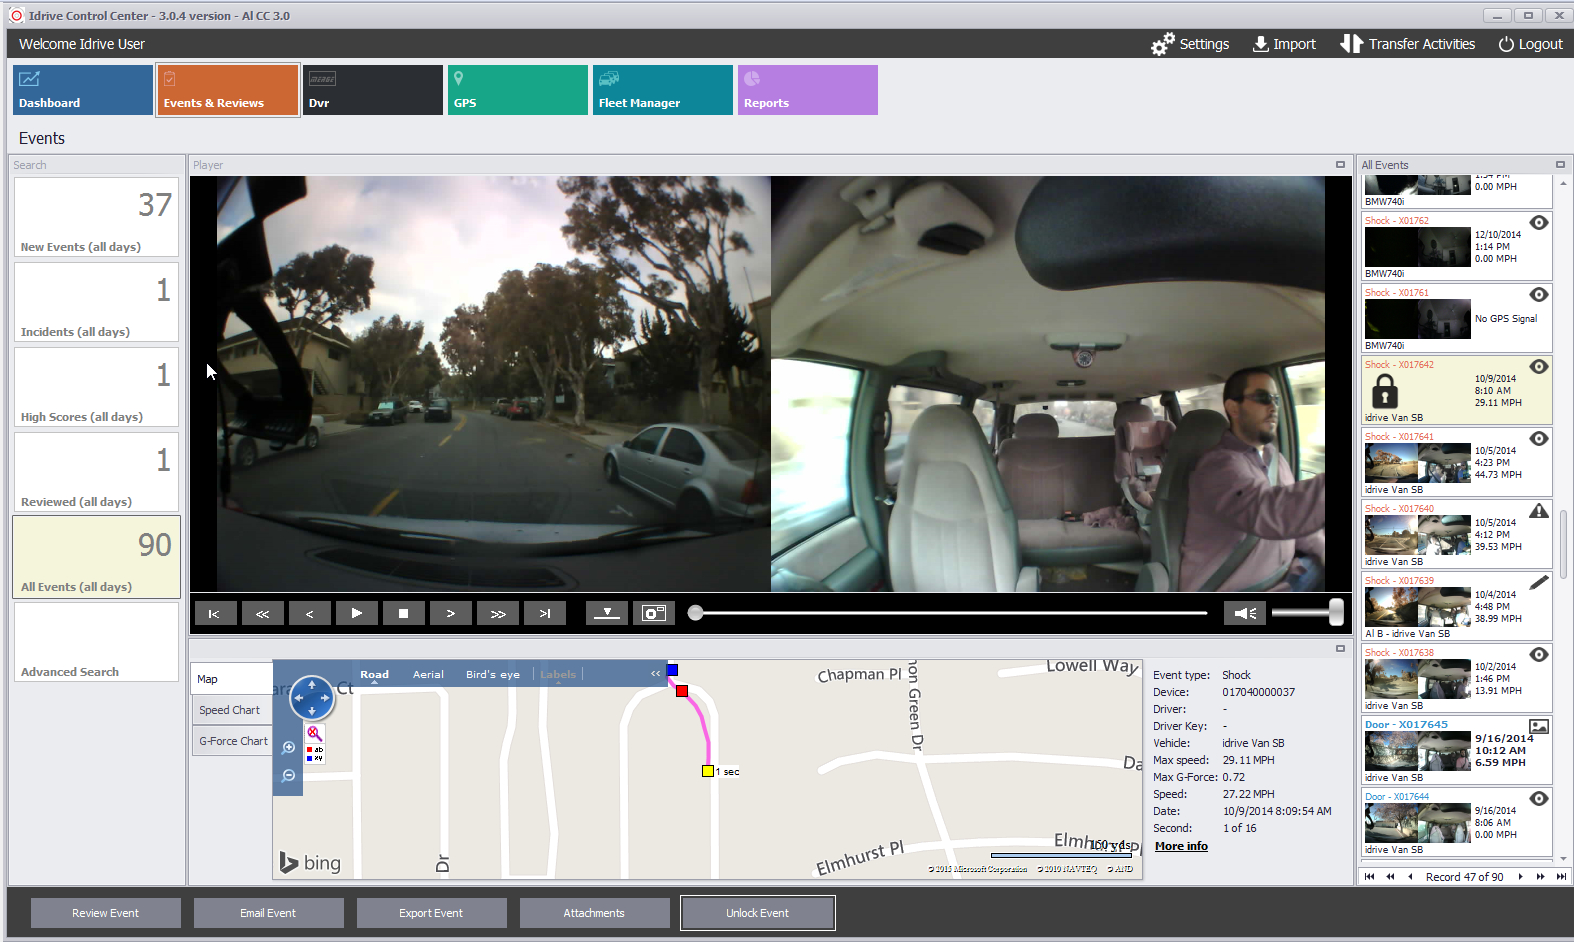
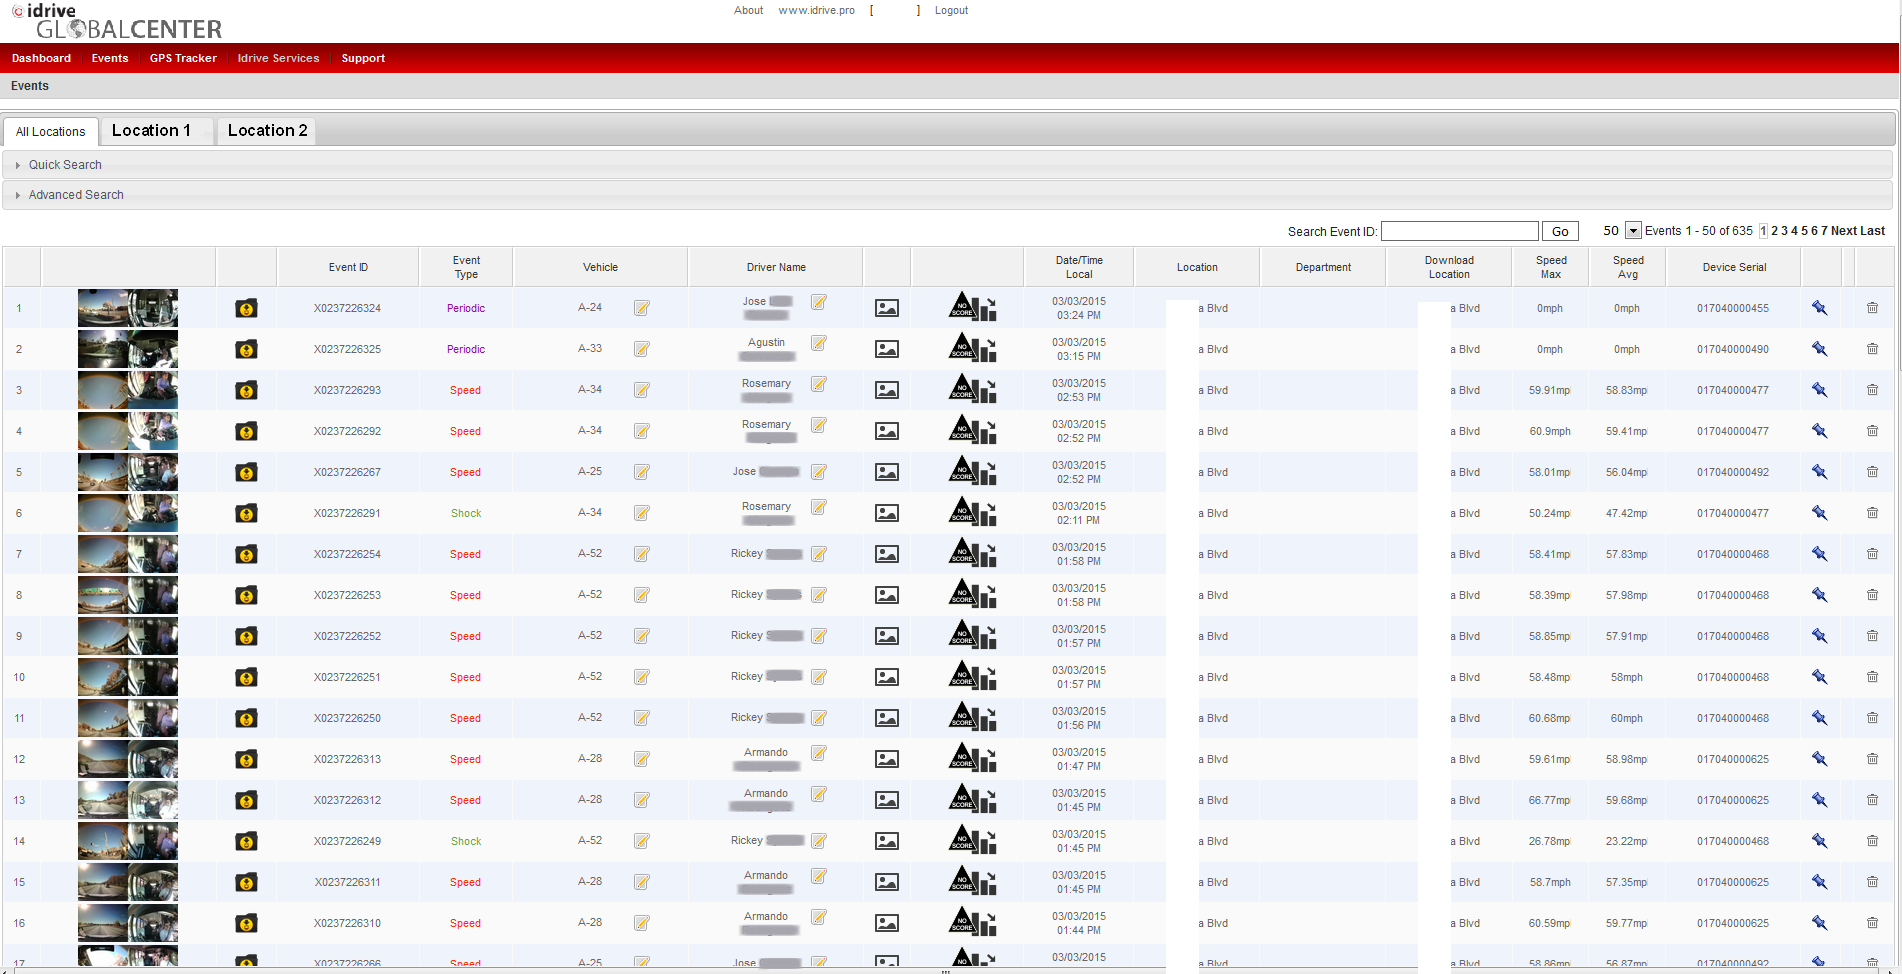
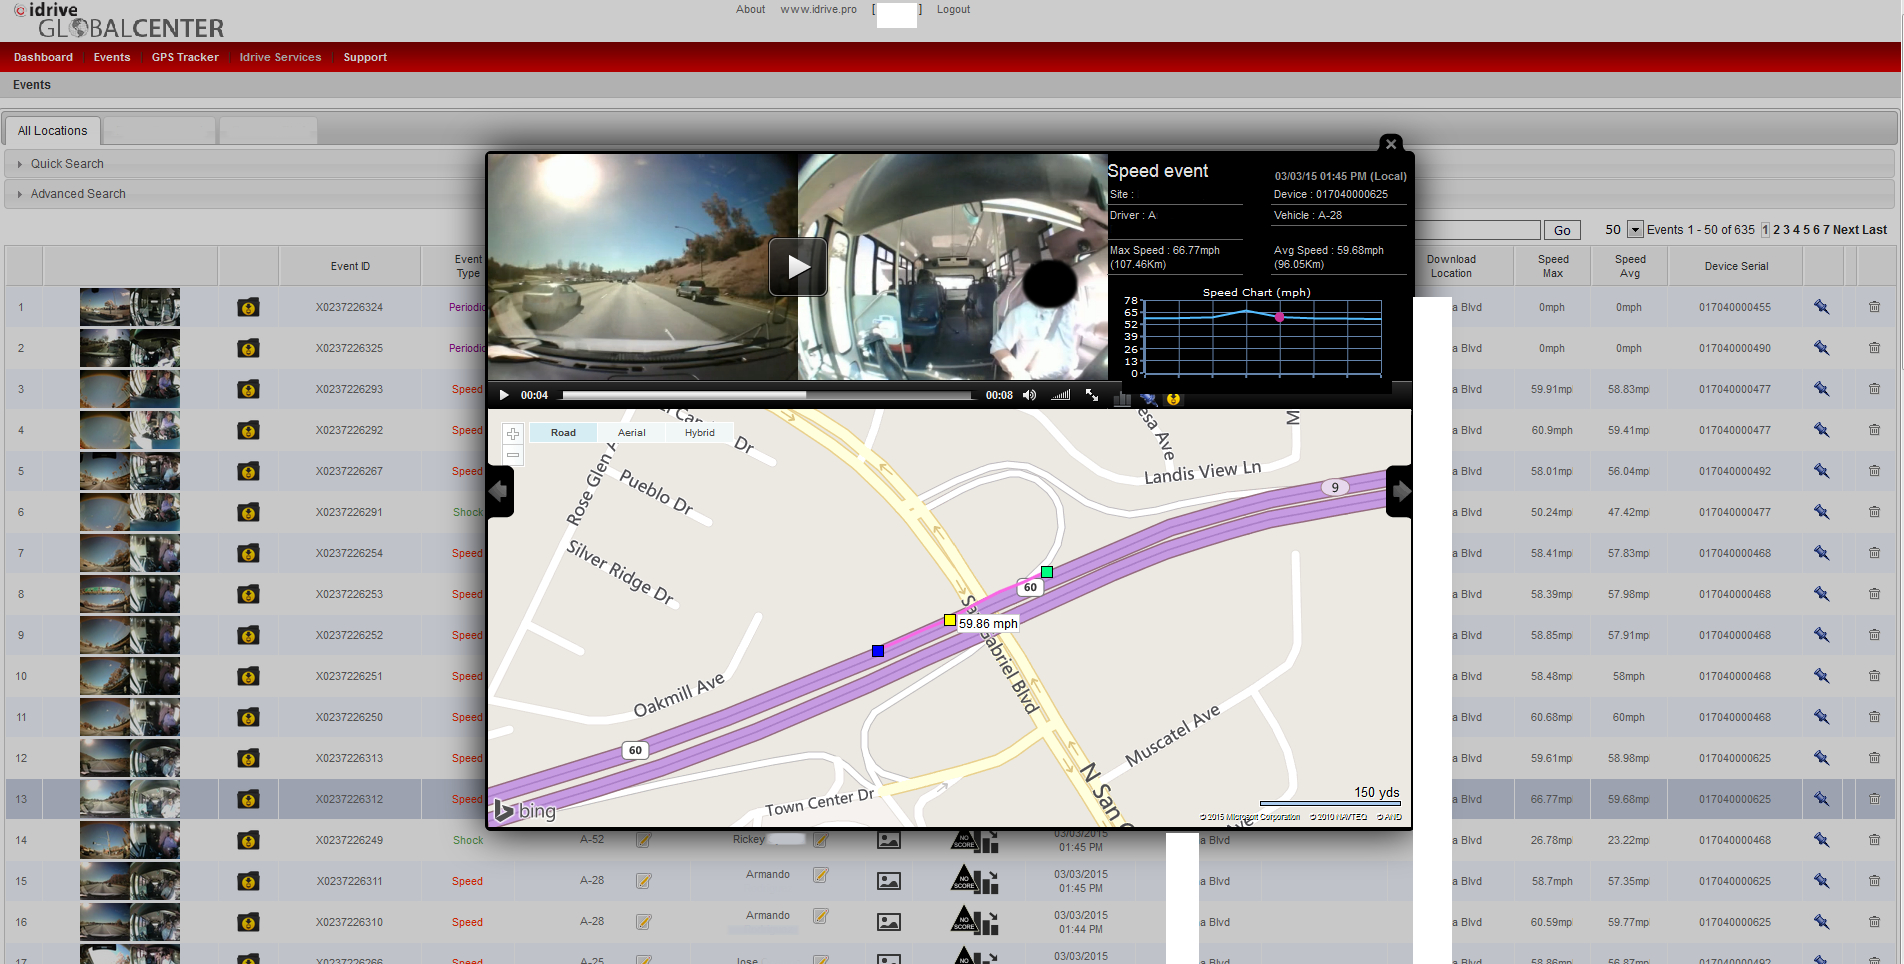
| − | + | Events and Reviews is a full featured player and review module that plays your events in full motion and sound showing both front and rear facing cameras simultaneously and permits complete user administration of the received data to comment into and save the event. Full GPS mapping, speed and G-Force values are viewable and coincide to every visible and matched piece of data for the event. | |
| − | + | [[File:new_events_icon_302.jpg|left|150px|]] | |
| + | Events that have not been viewed, reviewed or scored | ||
| + | <br/><br/><br/><br/> | ||
| − | + | [[File:incidents_icon_302.jpg|left|150px|]] | |
| + | Events that have been reviewed and marked as an INCIDENT receive a high score of 4 and can be quick searched as Incidents | ||
| + | <br/><br/><br/> | ||
| − | + | [[File:high_scores_icon_302.jpg|left|150px|]] | |
| + | Events that have been viewed and reviewed and as such marked with a high score of 3 or 4 | ||
| + | <br/><br/><br/><br/> | ||
| − | + | [[File:Reviewed_icon_302.jpg|left|150px|]] | |
| + | Events that have been viewed and marked as reviewed (with out any score) | ||
| + | <br/><br/><br/><br/> | ||
| − | + | [[File:all_events_icon_302.jpg|left|150px|]] | |
| + | Events ALL (viewed, reviewed, not viewed, scored, not scored, Incidents, etc.) | ||
| + | <br/><br/><br/><br/> | ||
| − | + | [[File:adv_search_icon_302.jpg|left|150px|]] | |
| + | Advanced Search opens the fly-out menu for future searches based on previously viewed and marked type of event, event behavior, vehicle, driver, day, time, speed, etc... | ||
| + | <br/><br/><br/><br/> | ||
| + | '''Extended Video''' | ||
| + | [[File:24ev.events.icon.jpg|left]] [[File:24ev.icon.jpg|middle|75px]] | ||
| − | ''' | + | Events displaying the '''EV''' icon notify the user that Extended Video is captured and available for download from the Camera storage |
| + | Read more about Extended Video in the Detailed Discussion below | ||
| + | <br\><br\><br\><br\><br\><br\><br\><br\><br\><br\><br\><br\><br\><br\><br\><br\> | ||
| − | ''' | + | '''End of Section''' |
| − | + | [[Idrive_Control_Center_3.0_User%E2%80%99s_Guide#Control Center 3.0 Dashboard View|Back To Dashboard]] | |
| − | + | or | |
| − | + | [[Idrive_Control_Center_3.0_User%E2%80%99s_Guide#EVENTS_and_REVIEWS_-_Idrive_Player|Detailed Discussion]] | |
| + | ---- | ||
| + | <br\><br\><br\><br\><br\> | ||
| − | ''' | + | =='''Merge - DVR'''== |
| + | [[File:35bb.Merge.dvrPath.jpg|thumb|700px]] | ||
| − | + | Also Known as DVR Digital Video Recorder, MDVR Mobile Digital (or Data) Video Recorder | |
| − | |||
| + | * Up to 4 simultaneously recording cameras the DVR is saving Video and optional Audio to a Hard Drive in a mobile Hard Drive DVR. Typically up to 250 hours of constant 4 channel recordings can be saved on the DVR hard drive and videos can be imported, viewed and saved in the Idrive Control Center software. | ||
| − | |||
| − | + | * DVR events can be created and saved, then specific clips can be created of up to 30 seconds from a longer segments of video; showing the most important segment of the video in the center or beginning of the 30 second clip. | |
| − | |||
| − | + | * After saving the clip into the idrive Control Center the Video Event can then be viewed, reviewed and marked with specific behavior and user comments just like the X1 and X2 Video Events review section. | |
| − | |||
| − | <br\><br\> | + | <br\><br\><br\><br\><br\><br\><br\> |
| − | |||
| − | + | '''End of Section''' | |
| − | + | [[Idrive_Control_Center_3.0_User%E2%80%99s_Guide#Control Center 3.0 Dashboard View|Back To Dashboard]] | |
| − | + | or | |
| − | + | [[Idrive_Control_Center_3.0_User%E2%80%99s_Guide#DVR_Usage_and_Management|Detailed Discussion]] | |
| + | ---- | ||
| + | <br\><br\><br\><br\><br\> | ||
| − | : | + | =='''GPS'''== |
| + | [[File:38A.gps.jpg|thumb|750px]] | ||
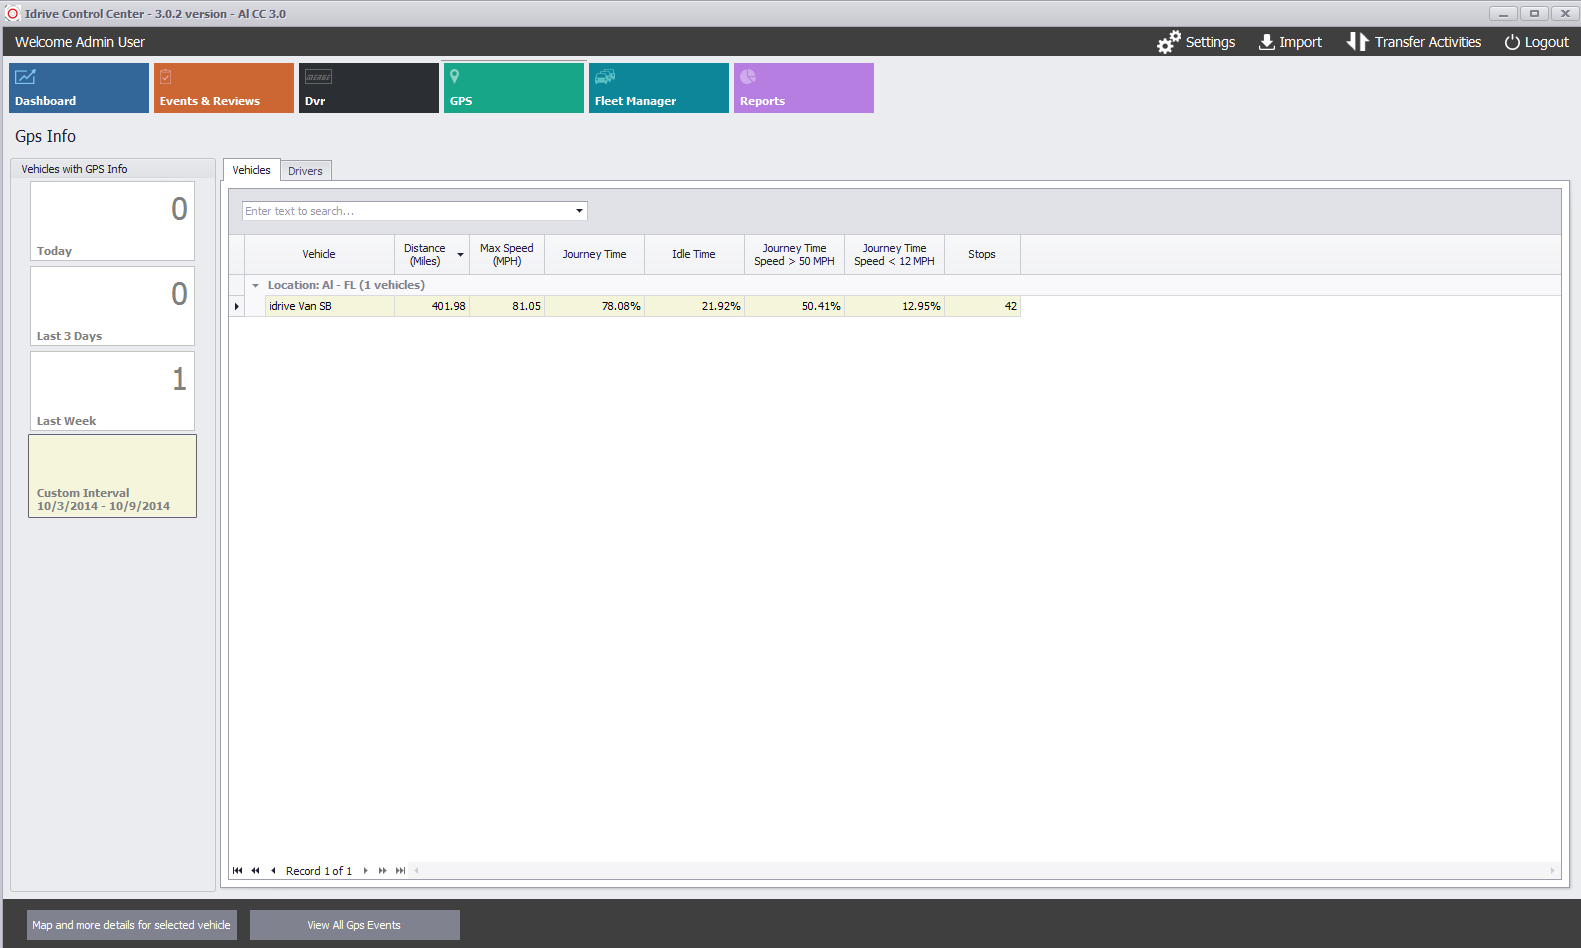
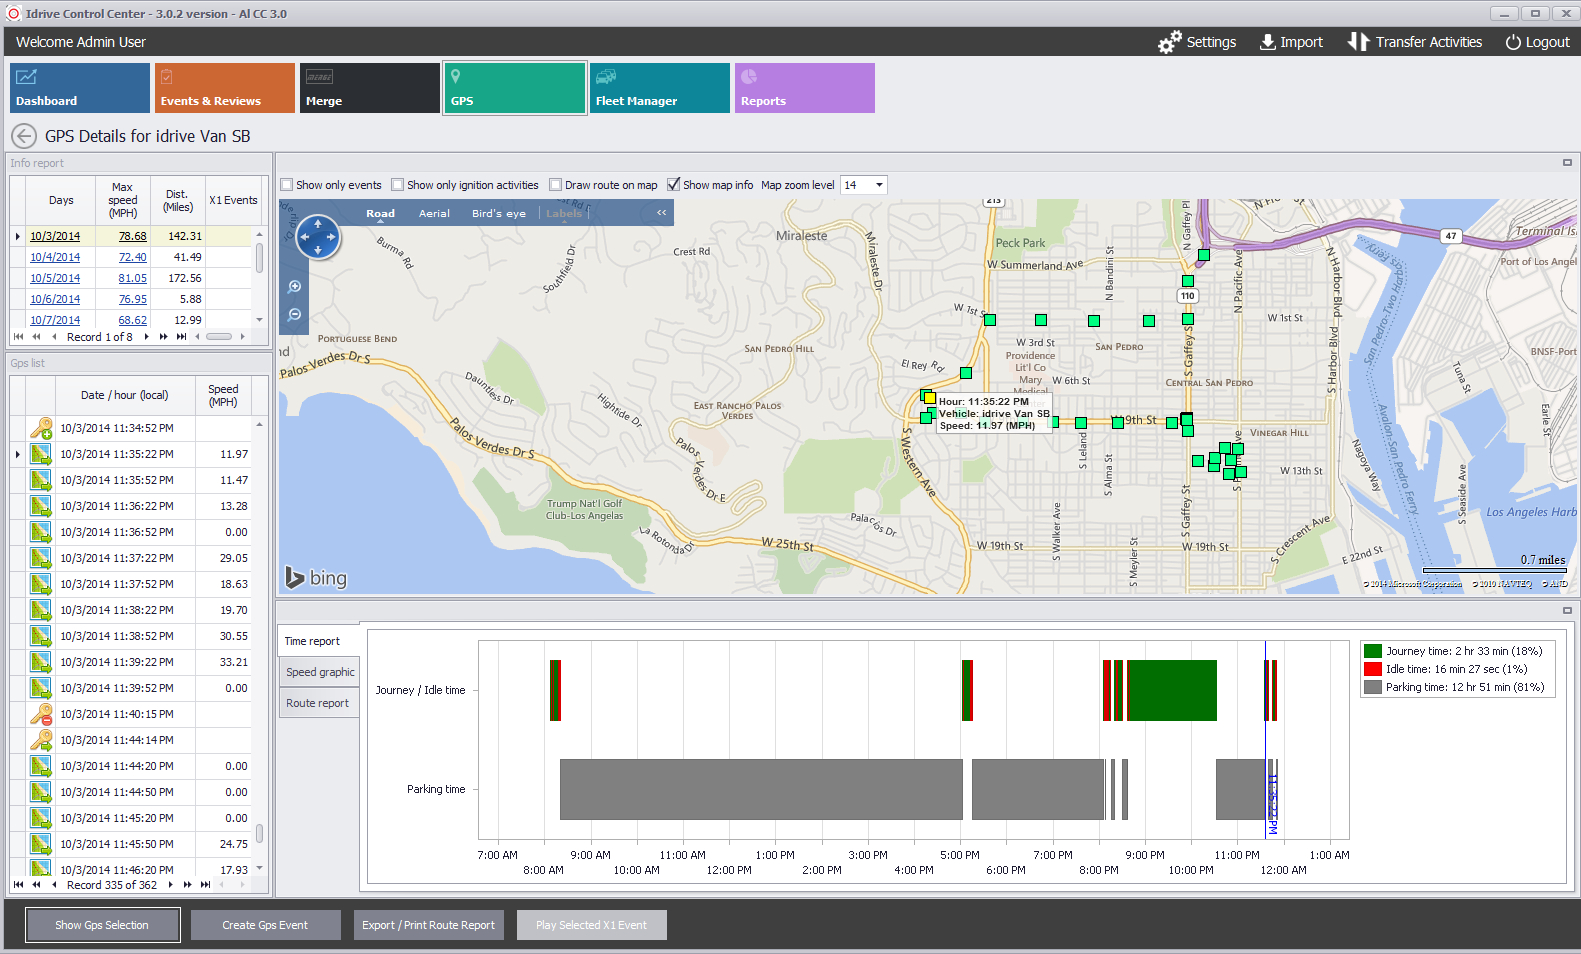
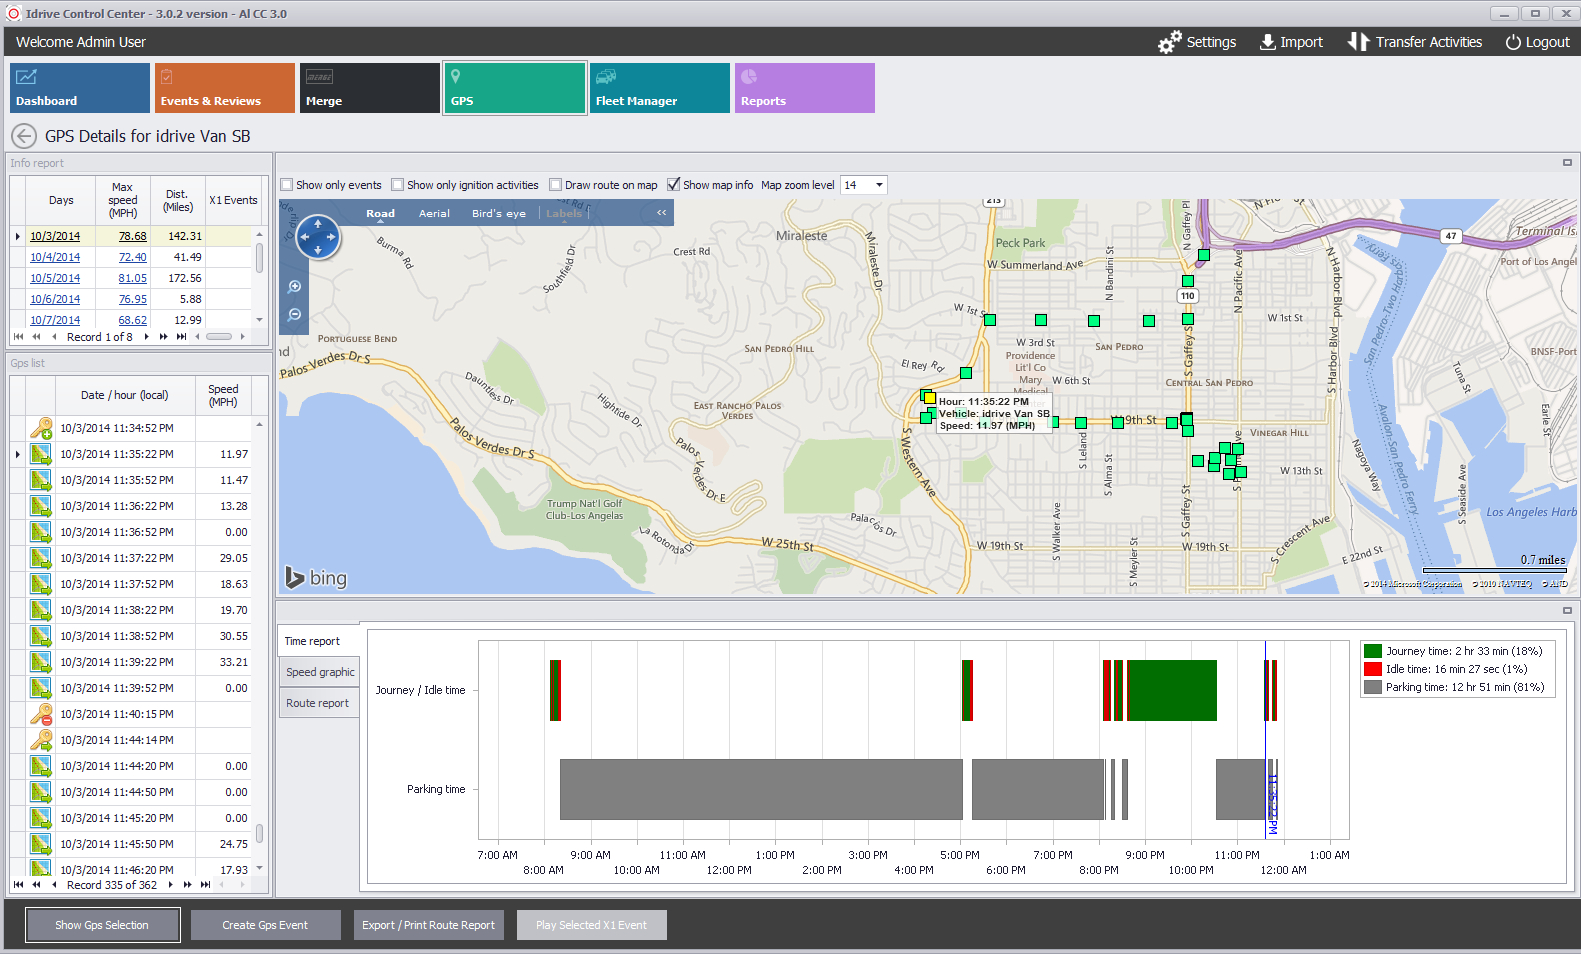
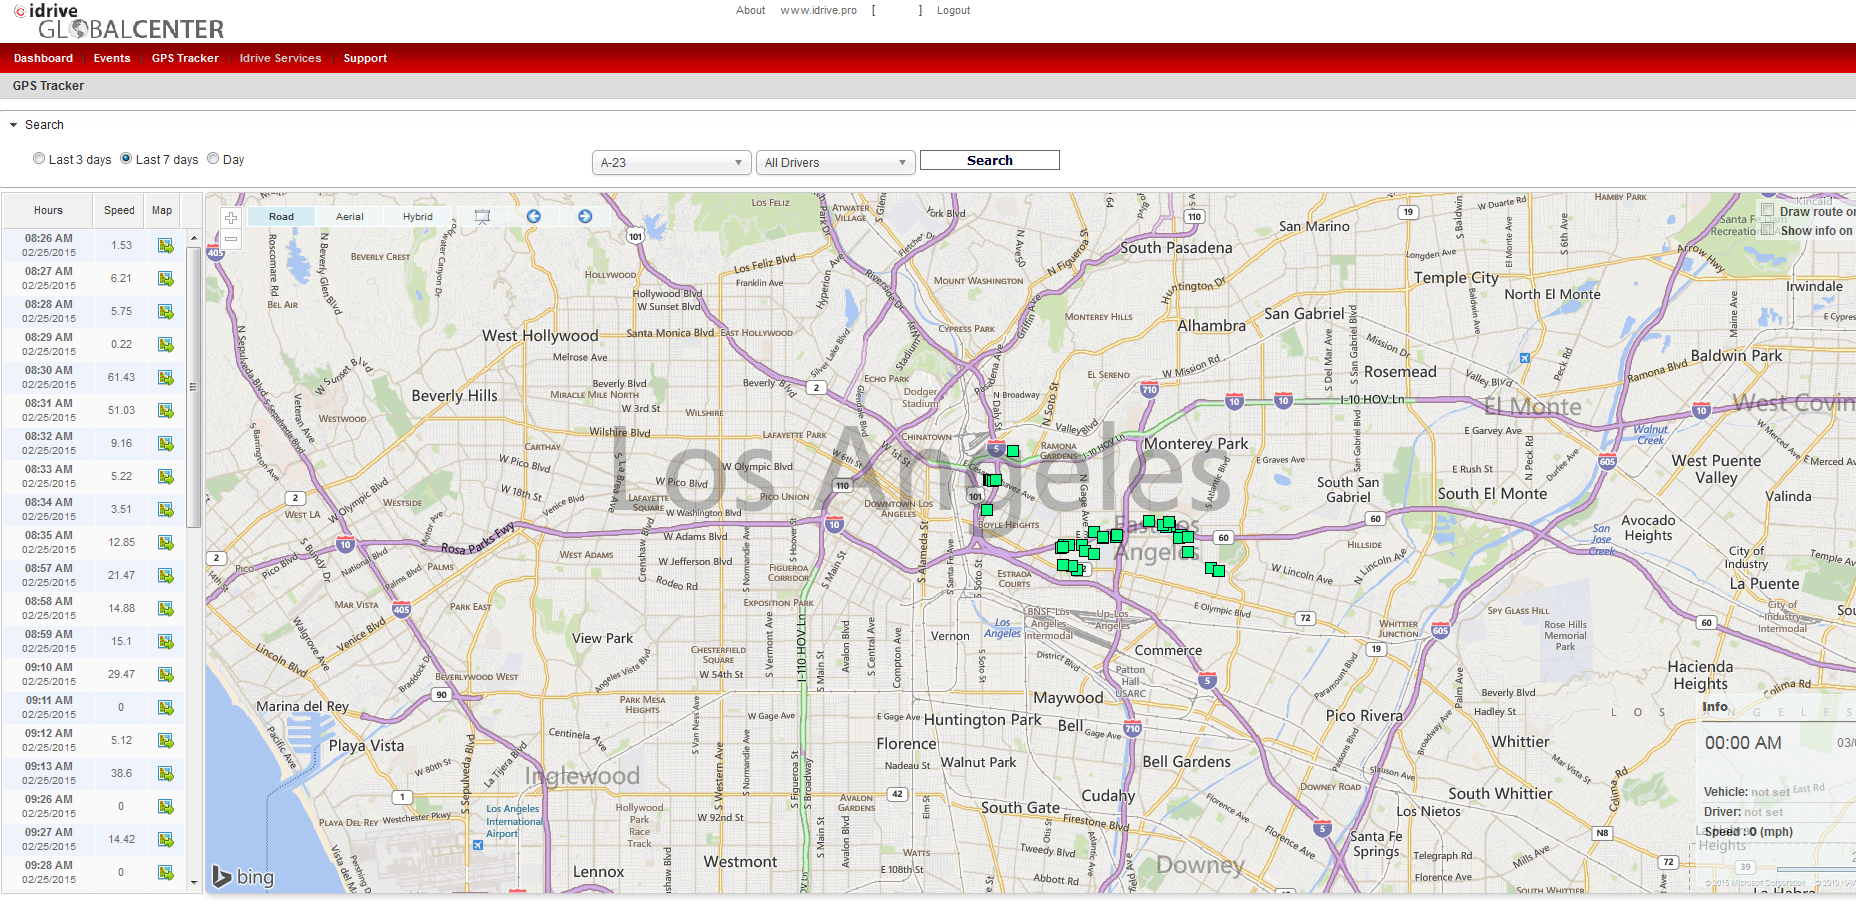
| − | + | GPS coordinates are saved and downloaded to the Idrive Control Center after each device connects via WiFi. Coordinates can be viewed in an interactive map displaying the location, speed and time that the coordinate was captured. | |
| + | Converged data is displayed to create a time report showing Journey time, Idle time and Parking time. | ||
| + | [[Idrive_Control_Center_3.0_User’s_Guide#GPS_Tracker_.28Vehicle_or_Driver_Views.29|Click Here]] | ||
| − | + | [[File:38AA.gps.jpg|left]] | |
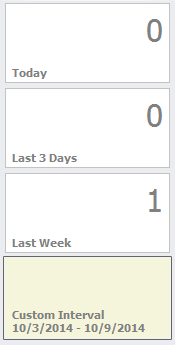
| + | Selections can be made based on received and stored data from previous downloads. | ||
| − | + | <br/><br\><br\> | |
| − | + | GPS activity from the last 3 days | |
| − | + | <br/><br\><br\> | |
| − | + | GPS activity from the last 7 days | |
| − | + | <br\><br\><br\> | |
| − | + | Select a specific 7 day range from GPS history logs | |
| + | [[Idrive_Control_Center_3.0_User’s_Guide#GPS_Tracker_.28Vehicle_or_Driver_Views.29|Click Here]] | ||
| − | + | <br\><br\><br\><br\><br\><br\> | |
| − | : | + | [[File:38A.gps.selected.jpg|thumb|750px]] |
| − | |||
| − | |||
| − | |||
| − | |||
| − | |||
| − | |||
| − | |||
| + | <br\><br\><br\><br\><br\><br\><br\><br\><br\><br\><br\><br\><br\><br\><br\><br\><br\><br\><br\><br\><br\><br\><br\><br\> | ||
| − | + | '''End of Section''' | |
| − | + | [[Idrive_Control_Center_3.0_User%E2%80%99s_Guide#Control Center 3.0 Dashboard View|Back To Dashboard]] | |
| − | + | or | |
| − | + | [[Idrive_Control_Center_3.0_User%E2%80%99s_Guide#GPS_Tracker_.28Vehicle_or_Driver_Views.29|Detailed Discussion]] | |
| + | ---- | ||
| + | <br\><br\><br\><br\><br\> | ||
| − | + | =='''Fleet Manager'''== | |
| + | [[File:39a.fleet.mgr.jpg|thumb|700px]] | ||
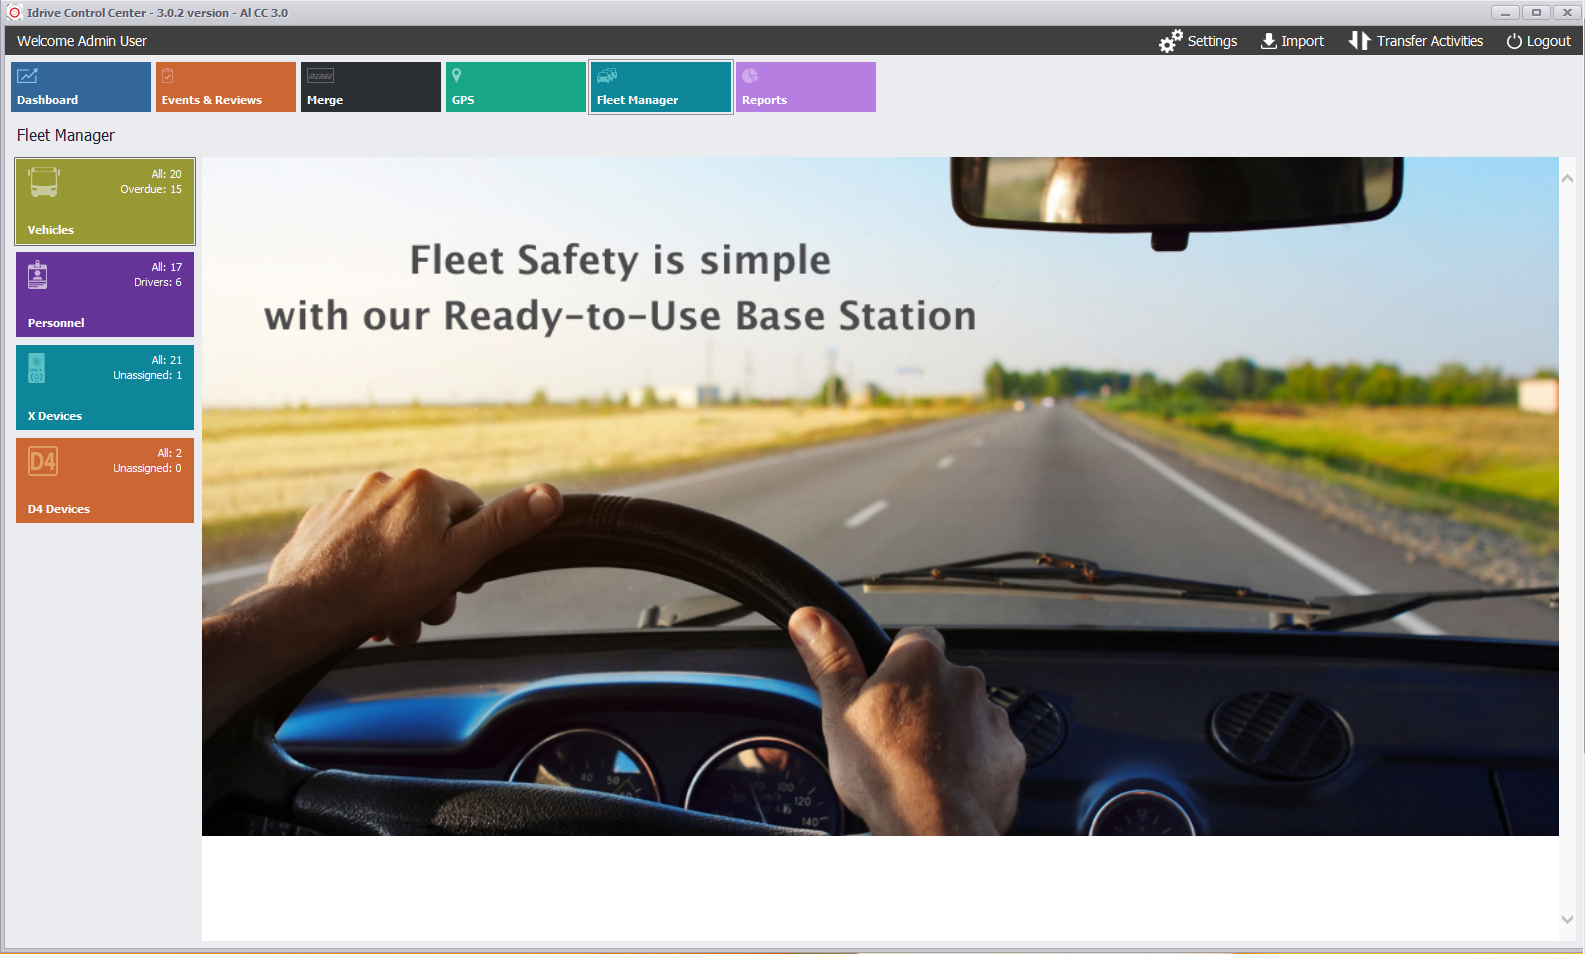
| + | Fleet Manager is used for management of information about your fleet operations as well as controlling the behavior of Idrive devices. | ||
| − | + | [[File:39aa.fleet.jpg|left]] | |
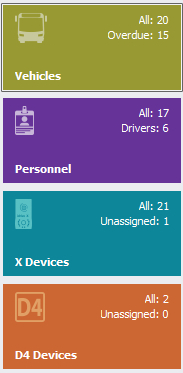
| + | List of all Vehicles in the Idrive Control Center that already have or need Idrive devices assigned to them [[Idrive_Control_Center_3.0_User%E2%80%99s_Guide#Manage_Your_Vehicles|Click Here]] | ||
| − | + | <br\><br\><br\> | |
| − | + | List of Personnel in the Idrive Control Center including users at varying levels of Control Center Permission and non-users such as drivers that can later be assigned and searched in Events and Reports [[Idrive_Control_Center_3.0_User%E2%80%99s_Guide#Manage_Your_Personnel|Click Here]] | |
| − | + | <br\><br\><br\> | |
| − | + | X Devices are varying models of Idrive Cameras such as X1, X1P and X2. Each having increased capabilities of the previous version and all viewable for configuration | |
| + | [[Idrive_Control_Center_3.0_User%E2%80%99s_Guide#X_Devices|Click Here]] | ||
| − | + | <br\><br\> | |
| − | + | D4 or DVR Devices are multichannel simultaneous and continuous recording units that can assigned to the Control Center. Afterward videos can be viewed and clips stored in the Control Center for viewing and review purposes [[Idrive_Control_Center_3.0_User%E2%80%99s_Guide#DVR Devices|Click Here]] | |
| − | + | <br\><br\><br\><br\><br\> | |
| − | + | <br/><br/><br/> | |
| − | + | '''End of Section''' | |
| − | + | [[Idrive_Control_Center_3.0_User%E2%80%99s_Guide#Control Center 3.0 Dashboard View|Back To Dashboard]] | |
| − | + | or | |
| − | + | [[Idrive_Control_Center_3.0_User%E2%80%99s_Guide#FLEET_MANAGER_-_Detailed|Detailed Discussion]] | |
| + | ---- | ||
| + | <br\><br\><br\><br\><br\> | ||
| + | =='''Reports'''== | ||
| + | [[File:41aa.reports.jpg|thumb|700px]] | ||
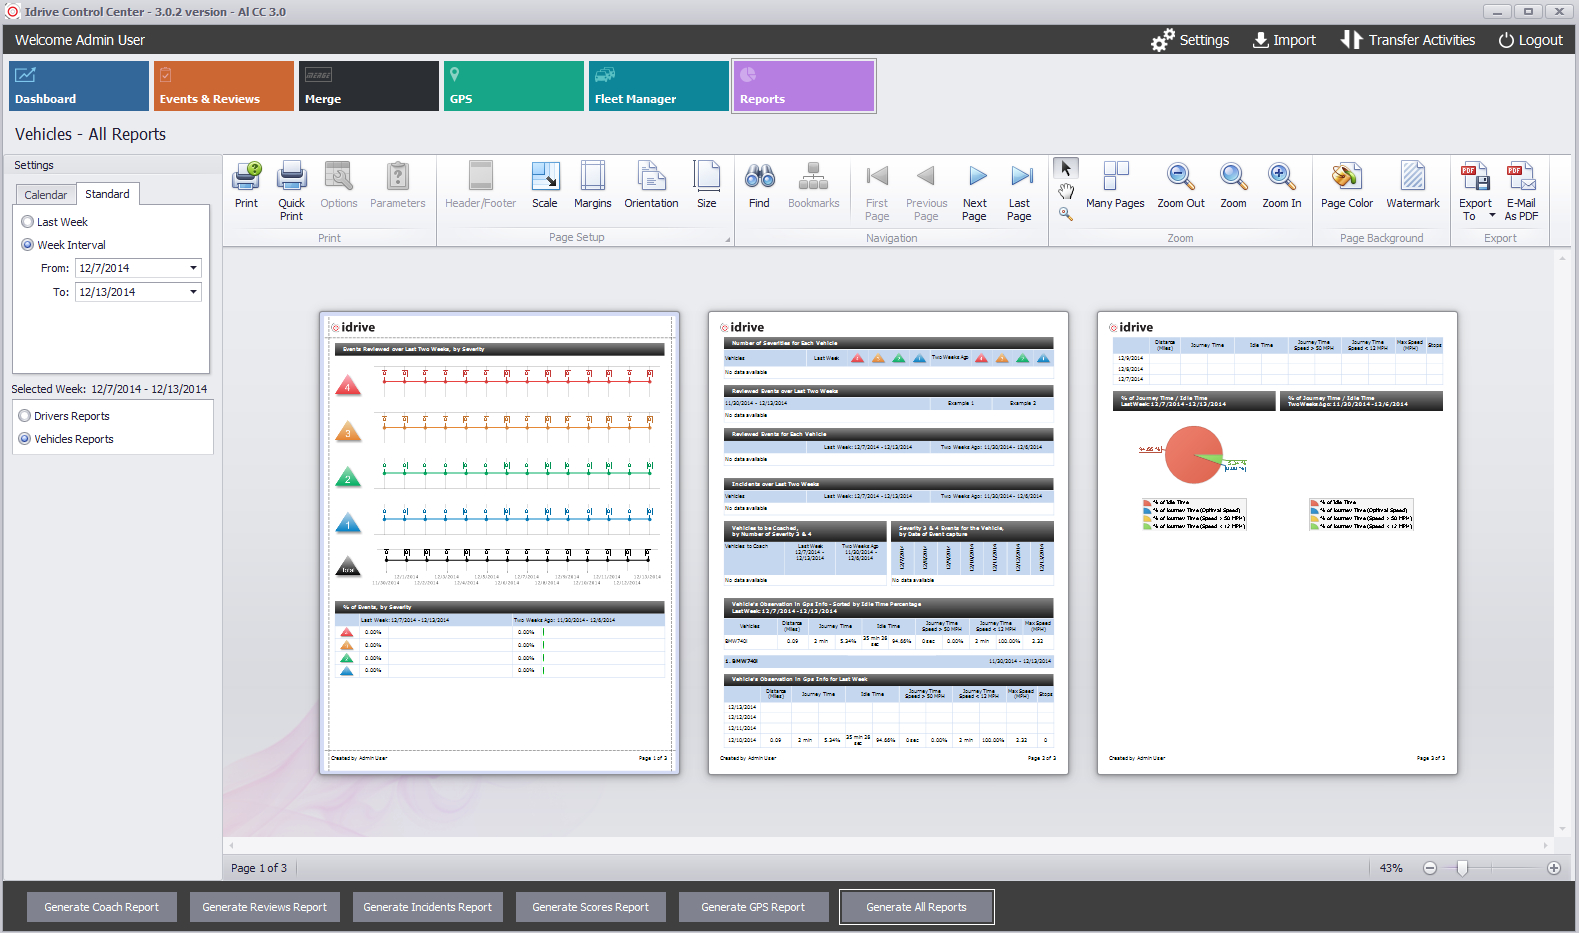
| + | Designed to condense all the data on events, drivers, vehicles and incidents into one all inclusive report or individual reports for your fleet supervisor to manage your fleet's daily operations and compare them to previous dates. | ||
| − | |||
| − | : | + | [[file:41b.reports.jpg|left|163px]] |
| + | Coach reports can be generated for prevention of future incidents based on driver behaviors in scored events. | ||
| + | <br\><br\> | ||
| − | : | + | [[file:41c.reports.jpg|left|163px]] |
| − | + | Review reports provide a detail into the numbers of reviewed events | |
| + | <br\><br\> | ||
| − | |||
| + | [[file:41d.reports.jpg|left|163px]] | ||
| + | Incidents are easily viewed in detail | ||
<br\><br\> | <br\><br\> | ||
| − | |||
| − | [[ | + | [[file:41e.reports.jpg|left|163px|]] |
| + | Scored events at a glance providing a graph view | ||
| + | <br\><br\> | ||
| − | |||
| − | + | [[file:41f.reports.jpg|left|163px|]] | |
| − | + | GPS reports show detailed journey, distance, idle and speed so you can get a better handle on fuel needs and waste elimination | |
| + | <br\> | ||
| − | |||
| − | + | [[file:41g.reports.jpg|left|163px|]] | |
| − | + | Detail of entire fleet in one conclusive report | |
| − | + | <br\><br\><br\><br\> | |
| − | |||
| − | + | '''End of Section''' | |
| − | + | '''No detailed discussion necessary''' | |
| − | + | [[Idrive_Control_Center_3.0_User%E2%80%99s_Guide#Control Center 3.0 Dashboard View|Back To Dashboard]] | |
| + | ---- | ||
| + | <br\><br\><br\> | ||
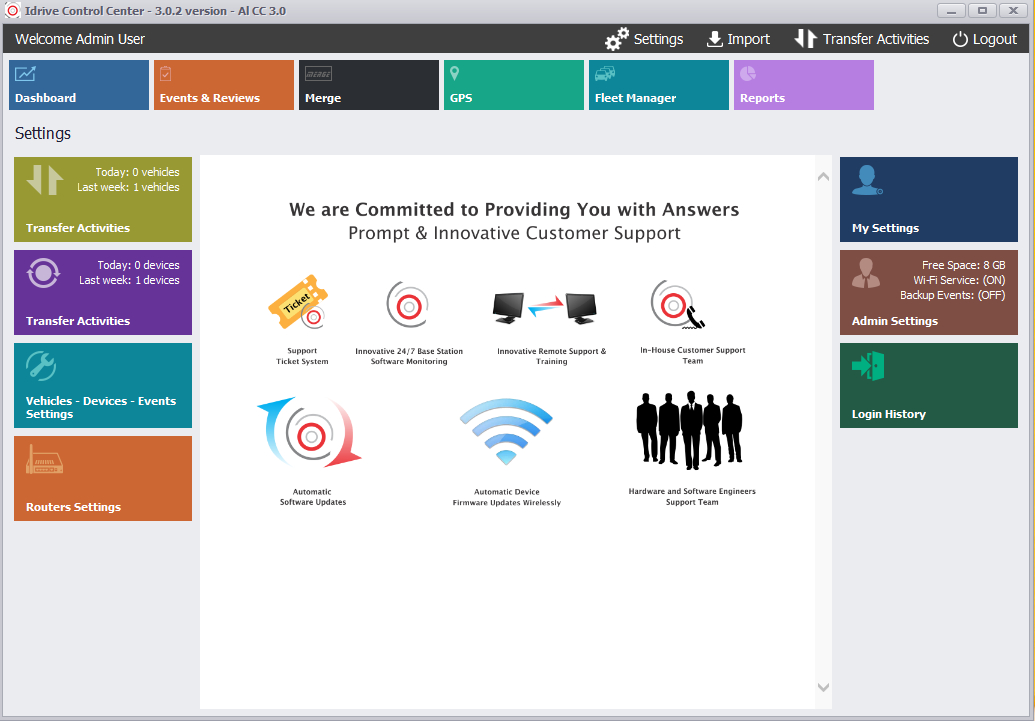
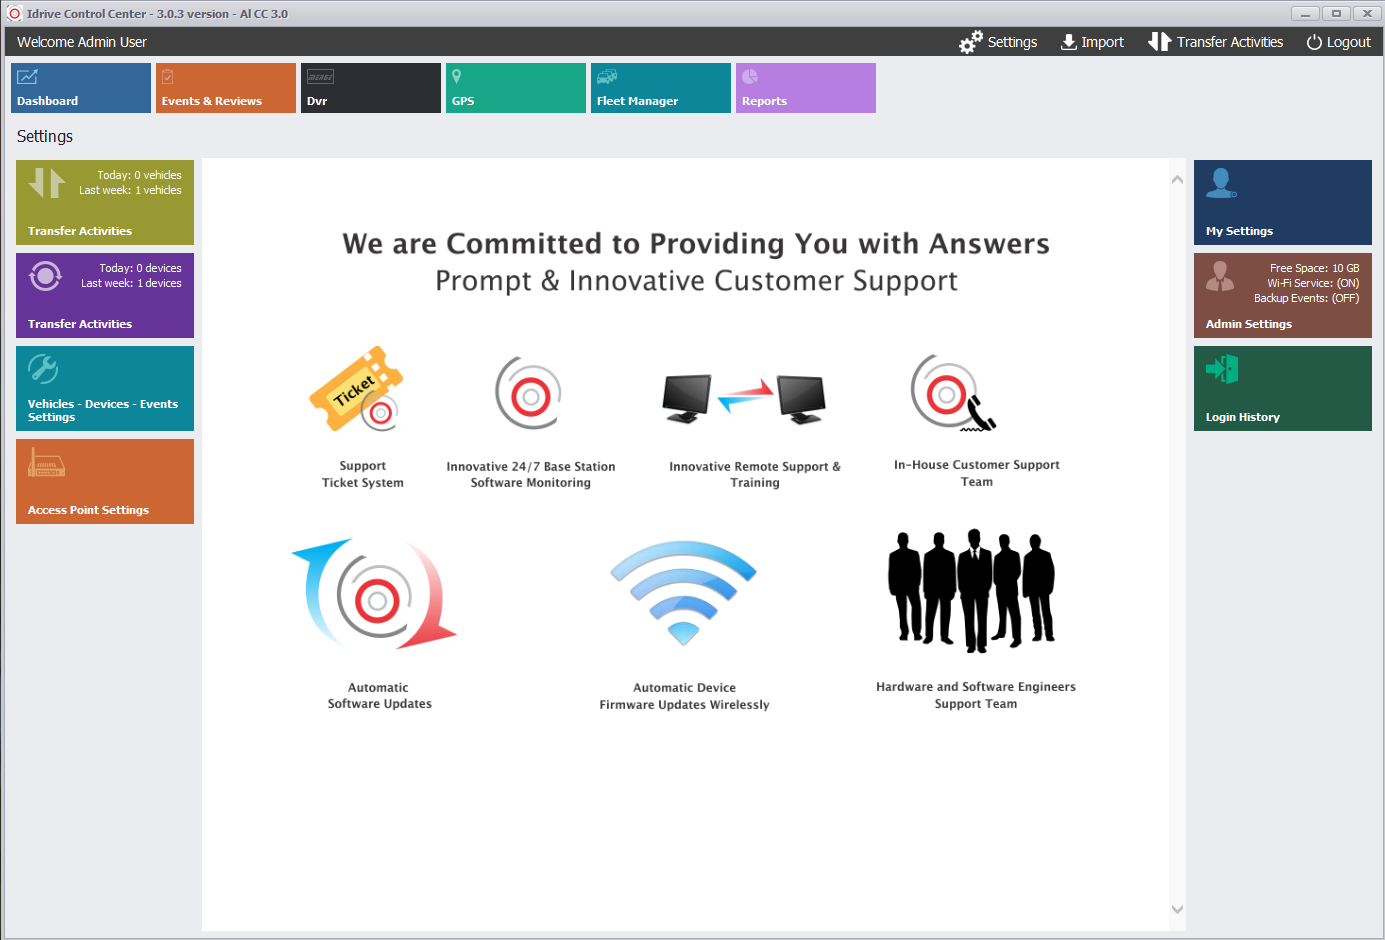
| − | + | =='''Settings'''== | |
| − | : | + | [[File:05.settings.jpg|thumb|700px]] |
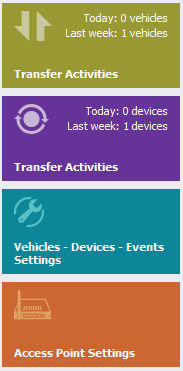
| − | : | + | [[File:05b.settings.jpg|left]] |
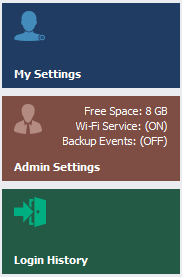
| − | : | + | [[File:05c.settings.jpg|left]] |
| − | + | Quick access to Transfer Activities by Vehicles (those vehicles pre-assigned by the client into the system with an associated Idrive Camera serial number) | |
| − | |||
| − | |||
| − | |||
| − | + | Quick access to Transfer Activities by Devices (Idrive Cameras pre-assigned by the Idrive into the system with or without an associated client vehicle name assignment) | |
| − | |||
| − | |||
| − | |||
| − | ' | + | Quick access to the configuration of Idrive Cameras' configuration in relationship to the client software. Displaying and allowing customization of Event recording lengths, LED behaviors in relationship to triggers and G-Force interactivity |
| − | |||
| − | |||
| − | + | Check the health of your outdoor Access Points (AP). Plus the ability to "name" your AP locations; e.g. Wash-bay, NE Parking, Tower 7, Fuel Station, etc. Naming your AP locations will allow you to optimize your vehicle parking for the best downloads | |
| − | |||
| − | |||
| − | |||
| − | |||
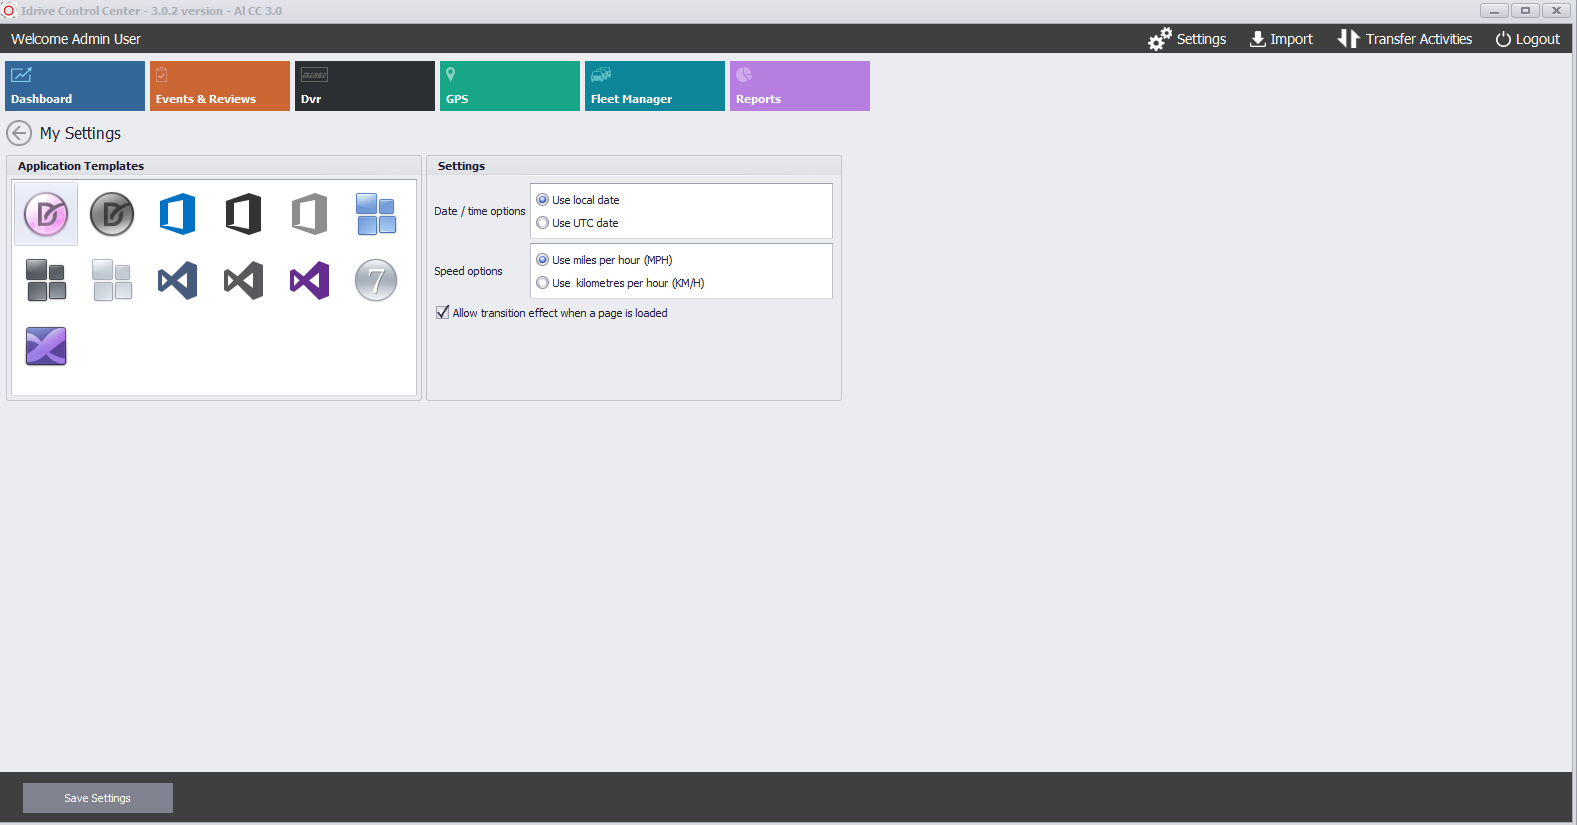
| − | + | Customize the look of your Control Center with color templates from recent Windows colors and contrast. Decide to use Local Date or UTC, choose between MPH or KM/H and allow or disallow windows transition effects | |
| − | |||
| − | |||
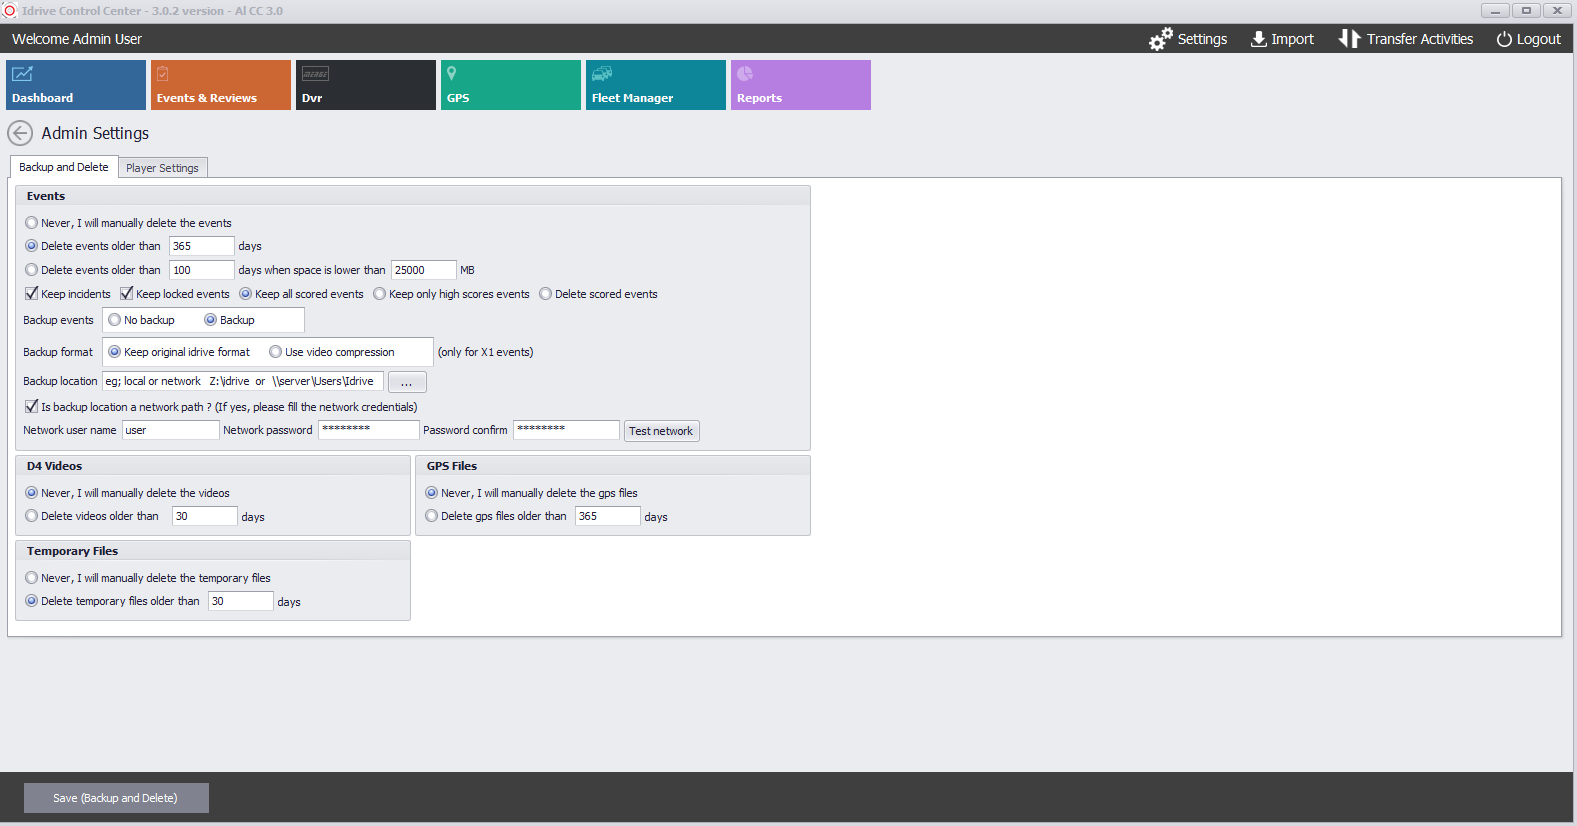
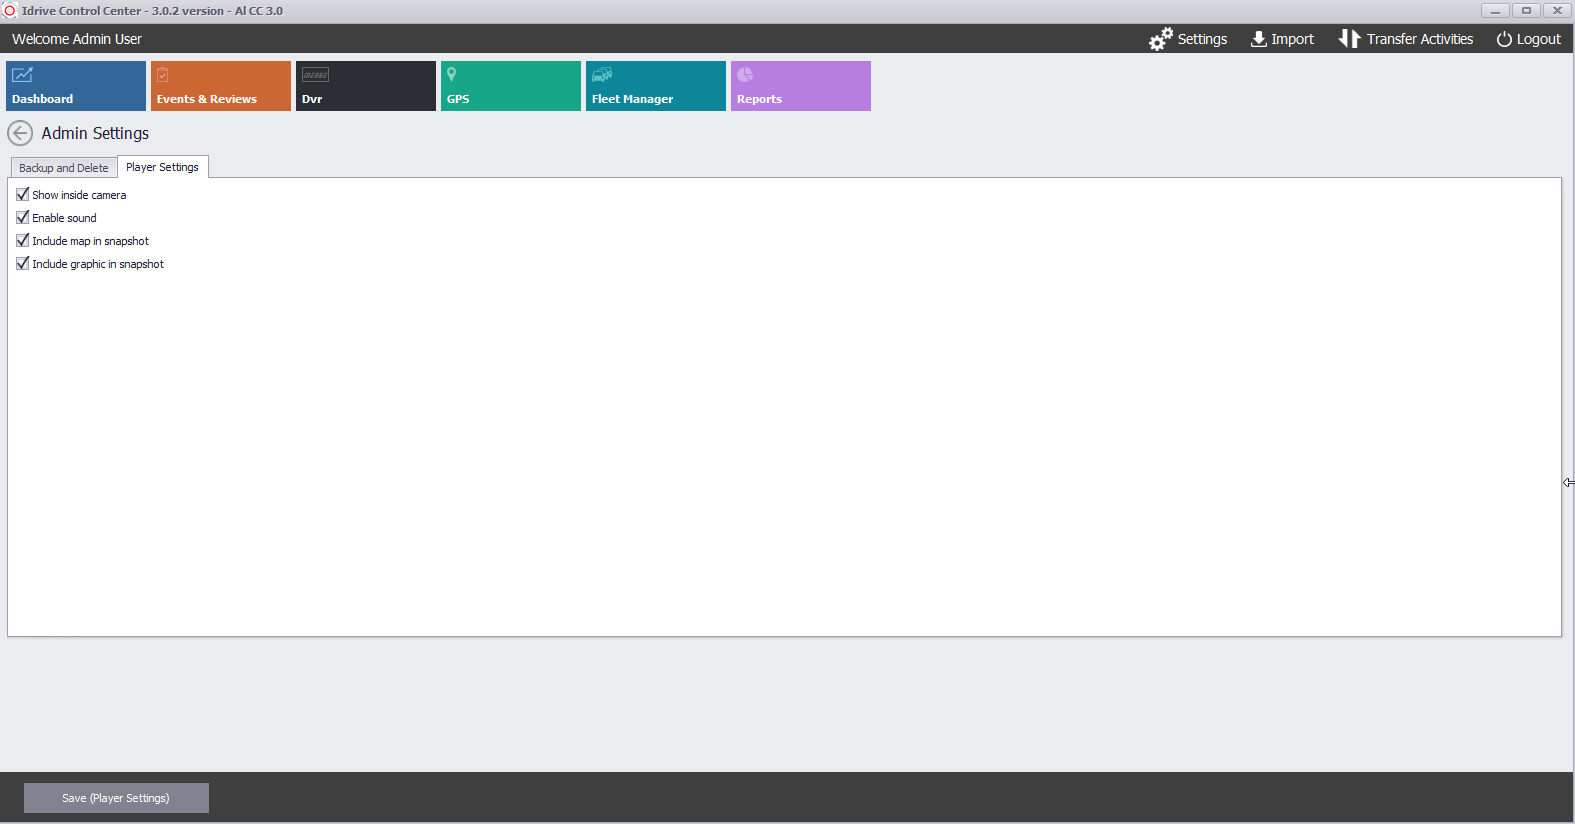
| + | Manage your storage and backup settings for the system. Can be set to Auto-Delete your oldest events that are not marked as Incidents. A/V settings for turning off inside Camera and Audio off fleet wide | ||
| − | |||
| − | |||
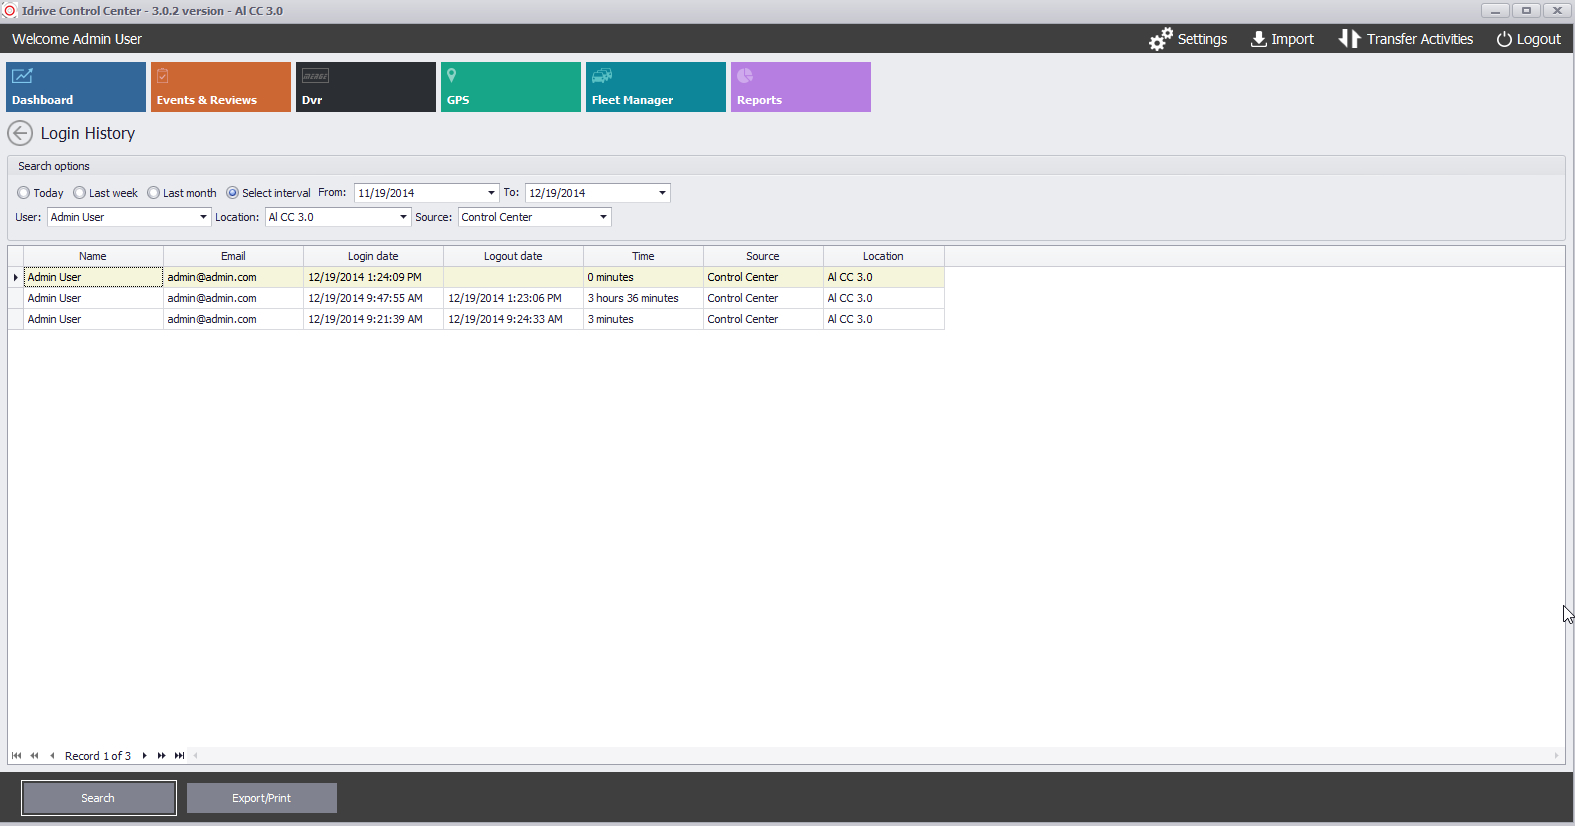
| + | Administrators can view the frequency and length that their employees (who are assigned to system responsibilities) have signed into the software and at which location | ||
| − | + | <br/><br/><br/> | |
| + | '''End of Section''' | ||
| − | + | [[Idrive_Control_Center_3.0_User%E2%80%99s_Guide#Control Center 3.0 Dashboard View|Back To Dashboard]] | |
| + | or | ||
| − | + | [[Idrive_Control_Center_3.0_User%E2%80%99s_Guide#Settings_Detail|Detailed Discussion]] | |
| + | ---- | ||
| + | <br\><br\><br\><br\><br\> | ||
| − | + | =='''Import'''== | |
| − | : | + | [[File:new.import.jpg|thumb|700px]] |
| + | [[File:Idrive Verbatim USB Stick.jpg|left|200px]] | ||
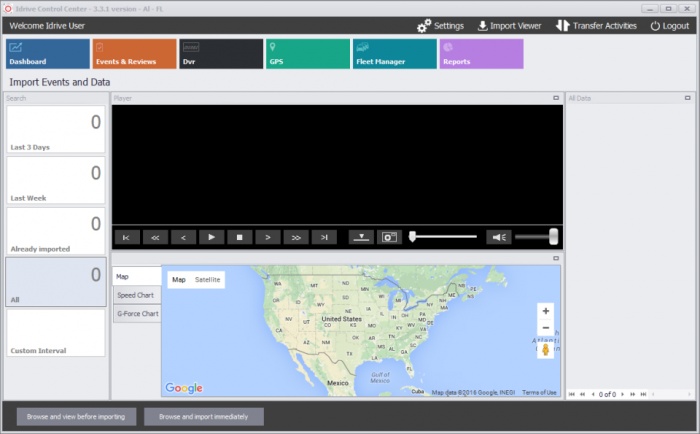
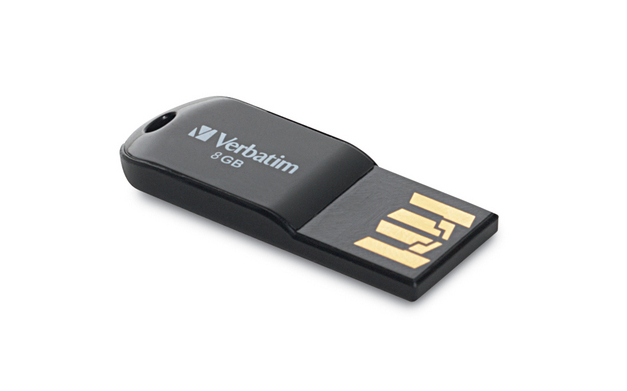
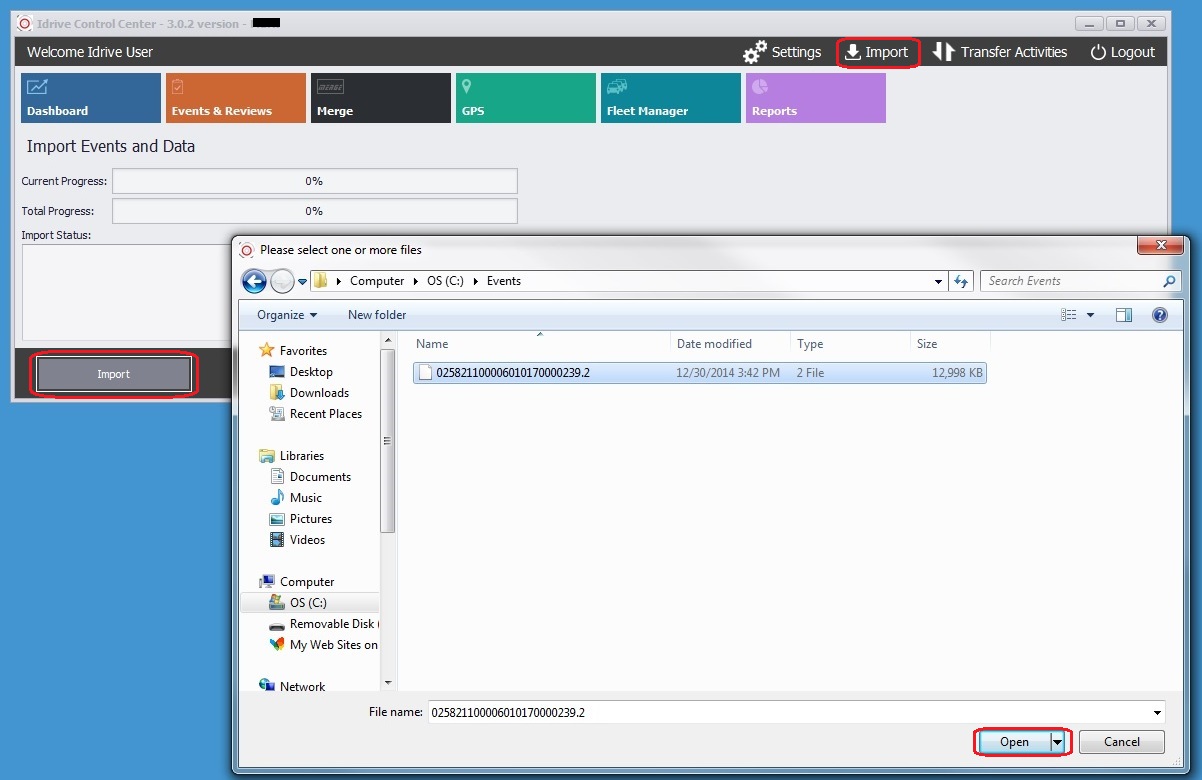
| − | In | + | On occasion a vehicle may become disabled and not return to the client location where it would connect to the Access Point and download its Events and GPS Data. In these situations a secure method is provided to safely download the files from a camera at a remote location onto a Micro USB Thumb Drive. |
| + | Afterward, the Events and GPS Data can be imported into the Idrive Control Center via the USB and software sections named IMPORT. | ||
| + | Imported Events and GPS Data can then be viewed like any other data in the Play and Review Section. | ||
| + | There are "soft Keys" found on the bottom left of the window representing two methods to Import, Please see the Import Detailed section to select what works best for you. | ||
| + | |||
| + | [[file:newa.import.jpg|left]] | ||
| + | |||
| + | <br/><br/><br/> | ||
| + | '''End of Section''' | ||
| − | + | [[Idrive_Control_Center_3.0_User%E2%80%99s_Guide#Control Center 3.0 Dashboard View|Back To Dashboard]] | |
| − | + | or | |
| − | + | [[Idrive_Control_Center_3.0_User%E2%80%99s_Guide#Import_Detailed|Import Detailed]] | |
| + | ---- | ||
| + | <br\><br\><br\><br\><br\> | ||
| − | + | =='''Transfer Activities'''== | |
| − | : | + | [[File:12.transf.act.jpg|thumb|700px]] |
| + | [[ File:12a.transf.act.jpg|left]] | ||
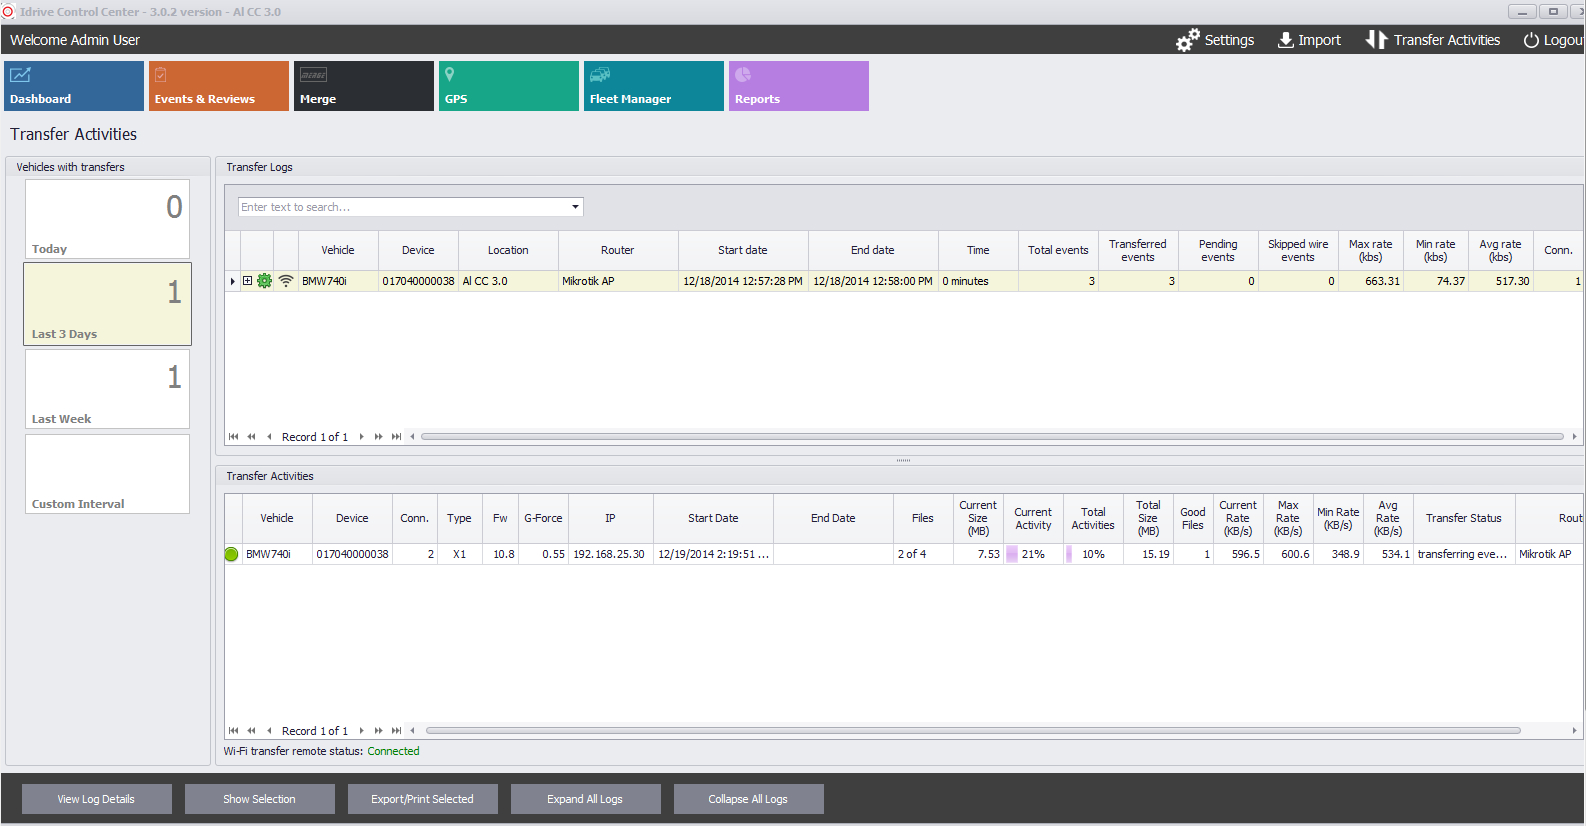
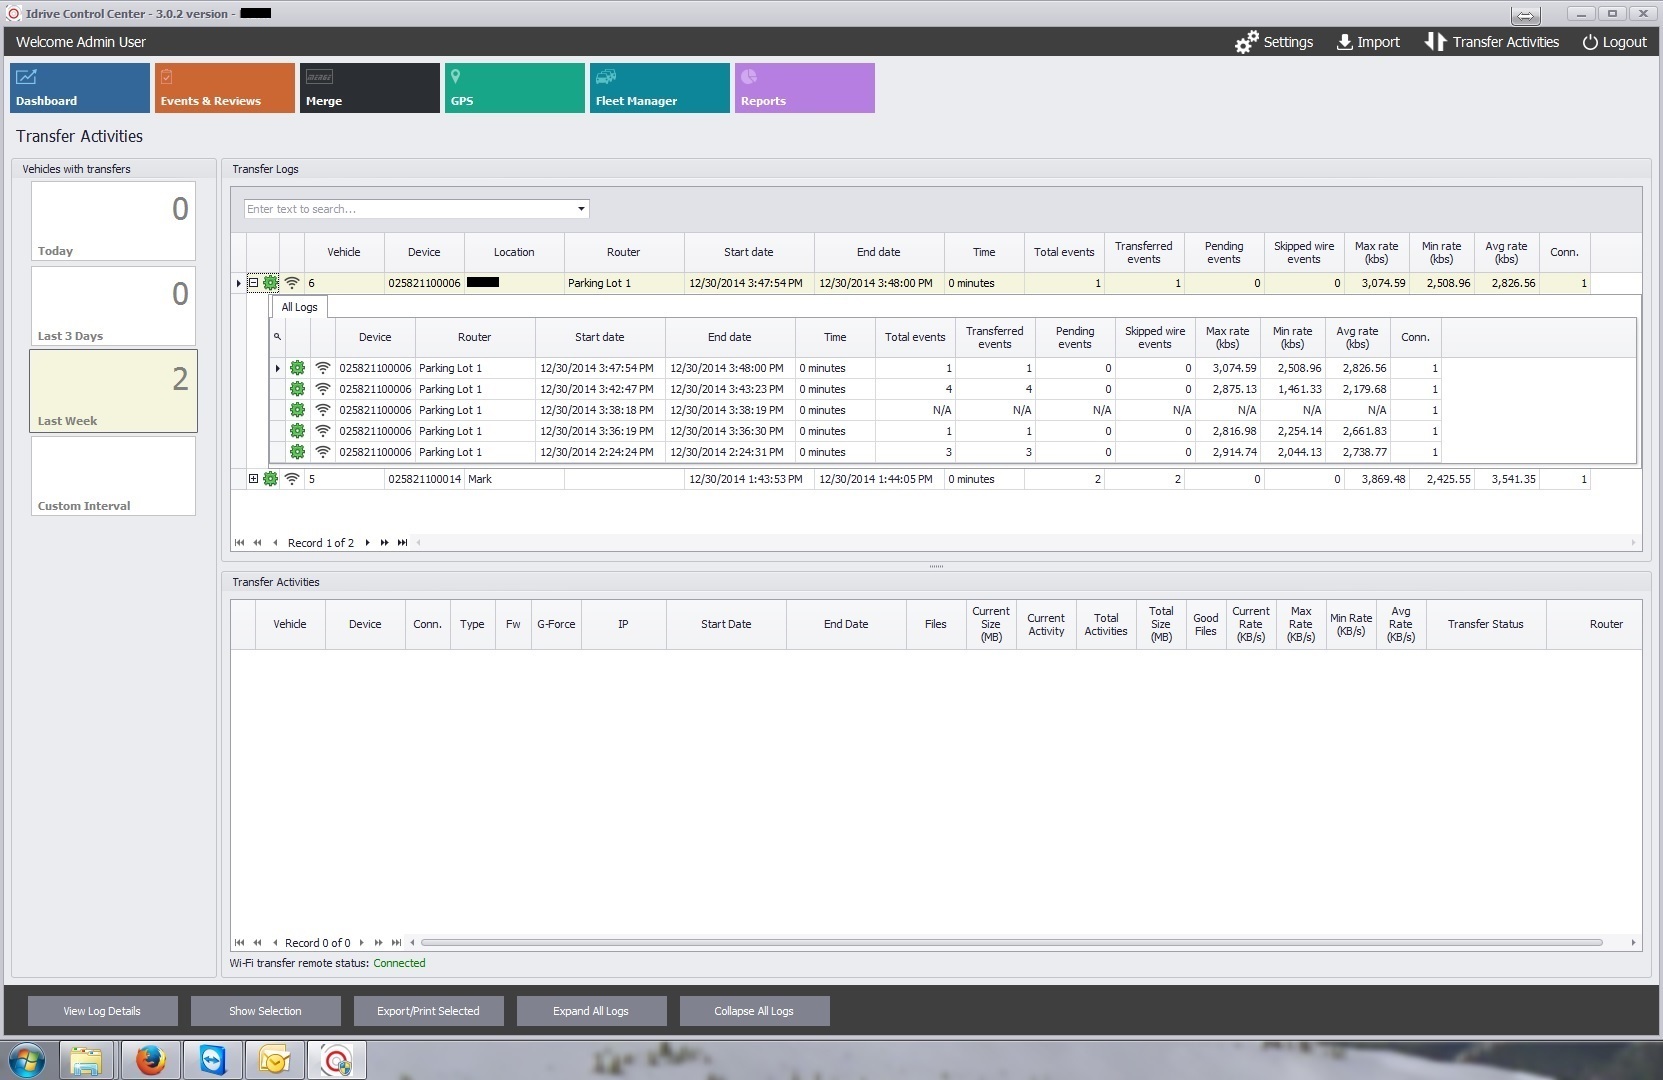
| + | View the status and current activity of WiFi downloads from the cameras installed and assigned to your vehicles. Downloads take place after they arrive back in your parking lot and ignition-off near the designated Access Points | ||
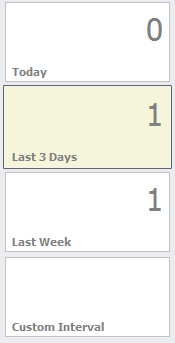
| − | + | <br/> | |
| − | + | View transfer activity from the last 3 days | |
| + | <br/><br\><br\> | ||
| − | + | View transfer activity from the last 7 days | |
| − | + | <br\><br\><br\> | |
| − | + | Select a specific 7 day range from transfer history logs | |
| − | |||
| − | + | <br/><br/><br/> | |
| + | '''End of Section''' | ||
| + | [[Idrive_Control_Center_3.0_User%E2%80%99s_Guide#Control Center 3.0 Dashboard View|Back To Dashboard]] | ||
| + | or | ||
| − | [[ | + | [[Idrive_Control_Center_3.0_User%E2%80%99s_Guide#Transfer_Activities_Detailed|Transfer Activities Detailed]] |
| + | ---- | ||
| + | <br\><br\><br\><br\><br\> | ||
| − | + | =='''THIS ENDS THE ABBREVIATED VERSION OF THE SOFTWARE MANUAL'''== | |
| − | + | ---- | |
| − | + | '''Below is a detailed discussion of each Software Tile and fly-out window in the Control Center Software''' | |
| + | In each section is a "Click here" link that will take you to the detailed discussion for that section. | ||
| + | After reading a section click the "Back To Dashboard" link provided at the end to return; then scroll to the next area that you wish to read | ||
| − | + | [[Idrive_Control_Center_3.0_User%E2%80%99s_Guide#Control Center 3.0 Dashboard View|Back To Dashboard]] | |
| − | + | <br\><br\><br\><br\><br\> | |
| − | |||
| − | |||
| − | + | ==Detailed Discussions== | |
| − | + | <br\><br\> | |
| − | |||
| + | =='''EVENTS and REVIEWS''' - Idrive Player== | ||
| − | + | [[File:23.events.reviews.png|thumb|750px|]] | |
| − | |||
| + | Selecting a dual image thumbnail of the event you wish to view will populate the main viewer and the map section below | ||
| − | : | + | The player buttons are similar to those you would find on many video players and are as follows |
| + | [[File:23aaa.events.reviews.jpg|left|450px|]] | ||
| + | <br\><br\> | ||
| − | |||
| − | |||
| − | + | * Go to beginning | |
| + | * Go to previous second | ||
| + | * Go to previous frame | ||
| + | * Play/Pause | ||
| + | * Stop | ||
| + | * Go to next frame | ||
| + | * Go to next second | ||
| + | * Go to end | ||
| − | |||
| + | * Go to Event Trigger | ||
| + | * Snapshot (captures both camera images, GPS Map and Speed Chart to export as jpg image to file location of your choice | ||
| + | <br\><br\> | ||
| − | + | [[File:25a.events.reviews.Gforce.jpg|right|600px]] | |
| + | <br\><br\> | ||
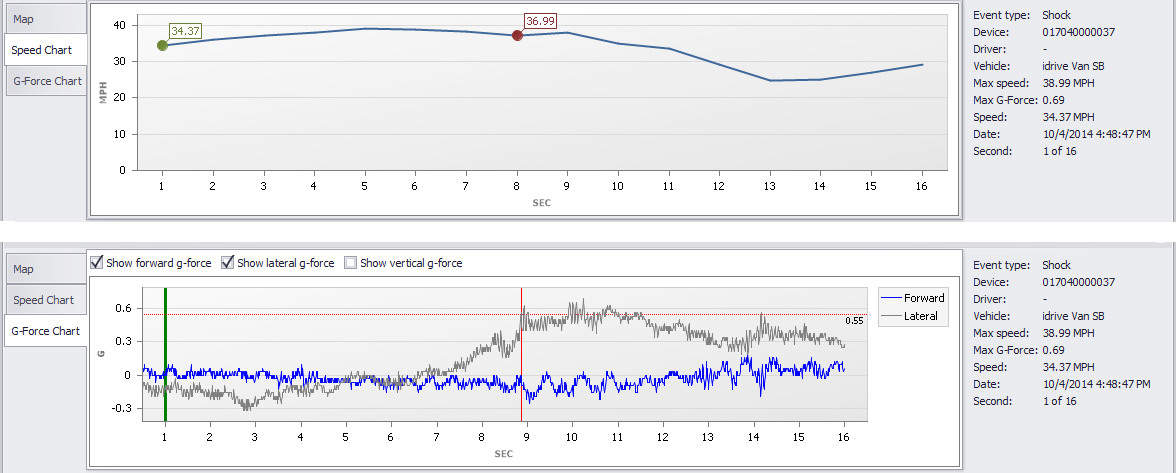
| − | + | '''Map - Speed Chart - G-Force Chart''' | |
| − | + | The default viewer window displays an interactive Map; selectable Viewer windows are: | |
| + | * Speed Chart | ||
| + | * G-Force Chart | ||
| + | '''Map Graphic''' panel displays the information about the location of the event. | ||
| − | + | • Pan the map by "click and drag". | |
| + | |||
| + | • Zoom in / out using the mouse scroll wheel. | ||
| − | + | • You can also use the pan and zoom buttons in the left upper corner. | |
| − | |||
| − | + | '''Speed Graphic''' -shows the speed of the vehicle over time during the event. | |
| − | + | '''G-Force Graphic''' -shows the G-Forces levels for the vehicle over the time period for the event. Forward, Lateral and Vertical Axis may be selected for display. | |
| − | : | + | '''Note: This graphic is only available with the Idrive X1P cameras with Firmware version 10.5 or higher.''' |
| − | |||
| − | + | ::*By default, the vertical G-Force is not visible. | |
| + | ::*The horizontal red line represents the trigger G-Force (in many cases, the graphic shows 2 horizontal lines: one for positive trigger and another for negative trigger). In this example, the positive line is higher than the max positive value of the G-Forces, so it is not displayed on the graphic. | ||
| + | ::*The vertical red line represents the trigger moment (not necessary the max value). | ||
| − | The | + | ::*The vertical green line represents the current second of the event. When you play the event, the line is changing the value (similar with speed graphic / map). Also, you can drag the green line and the player will seek to the most appropriate second. |
| − | + | '''Note:''' Each second has around 300 values on each axis (you can see the values if you click on “More Info” link from the player). For a “single core” computer, the animation of the G-Force graphic produces a significant delay between sound and images! (Because of the number of values) For those computers, the green line is not displayed! So, in order to see the “animation”, you must have at least a dual core computer! | |
| − | + | <br/><br/> | |
| − | |||
| − | + | ====Viewing Options==== | |
| − | + | [[File:23bbb.events.multi.select.jpg|thumb|750px]] | |
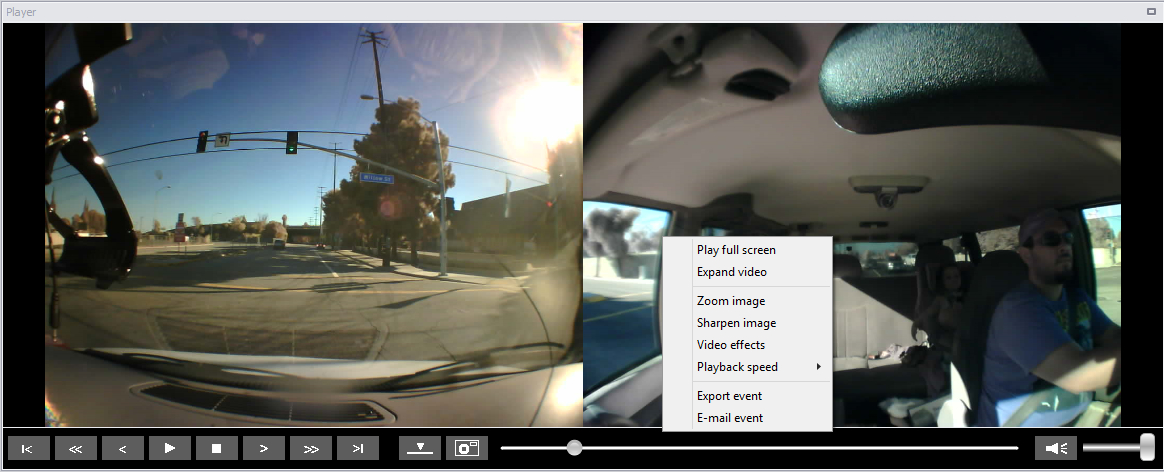
| + | Click the right mouse button over the desired image to select viewing options. | ||
| + | :Play Full Screen | ||
| − | + | :Expand Video | |
| + | :Zoom Image | ||
| − | + | :Sharpen Image | |
| − | + | :Video Effects | |
| − | : | + | :Playback Speed |
| − | + | :Export Event | |
| − | : | + | :Email Event |
| − | |||
| − | + | '''Expand Video Mode''' | |
| + | * This is the same as full screen mode except both views are enlarged side by side | ||
| + | * Viewer controls and shortcuts are the same as in Full Screen Mode | ||
| − | |||
| − | + | '''Zoom Image Mode''' | |
| − | |||
| − | + | ::* You can select the location to zoom into by selecting it with the left mouse button | |
| − | + | ::* Clicking the right mouse button will bring up the zoom level menu | |
| − | + | Navigation when zoomed in on and image is accomplished: | |
| − | |||
| − | |||
| + | ::* By the sliders at the side and bottom of the image | ||
| + | ::* By dragging the “frame selection window” image inside the small zoom image window | ||
| + | ::* When finished with the zoom image, press ESC on your keyboard to escape zoom window | ||
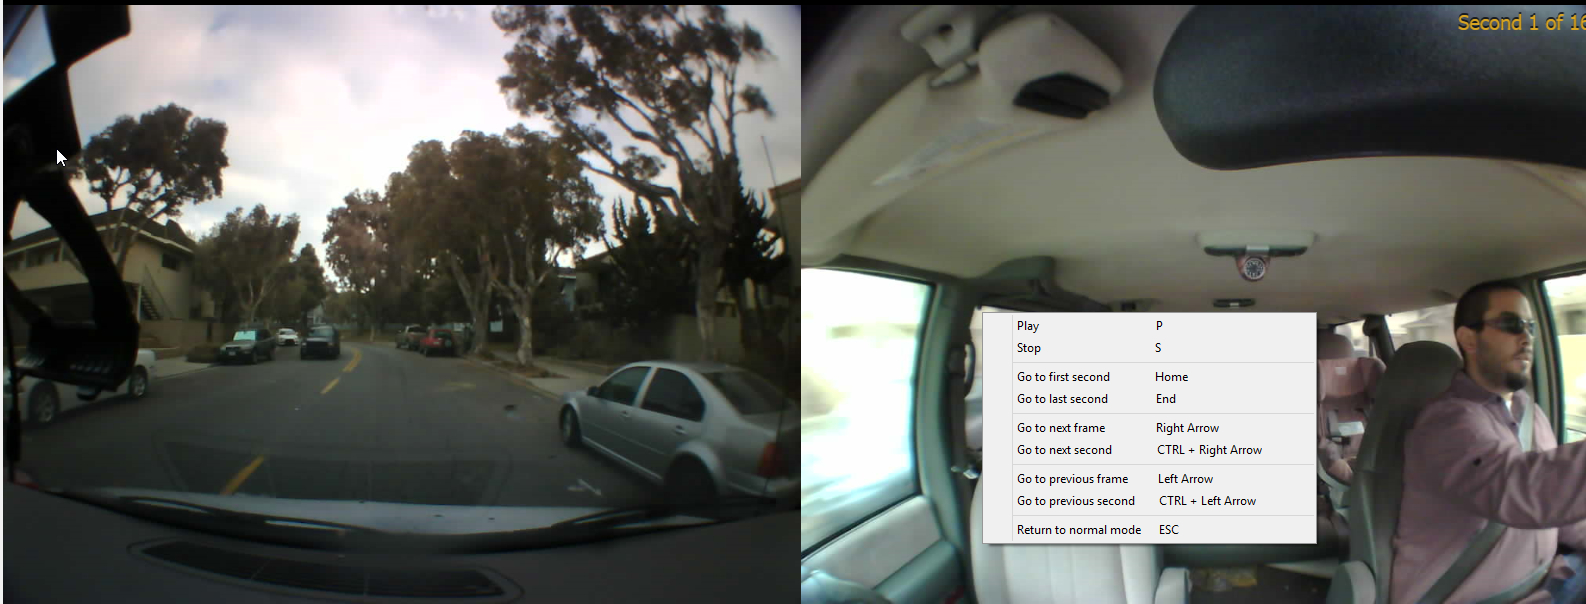
| − | + | '''Play Full Screen Mode''' | |
| − | + | * ''You can view an event in full screen mode by right clicking on the desired view from the event.'' | |
| − | |||
| − | |||
| − | |||
| − | + | * ''When in full screen mode the video controls are displayed by clicking in the video frame.'' | |
| − | |||
| − | ''' | + | '''Shortcuts in full screen mode:''' |
| + | [[File:23bc.events.multi.select.jpg|right|750px]] | ||
| + | '''P''' – Play | ||
| − | + | '''S''' – Stop | |
| − | + | '''Home''' – Go to first second | |
| − | + | '''End''' – Go to last second | |
| + | '''Right Arrow''' – Go to the next frame | ||
| − | + | '''CTRL + Right Arrow''' – Go to the next second | |
| − | + | '''Left Arrow''' – Go to previous frame | |
| + | '''CTRL + Left Arrow''' – Go to previous second | ||
| + | '''C''' – Toggle between the driver side and road side views | ||
| + | '''H''' – Hide the second camera window | ||
| − | + | '''ESC''' – Exit full screen mode | |
| − | + | <br/><br/> | |
| − | [[File: | + | [[File:adv_event_search_icon_302.jpg|right|750px|]] |
| − | ''' | + | '''By clicking the Advanced Search tile the screen displays an extensive search window. Here you can select:''' |
| − | + | * Event ID | |
| + | * Specific dates and or times | ||
| + | * search by Record date or download date | ||
| + | * Event Status or Score | ||
| + | * Only New or Sleep events | ||
| + | * Fleet Search by Vehicle, Driver, Location, group or device | ||
| + | * Speed | ||
| + | * G-force | ||
| − | |||
| − | + | Event Types | |
| + | * Shock, Periodic, Panic, Speed, etc | ||
| − | |||
| − | + | Reviews (only after previously clicking and saving a Review can you the search the following) | |
| + | * Adverse Conditions | ||
| + | * Event Trigger | ||
| + | * Risky Actions - Fundamentals | ||
| + | * Risky and Other Actions, etc. | ||
| − | + | <br\><br\><br\><br\> | |
| − | |||
| − | : | + | [[File:23bb.events.multi.select.jpg|left|200px]] |
| + | Left Clicking the Maximize/Minimize icon will fly-out the details view of the events to be viewed | ||
| − | + | <br\> | |
| − | : | + | [[File:23aa.events.expansion.png|right|750px]] |
| − | + | <br\><br\><br\><br\><br\><br\><br\><br\><br\><br\><br\><br\><br\> | |
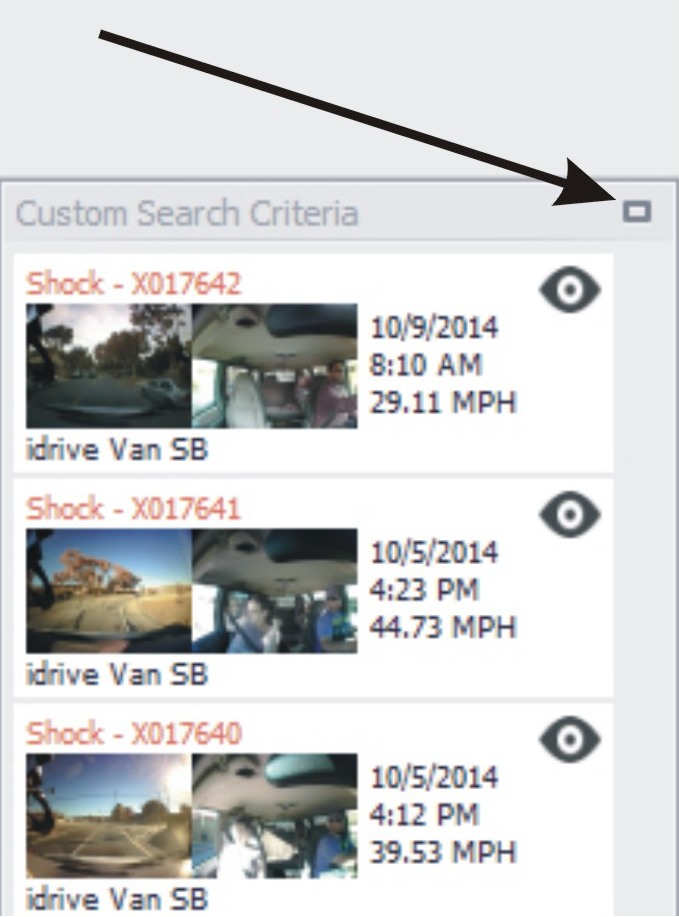
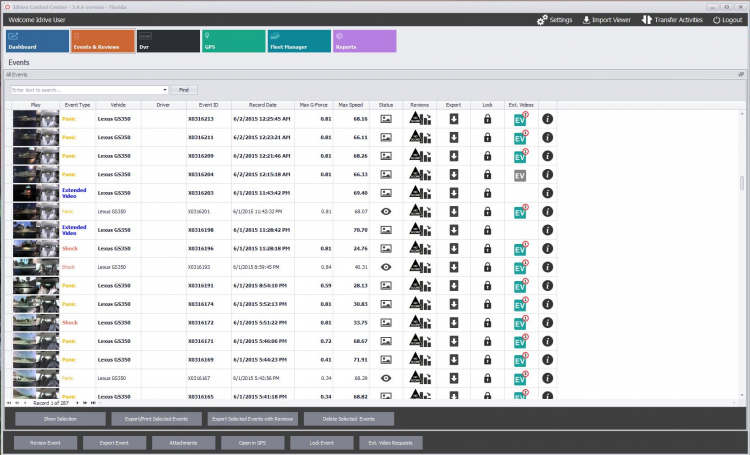
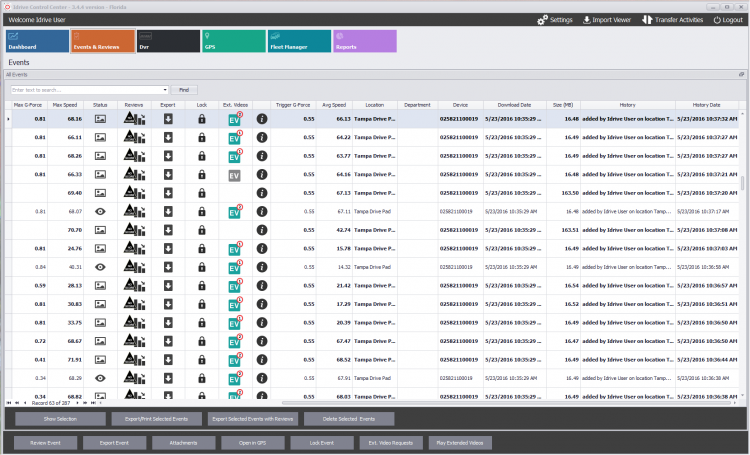
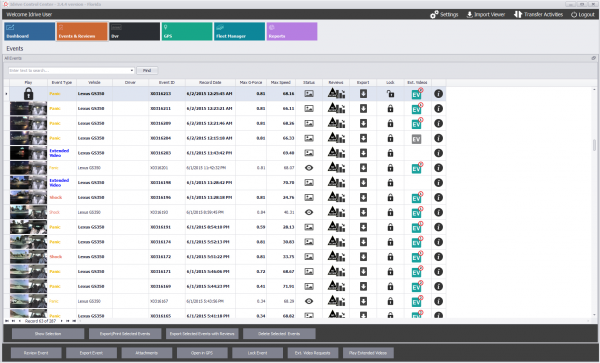
| − | : | + | Left clicking any[[File:23dd.events.information.jpg||50px]]icon will expand for extensive data views, column sorting and multiple selections for printing or manually deleting |
| − | + | <br\><br\><br\><br\><br\><br\><br\><br\><br\><br\><br\> | |
| + | ====Status Icons Definitions==== | ||
| + | [[File:23dd.events.multi.expansion.png|right|750px]] | ||
| + | [[File:23aa.events.reviews.jpg|left|50px|]] | ||
| − | + | '''Not Yet Viewed''' – no explanation necessary | |
| − | |||
| − | |||
| − | + | '''Viewed''' – when an event is viewed, the icon will change to the “eye” | |
| − | |||
| − | |||
| − | + | '''Reviewed''' – once reviewed, scored and saved (see window image next page) | |
| − | |||
| − | |||
| − | + | '''Incident''' – once reviewed and “Incident” selection is made and saved (see window image next page) | |
| − | :: | + | <span style="color:#ff0000">'''Important Note: Always check the "Incident" box to ensure the event is not automatically deleted by the software. Events tagged with Incident will Never be auto deleted from the system''' (See Also: '''[[Idrive_Control_Center_2.0_User’s_Guide#Deleting_Event.28s.29|Deleting Events]]''') |
| − | + | Events saved with any of these specific parameters or selections can be advance searched quickly by a user to perform driver reviews or needing to quickly locate an event for corporate or insurance purposes | |
| − | |||
| − | |||
| − | |||
| − | |||
| − | |||
| − | |||
| − | |||
| − | |||
| − | |||
| − | |||
| − | |||
| − | |||
| − | |||
| − | |||
| − | |||
| − | |||
| − | |||
| − | |||
| − | |||
| − | |||
| − | |||
| − | |||
| − | + | <br/><br/><br/><br/><br/><br/> | |
| + | With the Expanded view a user can select a function via the icons inline with the event or by the fixed function buttons at the bottom of the Event window | ||
| − | + | [[File:23aa.icons.reviews.png|left|550px]] | |
| − | + | <br/><br/><br/><br/><br/><br/> | |
| − | [[File: | + | [[File:23a.events.buttons.png|left|750px]] |
| − | |||
| − | + | <br/><br/><br/><br/><br/><br/><br/><br/> | |
| − | : | + | ====Review an Event==== |
| + | [[File:review_event_icon_302.jpg|left|150px|]] | ||
| − | : | + | [[File:26.review.jpg|right|750px]] |
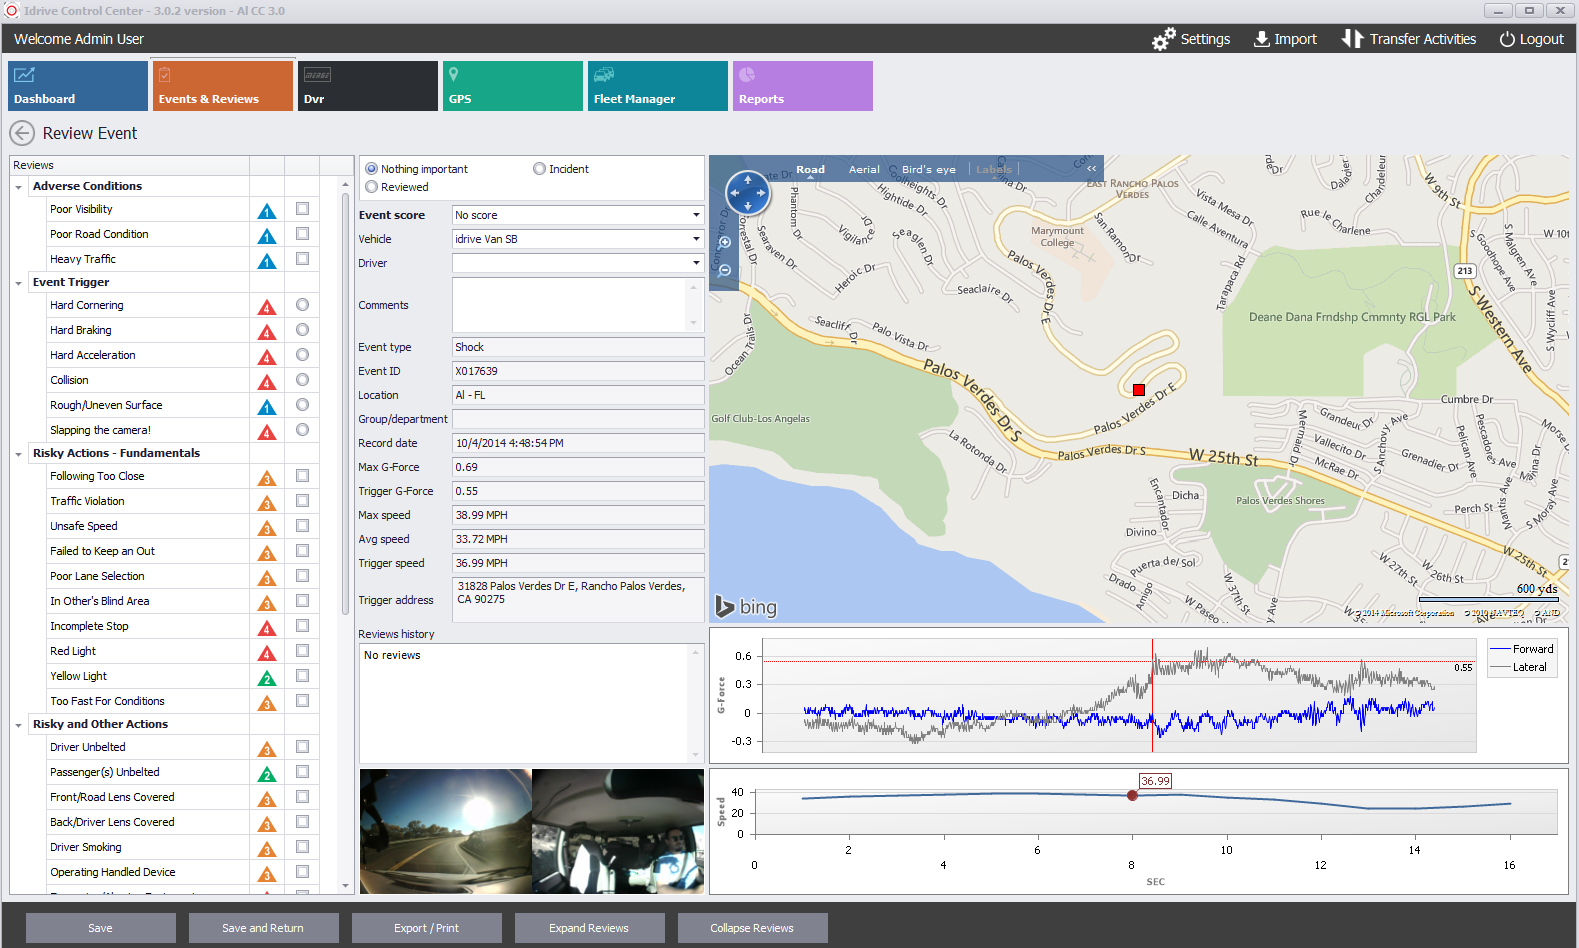
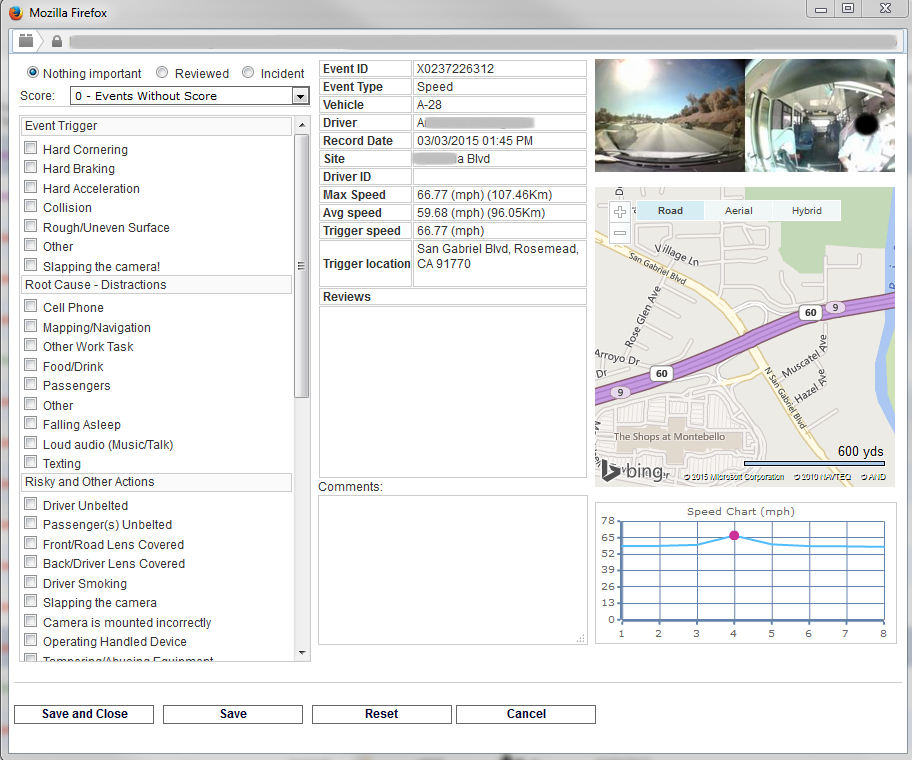
| − | + | Selections made will be stored within the Event and can be reviewed whenever the event is opened. | |
| + | At a glance, the Review icon shows the score previously saved for that Event. | ||
| − | + | The icon variables in the Search Window show a rating of "NO SCORE, 1, 2, 3, or 4" | |
| + | * 1 being the least severe | ||
| + | * 4 the most severe | ||
| − | + | The Reviews Window provides the most frequent Event Triggers: | |
| + | * Adverse Conditions | ||
| + | * Risky Actions (Fundamental and Other) | ||
| + | * Root Cause (Distractions and Poor Awareness) | ||
| − | + | These pre-selectable items have a base Event Score that will accumulate for the total Event Score when saved. | |
| + | '''Note:''' Before saving you can lower or raise the overall Event Score this will over-ride the system pre-selected Review Score | ||
| − | + | '''Note:''' The G-Force graphic will only populate when Reviewing X1-P or higher cameras | |
| − | |||
| + | Optionally you can attach a file as a written report | ||
| − | + | * Click on the Attachments tab and choose the path the file you wish to attach to the event | |
| − | + | * After you make a selection click the Save file button | |
| + | <br/><br/> | ||
| − | + | ====Export an Event==== | |
| + | |||
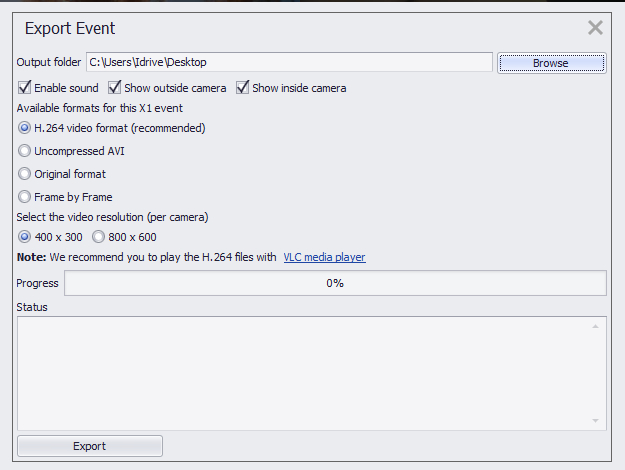
| − | + | * Click the Export icon and the Export Events form will open | |
| + | * Select the options and click Export | ||
| + | [[File:28a.event.export.jpg|right|550px]] | ||
<br/><br/> | <br/><br/> | ||
| − | + | '''Export file options''' | |
| − | + | ::* Output folder location | |
| − | + | ::* Enable Sound | |
| − | + | ::* Show outside camera | |
| − | + | ::* Show inside camera | |
| − | |||
| − | + | '''Export file format''' | |
| − | : | + | ::* H.264 *(see format info below) |
| − | : | + | ::* Uncompressed AVI (large files) |
| + | ::* Original Format | ||
| − | + | ::* Frame by Frame | |
| − | |||
| − | + | '''Export file video Resolution''' | |
| − | * | + | ::* 400x300 |
| + | ::* 800x600 | ||
| − | |||
| − | |||
| − | + | =====About file formats===== | |
| − | + | ::* Ucompressed AVI - An industry standard format however the file size is very large. | |
| − | + | ::* H.264 or MPEG-4 Part 10, Advanced Video Coding (MPEG-4 AVC) is a video compression format that is currently one of the most commonly used formats for the recording, compression, and distribution of video content. The final drafting work on the first version of the standard was completed in May 2003, and various extensions of its capabilities have been added in subsequent editions. | |
| − | + | ::::-[http://en.wikipedia.org/wiki/H.264/MPEG-4_AVC Read More about H.264, external Wiki Link] | |
| − | + | ::::-A free “open-source” Media player can be downloaded from VideoLan at http://www.videolan.org/vlc | |
| − | + | ::* Original Format - Proprietary format that can only be viewed with Idrive Software (not recommended) | |
| − | + | ::::-Full feature event file as downloaded from the X1 device | |
| − | + | ::::-Viewable only on Idrive Control Center or Idrive Direct View software | |
| − | + | ::*Frame by Frame -Individual jpg pictures of each frame in the event | |
| − | + | ::::-8 Frames per second of video (4 from the inside camera & 4 from the outside camera) | |
| − | + | ::::-Files named by second, frame number, camera. Example: S_03_f_2_in.jpg (3rd second, 2nd frame, inside camera) | |
| − | |||
| − | + | {| class="wikitable" | |
| + | |- | ||
| + | !Comparison of Export File Sizes|| for 30 Second Event | ||
| + | |- | ||
| + | |'''Export Type''' ||'''Resolution'''||''' File Size '''|| '''Note''' | ||
| + | |- | ||
| + | | H.264 || 400 x 300 || 0.9 MB || | ||
| + | |- | ||
| + | | H.264 || 800 x 600 || 2.55 MB || | ||
| + | |- | ||
| + | | Uncompressed AVI || 400 x 300 || 83.3 MB || Too Large to email | ||
| + | |- | ||
| + | | Uncompressed AVI || 800 x 600 || 330 MB || Too Large to email | ||
| + | |- | ||
| + | | Original Format || N/A || 7.9 MB || Can only viewed with Idrive Software | ||
| + | |- | ||
| + | | Frame by Frame || N/A || N/A || Produces pictures rather than video | ||
| + | |- | ||
| + | |} | ||
| − | + | Select the appropriate file format and size for Email, DVD, Thumb drive ETC. | |
<br/><br/> | <br/><br/> | ||
| − | ==== | + | ====Lock / Unlock an Event==== |
| − | [[File: | + | [[File:23aa.icons.reviews.png|left|550px]] |
| − | : | + | [[File:23a.events.buttons.png|left|850px]] |
| − | ::* | + | <br/><br/><br/><br/><br/><br/><br/><br/> |
| + | |||
| + | [[File:29.event.lock.jpg|thumb|400px]] | ||
| + | |||
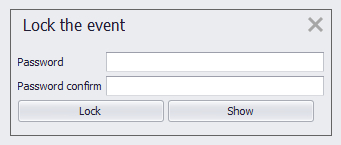
| + | On occasion you may wish to secure an Event so it cannot be viewed. Once the event is locked a password is required to open it for viewing. | ||
| + | |||
| + | ::* Locking an Event on the Control Center will also cause it to be locked on the Global Center as well | ||
| + | |||
| + | ::* Only the User(s) (having privileges and knowing the Lock Code) will be permitted to View a Locked Event | ||
| + | |||
| + | ::* Only the User that Locked the event can remove the lock. | ||
| + | |||
| + | ::* Lock codes can be alpha numeric characters up to 10 digits in length | ||
| − | + | <br/><br/><br/><br/> | |
| − | |||
| − | + | Once an event is locked the "Play" Icon showing the Event preview image is replaced with a Lock icon in both the regular Event screen list and the maximized Event screen list | |
| − | + | To Unlock the Event click the UnLock button at the bottom and insert the password and click unlock | |
| − | [[File: | + | [[File:29a.event.lock.jpg|left|600px]][[File:29aaab.event.lock.png|center|600px]] |
| − | + | <br/><br/> | |
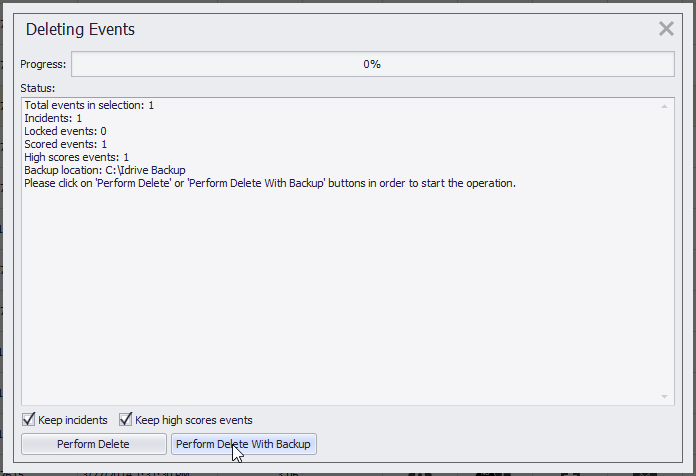
===Deleting Event(s)=== | ===Deleting Event(s)=== | ||
| + | [[File:30.Delete.event.jpg|right|550px]] | ||
<span style="color:#ff0000">'''''It is your data, once deleted there is no way to restore an event without a Backup!'''''</span> | <span style="color:#ff0000">'''''It is your data, once deleted there is no way to restore an event without a Backup!'''''</span> | ||
| − | |||
| + | More details on "Auto Delete" settings are available; see Admin Settings | ||
| − | |||
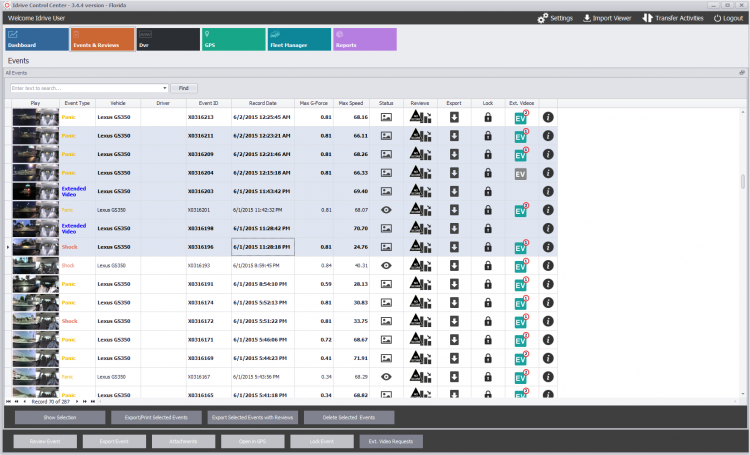
| + | Delete events from the Control Center “Events & Review” window containing the events lists. You can select single or multiple events to delete. | ||
'''Single Event Delete''' | '''Single Event Delete''' | ||
| − | ::* | + | ::* Select an event by left clicking the Status Icon or Event Type (clicking the thumb nail images causes the event to open on screen) |
| − | ::* Left mouse click the “Delete selected event(s)” | + | ::* Left mouse click the “Delete selected event(s)” from the three Function buttons below |
| + | |||
| + | :::[[File:30a.Delete.event.jpg|550px]] | ||
::* The Control Center identifies the backup location (if pre-selected) and presents 3 options: | ::* The Control Center identifies the backup location (if pre-selected) and presents 3 options: | ||
| Line 767: | Line 867: | ||
'''Note:''' ''if the selected item to delete is marked as an Incident or Locked or Scored (1,2,3 or 4) then the appropriate options will populate in the Deleting Events Window allowing or blocking the delete operation'' | '''Note:''' ''if the selected item to delete is marked as an Incident or Locked or Scored (1,2,3 or 4) then the appropriate options will populate in the Deleting Events Window allowing or blocking the delete operation'' | ||
| − | + | ||
<br/><br/> | <br/><br/> | ||
| + | |||
| + | [[File:30aab.Delete.event.png|right|750px]] | ||
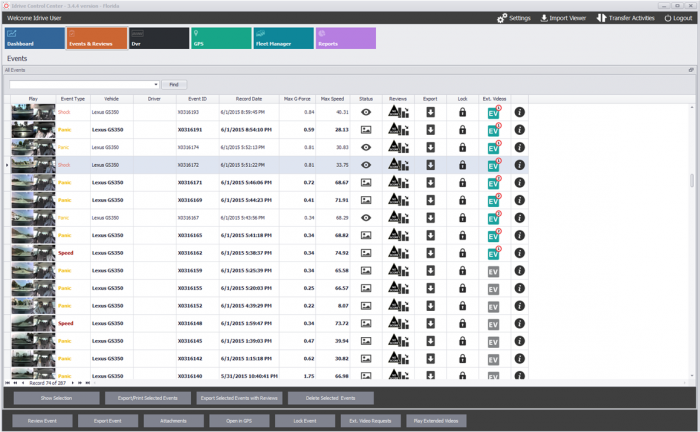
'''Multiple Events Delete (two ways to select multiple events)''' | '''Multiple Events Delete (two ways to select multiple events)''' | ||
| Line 775: | Line 877: | ||
::* Hold the “CTRL” key down on your keyboard, then | ::* Hold the “CTRL” key down on your keyboard, then | ||
| − | ::* Simultaneously left mouse click each of the event icons you choose to delete ( | + | ::* Simultaneously left mouse click each of the event icons you choose to delete (Windows multiple selection) |
| Line 784: | Line 886: | ||
::* Simultaneously left mouse click a start event and an end event | ::* Simultaneously left mouse click a start event and an end event | ||
| − | ::* All the events including the start and end event will be selected ( | + | ::* All the events including the start and end event will be selected (Windows consecutive selection) |
'''THEN''' | '''THEN''' | ||
| − | ::* | + | ::* Left mouse click the “Delete selected event(s)” from the three Function buttons below |
| − | |||
| + | '''Note''': ''if the selected items to delete are marked as an Incident or Locked or Scored (1,2,3 or 4) then the appropriate check box options will populate in the Deleting Events Window (see above) allowing or blocking the delete operation on the selected items'' | ||
| − | |||
| − | + | The Control Center identifies the backup location (if selected) and presents 3 options: | |
| − | + | '' - Perform Delete'' | |
| − | |||
| − | |||
| − | |||
| − | |||
| − | |||
| − | |||
| − | |||
| − | |||
| − | |||
| − | |||
| − | |||
| − | |||
| − | |||
| − | |||
| − | |||
| − | '' - Perform Delete'' | ||
'' - Perform Delete with backup (visible only if the backup location is pre-specified)'' | '' - Perform Delete with backup (visible only if the backup location is pre-specified)'' | ||
| Line 841: | Line 926: | ||
<br/><br/> | <br/><br/> | ||
| − | === | + | ===Attachments=== |
| + | [[File:28.event.attach.jpg|thumb|750px]] | ||
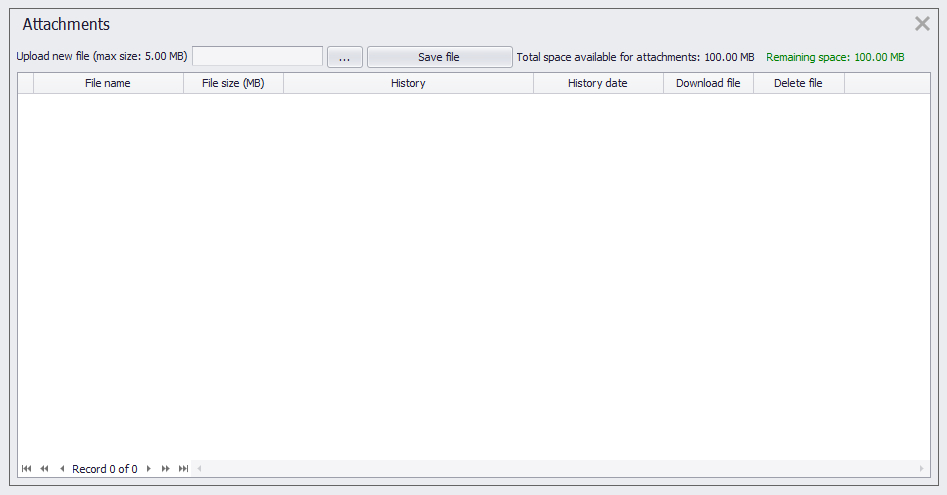
| + | Selecting the Attachments function button allows you to link into an Event a file of your choosing from most of the popular windows files extensions, such as: | ||
| + | * Image (picture) files | ||
| + | * Word, Text and PDF files etc. | ||
| − | + | You can upload a new file to the software at any time to attach it to an event (max 5MB size) | |
| − | + | <br\><br\><br\><br\><br\><br\><br\><br\><br\><br\><br\><br\><br\><br\><br\><br\><br\><br\><br\><br\><br\> | |
| − | <br | ||
| − | + | ===EV - Extended Video=== | |
| − | + | [[File:24ev.events.icon.jpg|left]] [[File:24ev.icon.jpg|middle|75px]] | |
| − | + | Events displaying the '''EV''' icon notify the user that Extended Video is captured and available for download from the Camera storage | |
| + | <br\><br\> | ||
| + | With the Expanded view a user can select a function via the icons inline with the event or by the fixed function buttons at the bottom of the Event window | ||
| − | : | + | [[File:23aa.icons.reviews.png|550px]] |
| − | + | <br/><br/> | |
| − | : | + | [[File:23a.events.buttons.png|750px]] |
| − | + | <br\><br\><br\><br\><br\><br\> | |
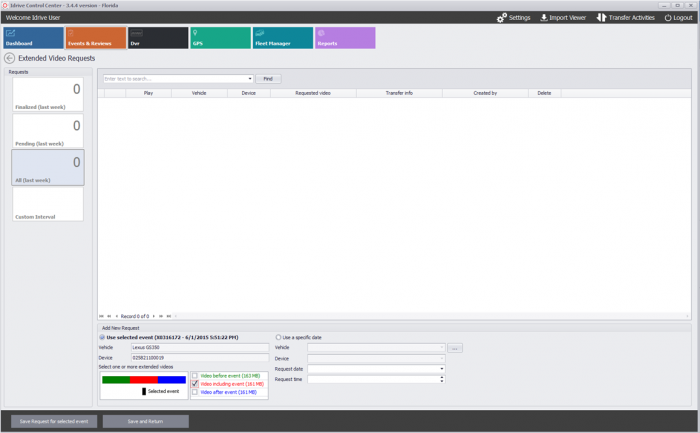
| − | ''' | + | '''To place a request for an EV Extended Video;''' |
| + | # select the EV icon for the event of your choice '''OR''' | ||
| + | # click on the grey button below that states EXT. Video Requests | ||
| + | # when the next window opens; make your selection from the bottom left side to submit the request for the Extended Events | ||
| + | * This will take place the next time the camera connects via WiFi | ||
| + | [[File:Ev.a.png|700px|left]][[File:Ev.b.png|700px|right]] | ||
| − | <br | + | <br\><br\><br\><br\><br\><br\><br\><br\><br\><br\><br\><br\><br\><br\><br\><br\> |
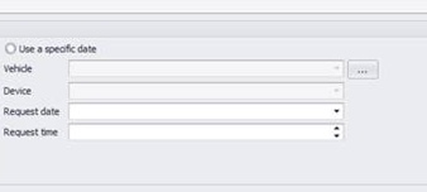
| − | + | '''You may also retrieve EV "based on date and time" using the option for “Specific Date” EV retrieval''' | |
| + | * If these files still exist on the camera, then a WiFi connection will retrieve the EV | ||
| + | [[File:Ev.c.png|left]] | ||
| − | |||
| + | <br\><br\><br\><br\><br\><br\><br\><br\><br\> | ||
| − | |||
| − | + | '''End of Section''' | |
| − | |||
| − | + | [[Idrive_Control_Center_3.0_User%E2%80%99s_Guide#Control Center 3.0 Dashboard View|Back To Dashboard]] | |
| + | ---- | ||
| + | <br\><br\><br\><br\><br\><br\> | ||
| + | =='''DVR Usage and Management'''== | ||
| − | |||
| − | |||
| − | |||
| − | + | ===DVR Videos and Events=== | |
| − | + | Files must be transferred in advance from the DVRs to the Idrive PC (where the Control Center Software is installed). These files are entirely too big to be transferred Via WiFi. Use either the network port on the front of the DVR or remove the hard drive and connect it to the Base Station. Please see the Idrive D4 Installation and Operation guide for more details. | |
| − | |||
| − | ==Import== | + | ====Selection of DVR Events for Import==== |
| + | [[File:35aa.Merge.dvrPath.jpg|thumb|950px]] | ||
| + | [[File:35d.Merge.buttons.jpg|right|1100px]] | ||
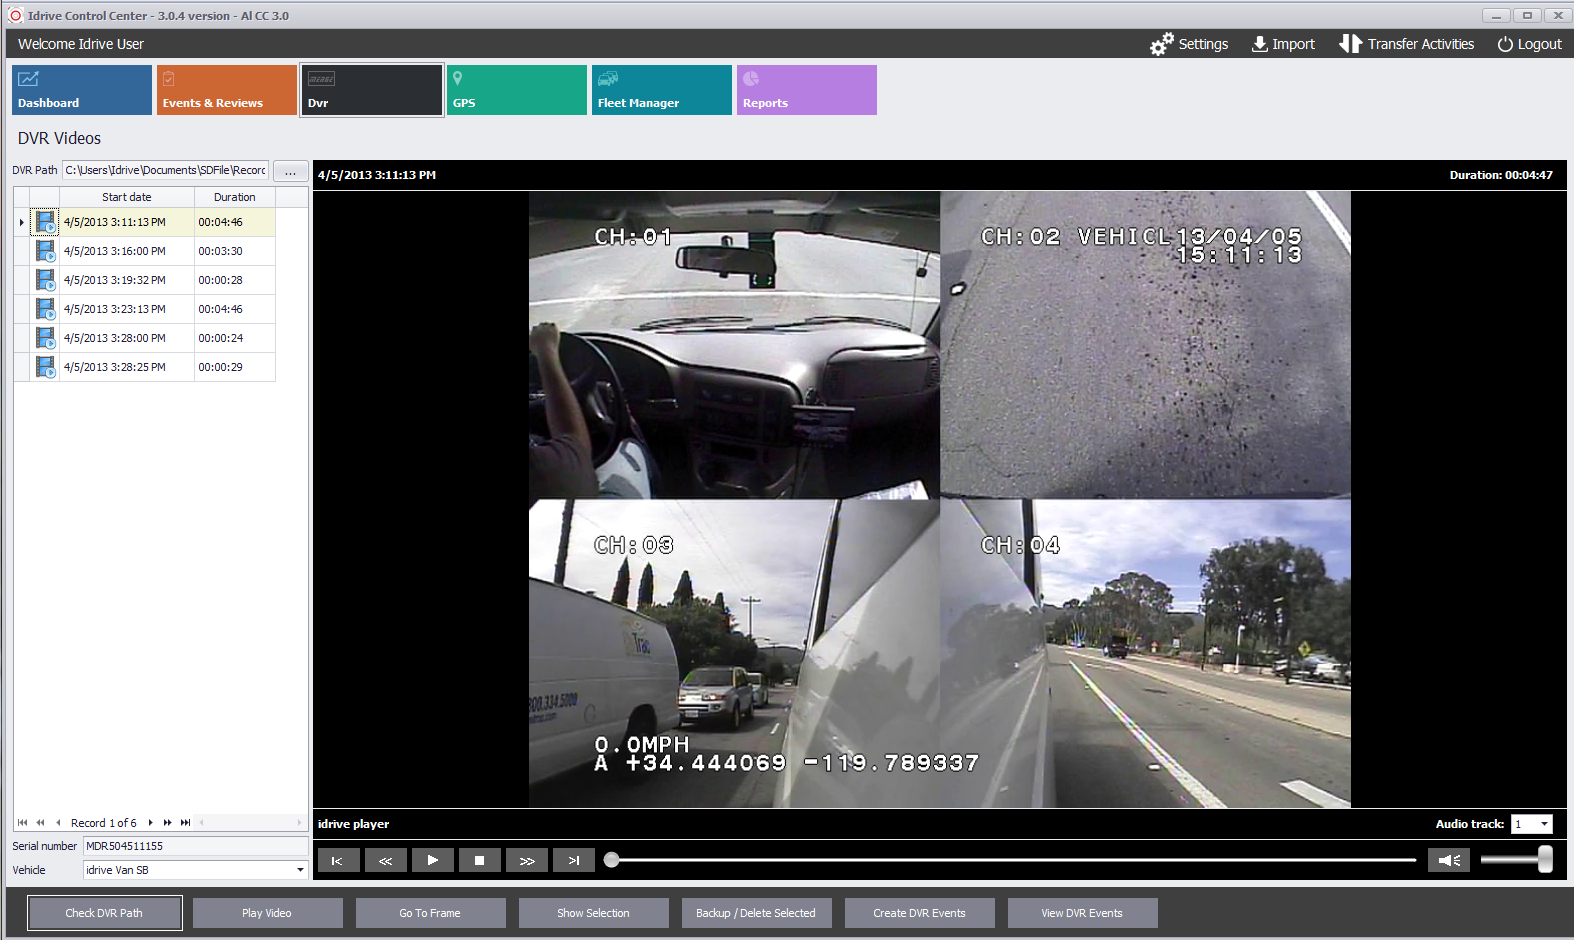
| + | Once the DVR files have been transferred to the Idrive Base Station they can be imported into the the Idrive Control Center as event files. | ||
| − | + | * Launch Control Center | |
| − | |||
| + | * Select '''DVR''' | ||
| + | * Type or select the path where the DVR files are stored. (Typical Backed up files from an Idrive D4 DVR will be located in C:\Users\Documents\SDFile\Record - then select the folder for the "YYYYMMDD") | ||
| + | * Select '''Check DVR Path''' function button at the bottom | ||
| − | + | The available files from that DVR path will populate the left column above and the Serial Number of the DVR will appear in lower left side of the window | |
| − | ''' | + | '''Note:''' You must have a serial number assigned to a vehicle, use the drop down vehicle place holder to assign these videos to what you will perform next |
| − | |||
| + | * You can select a video to preview before creating an DVR Event by hitting the play button on a selected video | ||
| − | ''' | + | * Selecting the Go To Frame function button from the bottom will open a window allowing you to search based on the video start date and time. The application tries to identify the video from the list that matches your criteria. If found the video is loaded in the '''[[Idrive_Control_Center_2.0_User’s_Guide#DVR_Player|DVR Player]]''' tab and the application seeks the video to match your input time. If the application is unable to find a video matching your criteria, it will return an error message. |
| − | + | Once the file(s) selection, date and time has been made you can then Create DVR Events from the function button at the bottom | |
| + | <br/><br/> | ||
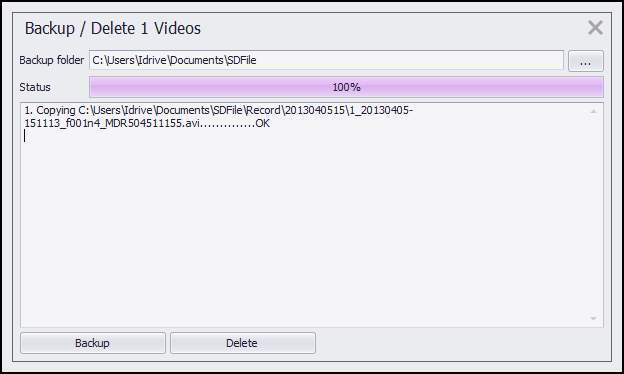
| − | ''' | + | ===Backup/Delete Selected=== |
| + | [[File:36B.Merge.backup.delete.jpg|thumb|500px]] | ||
| + | '''Backup''' | ||
| − | + | The viewed DVR files are not presently imported into the system, they are being read from a remote directory on the PC or from an external attached DVR Hard Drive (HDD). If you wish to have them permanently stored in the PC through the Control Center software; | |
| + | * Click the function button for Backup/Delete selected | ||
| + | * Choose you file location | ||
| + | * Click Backup | ||
| − | + | the original file will be stored in the software so it can open it on demand in future without having to manually attach the DVR HDD or search for the files in other directories | |
| + | '''Delete''' | ||
| + | Self explanatory | ||
| + | <br/><br/><br/><br/><br/><br/> | ||
| + | ===Create DVR Events=== | ||
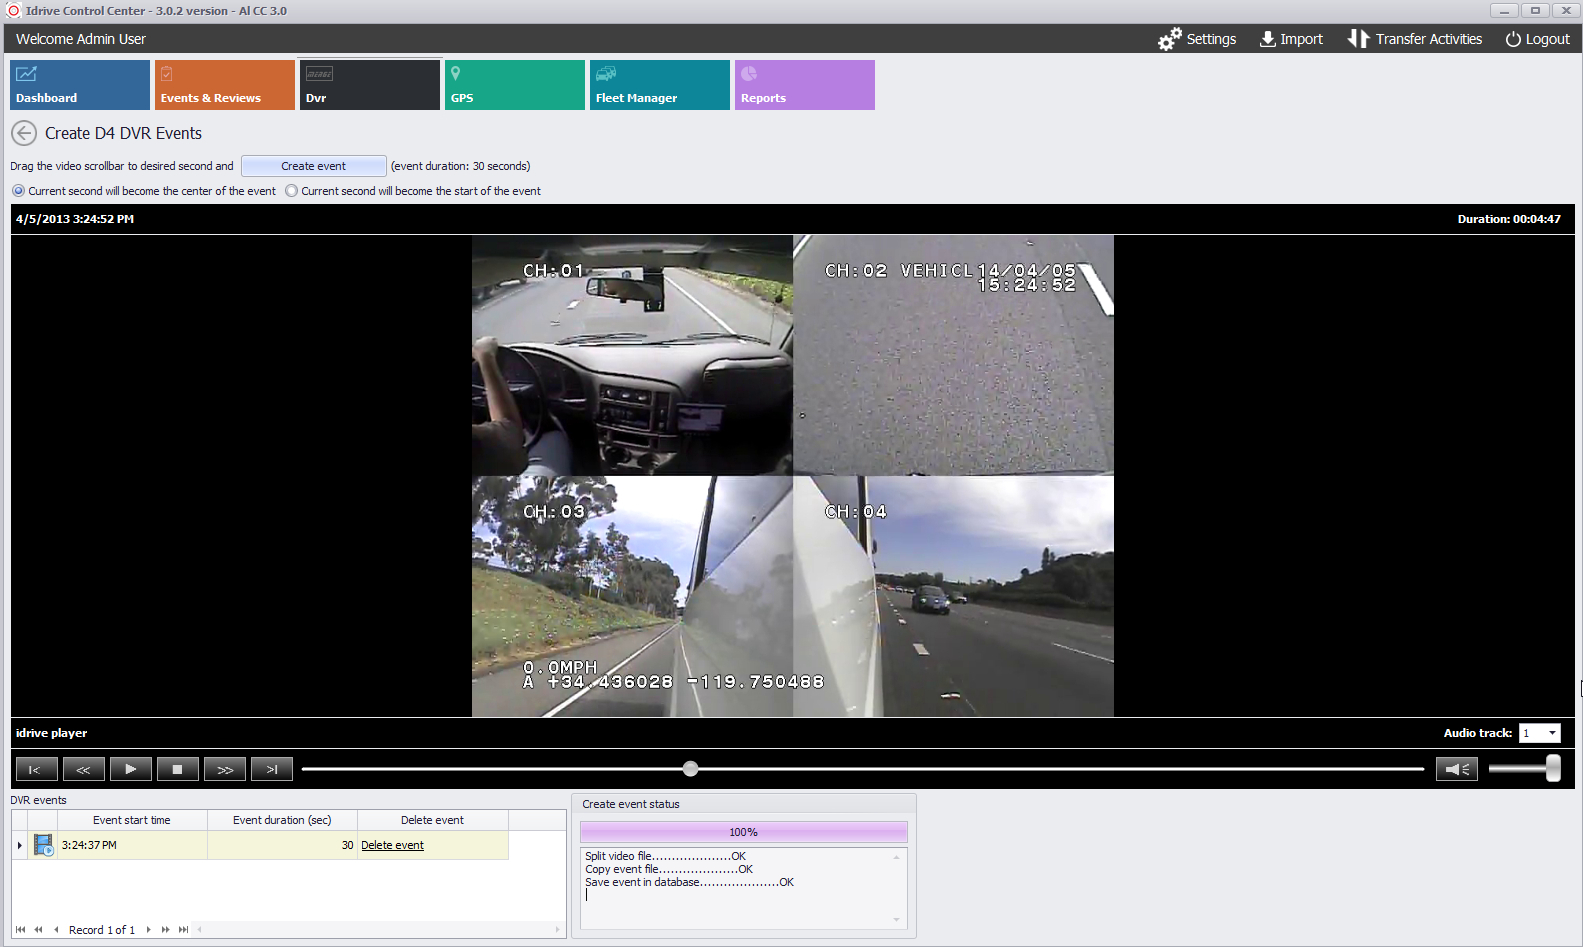
| + | [[File:37.Merge.create.events.jpg|thumb|950px]] | ||
| + | * From the previous screen, Click the Create DVR Events (while on the current loaded video) | ||
| − | |||
| − | + | * This window opens and gives you the ability to create a 30 second extracted video event with two options: | |
| + | ** Current second will become the center of the video | ||
| + | ** Current second will start the event | ||
| − | |||
| − | * | + | * After your selection above, click the Create event button and the Control Center Software will split the video and create the DVR Event |
| − | |||
| − | * | + | * Your new DVR Event will populate the lower left window and you can double click it to view it |
| − | |||
| − | |||
| − | |||
| − | + | * If you are happy with your production you can exit | |
| + | * If you wish to delete it and start over, select the left back arrow to go back on window , then click Delete event and confirm delete | ||
| − | |||
| − | + | <br/><br/><br/><br/><br/><br/><br/> | |
| + | ===View DVR Events=== | ||
| + | From the main DVR window select View DVR Events from the function buttons at the bottom of the page | ||
| + | [[File:35d.Merge.buttons.jpg|right|1100px]] | ||
| + | <br/><br/><br/><br/><br/><br/> | ||
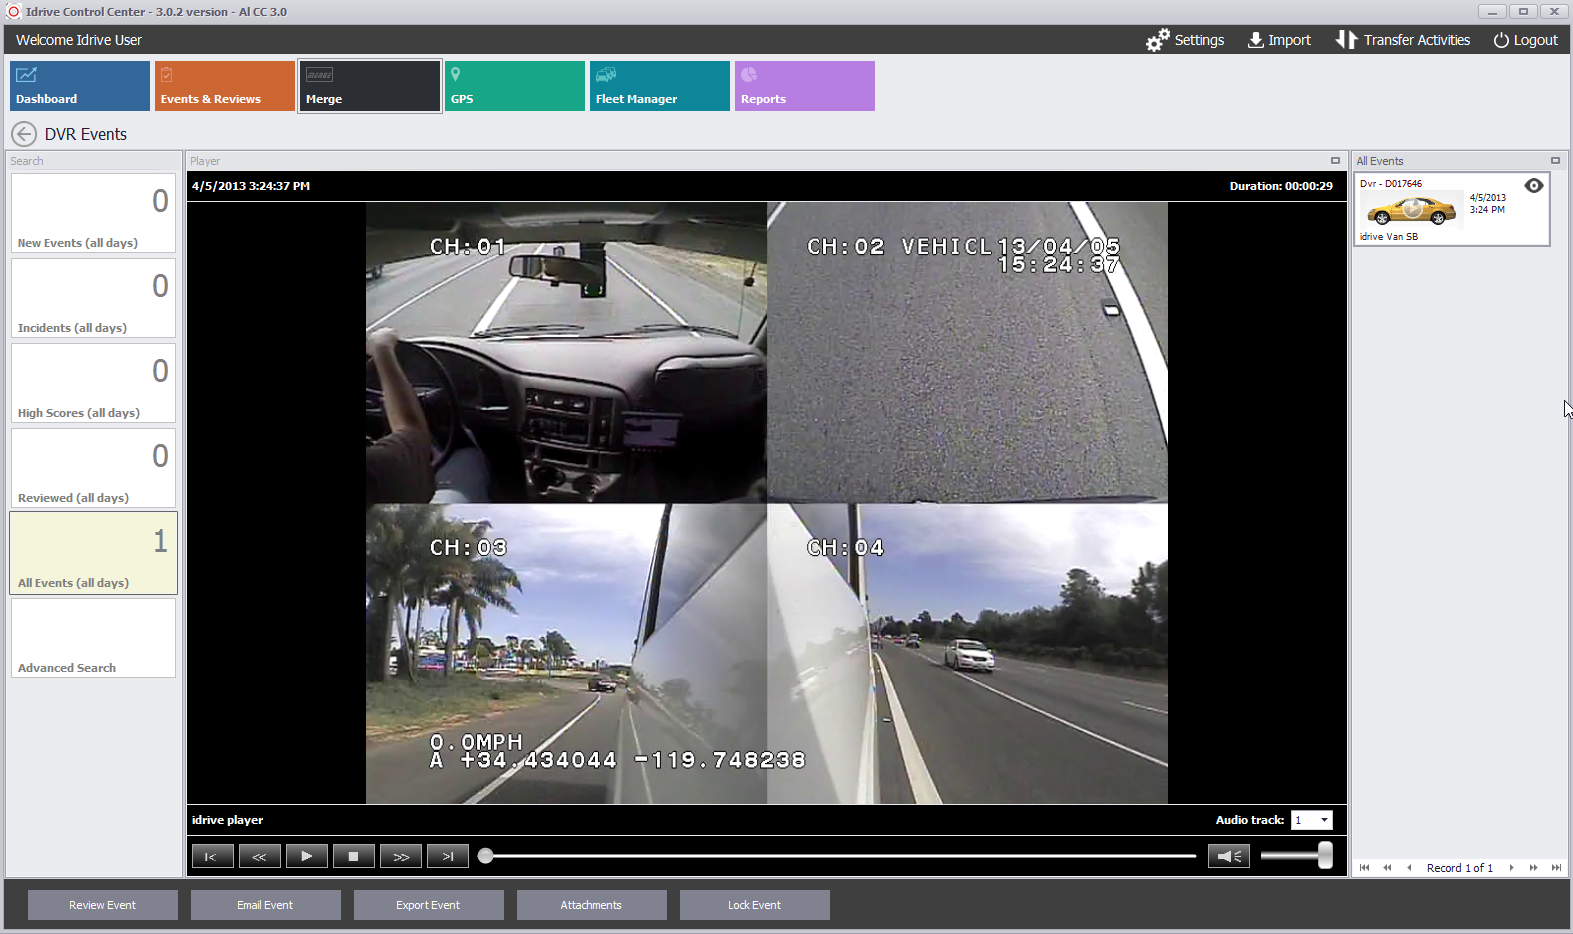
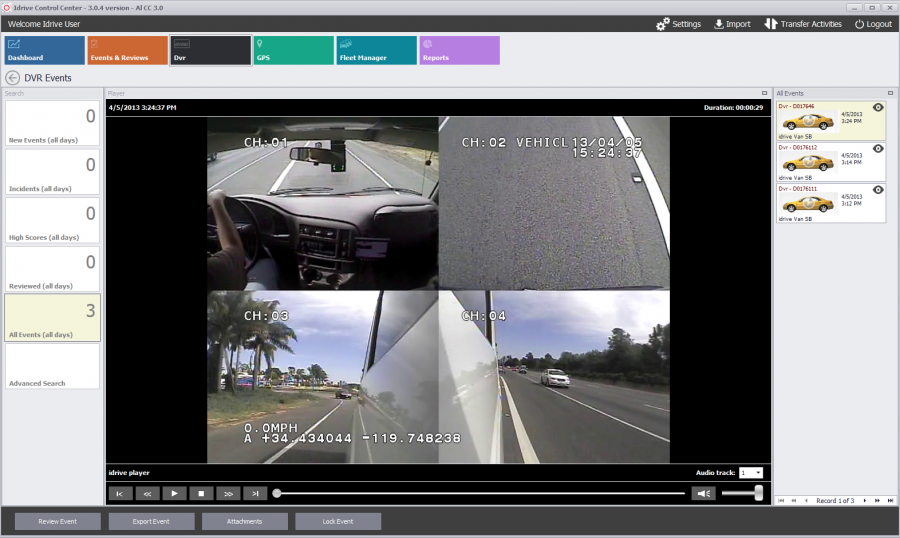
| − | [[File: | + | [[File:37c.Merge.play.events.png|thumb|900px]] |
| + | When this page loads you can select from the available Event Icons on the right, then: | ||
| + | <br/><br/><br/> | ||
| + | * View them as you would an X-Camera Event | ||
| + | * Review then with your comments | ||
| + | * Scores as well | ||
| + | <br/><br/><br/><br/><br/><br/><br/><br/><br/><br/><br/><br/><br/><br/><br/><br/><br/><br/><br/><br/><br/><br/> | ||
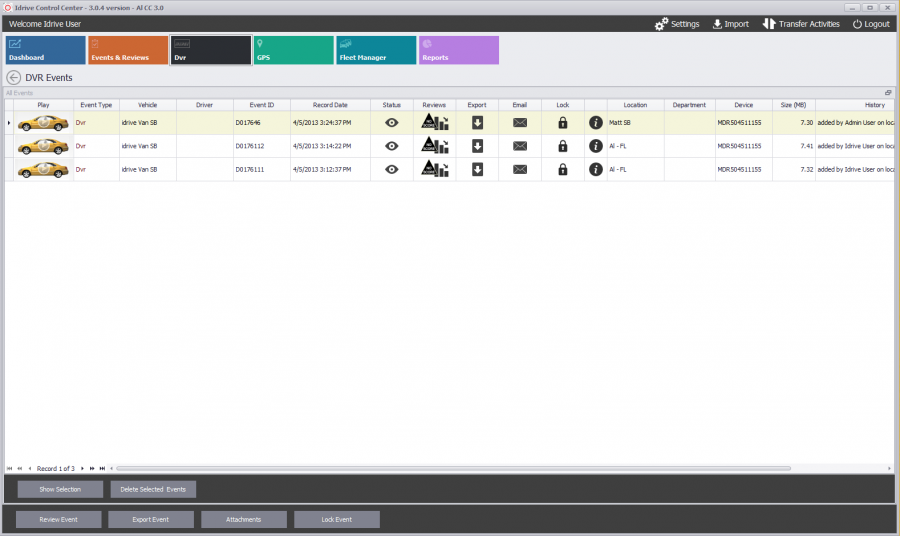
| − | + | [[File:37d.Merge.play.events.png|thumb|900px]] | |
| − | + | You can Maximize the events window by clicking the Max/Min icon in the upper right side of the event column window to reveal the option icons to: | |
| + | * Play | ||
| + | * Review (Comment and Score) | ||
| + | * Export | ||
| + | * Email Keep in mind the original files were too large to email, but the clipped event of 30 seconds can be attached to most email clients because of its compressed reduced size | ||
| + | * Lock | ||
| − | + | <br/><br/><br/><br/><br/><br/><br/><br/><br/><br/><br/><br/> | |
| + | The Function buttons are also available at the bottom for quick access | ||
| − | + | [[File:37e.Merge.play.events.png|right|900px]] | |
| − | |||
| − | |||
| − | + | <br/><br/><br/><br/><br/><br/><br/><br/><br/><br/> | |
| + | '''End of Section''' | ||
| − | [[ | + | [[Idrive_Control_Center_3.0_User%E2%80%99s_Guide#Control Center 3.0 Dashboard View|Back To Dashboard]] |
| + | ---- | ||
| + | <br\><br\><br\><br\><br\> | ||
| + | =='''GPS Tracker (Vehicle or Driver Views)'''== | ||
| + | GPS Tracker has two modules for viewing GPS data by Vehicle or by Driver | ||
| + | [[File:38A.gps.jpg|thumb|750px]] | ||
| − | + | <br/><br/> | |
| + | '''Both Vehicle View or Driver View modules look similar; the only difference is the vehicle name is populated rather than the persons name'''. | ||
| − | + | GPS Tracker displays information about a vehicle/driver location selectable into Vehicles or Drivers view . | |
| − | * | + | GPS Data includes: |
| + | * Ignition triggers both on and off | ||
| + | * Location of events triggers (viewable in the GPS window) | ||
| + | * Speeds and times recorded | ||
| − | |||
| − | + | The GPS Tracker module uses the GPS data file that is downloaded from the X-device along with the events. After each transfer, the GPS file is removed from the device and a new file is generated when the vehicle’s ignition is turned On. If no transfer occurs the current GPS file will continue to be appended with coordinates so that no data is lost. | |
| − | + | Make a selection form the provided data and click the function button at the bottom for '''Map and more details for selected vehicle''' or '''View All GPS Events''' (more on GPS Events below... | |
| − | + | [[File:38b.gps.date.jpg|left|450px]] | |
| − | + | [[File:38A.gps.selected.jpg|thumb|750px]] | |
| − | + | <br/><br/> | |
| + | [[File:38AA.gps.selected.jpg|thumb|750px]] | ||
| − | + | <br/><br/> | |
| − | + | [[File:38bb.gps.selected.jpg|right|750px]] | |
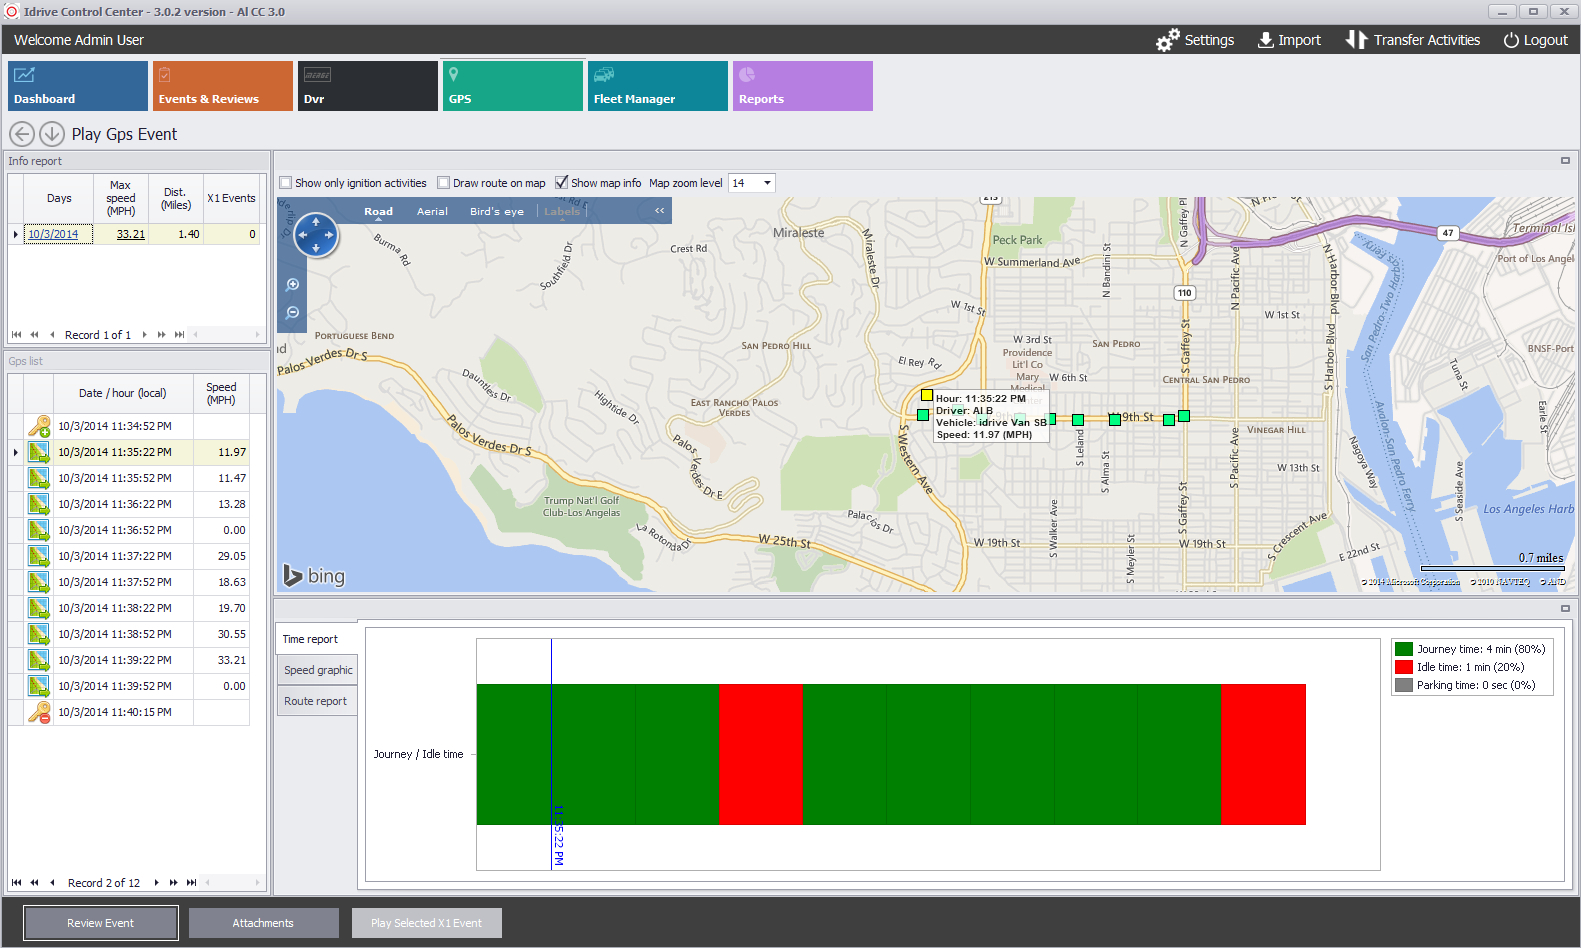
| + | '''Once selected, the the detailed data for the GPS file is revealed'''. | ||
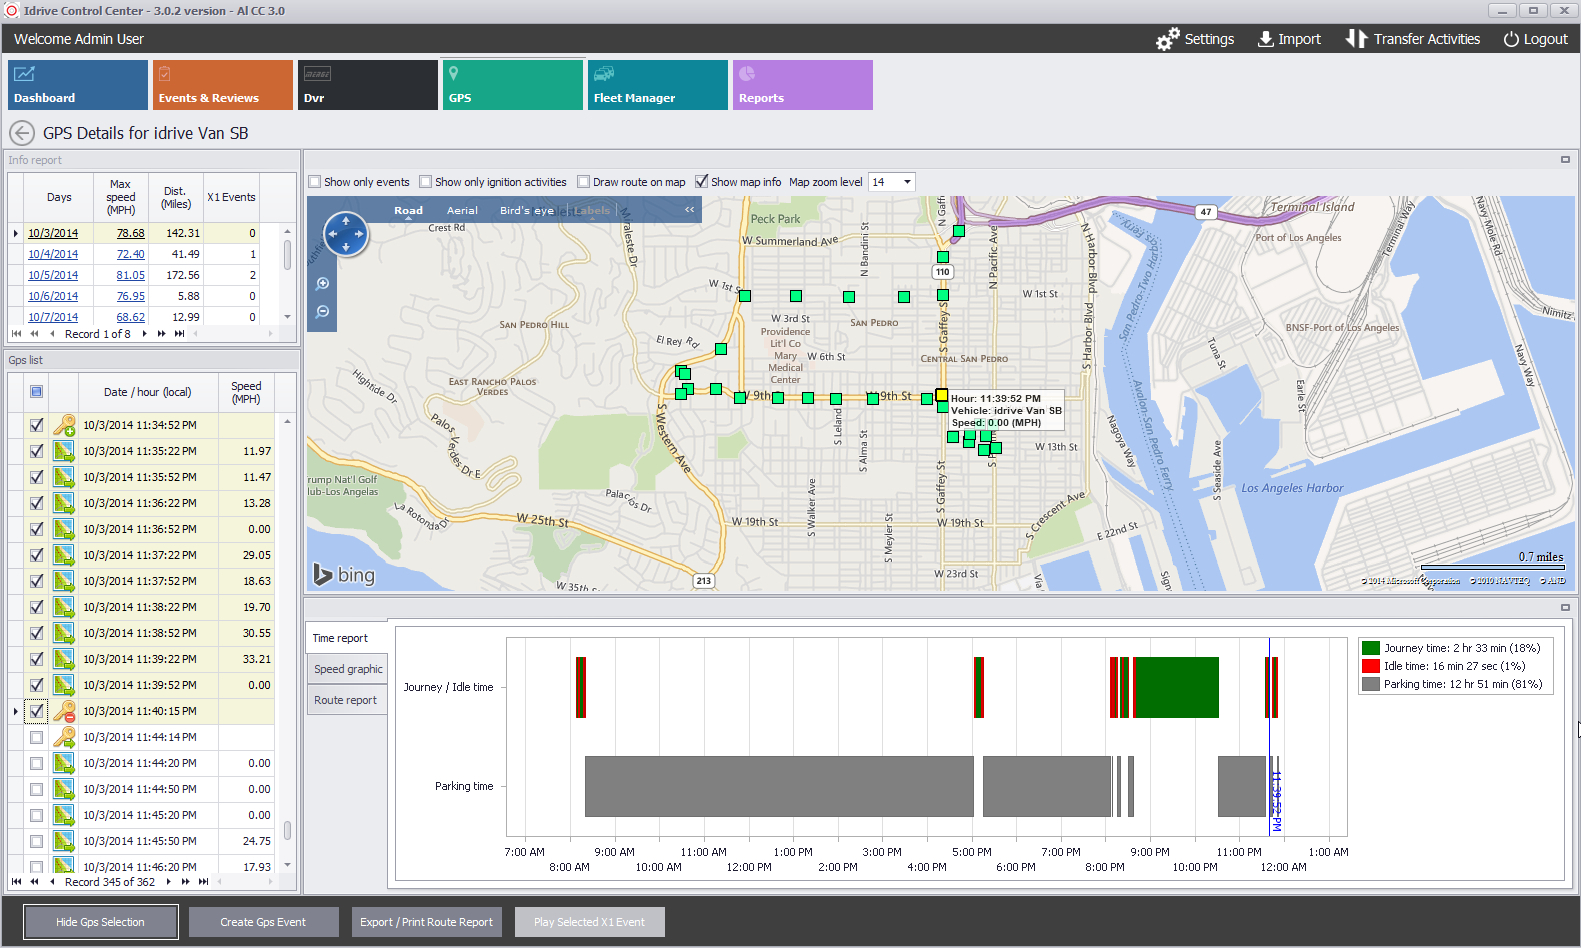
| + | * Each time and coordinate are converged into a green square on the map | ||
| + | * When you click on a specific time coordinate from the left column coordinate list | ||
| + | ** that location is shown on the map as a yellow square and centered in the map. | ||
| + | * Each marker point shows the location in the selected intervals | ||
| − | + | * The Detailed View shows vehicle/driver information in 30 second intervals | |
| − | + | * The Standard View shows the vehicle/driver information in 10 minute intervals | |
| − | + | * A vehicle MUST be assigned in advance of the data download to the device for the GPS tracking tool to function | |
| − | + | * A driver MUST be assigned in advance of the data download to the vehicle/device for the GPS tracking tool to function | |
| − | |||
| − | |||
| − | |||
| − | |||
| − | |||
| − | |||
| − | |||
| − | |||
| − | |||
| − | |||
| − | |||
| + | <br/><br/><br/><br/> | ||
| + | '''The default player window shows the Time Report in the lower section of the window displaying:''' | ||
| + | * Journey time in hours, minutes and seconds (percentage of over all time) | ||
| + | * Idle time in hours, minutes and seconds (percentage of over all time) | ||
| + | * Parking time in hours, minutes seconds (percentage of over all time) | ||
| − | + | <br/><br/> | |
| − | + | ===GPS Mapping=== | |
| − | + | A Selected GPS time is highlighted as a yellow block and centered on the map indication the vehicles / driver location at that moment | |
| − | + | Location, Ignition records and Event Triggers are displayed in the map window | |
| + | |||
| − | + | '''Map options''' | |
| − | + | * Show only Events - only event triggers will be shown on the map | |
| − | : | + | * Draw Route on Map: displays a pink line over the route on the map |
| − | : | + | * Show info on map: to display the additional info textbox on the map |
| − | + | * Map zoom level - sets the zoom level of the map | |
| − | + | All options can be changed to any required needs at the time of viewing. | |
| + | <br:/><br:/> | ||
<br/><br/><br/><br/> | <br/><br/><br/><br/> | ||
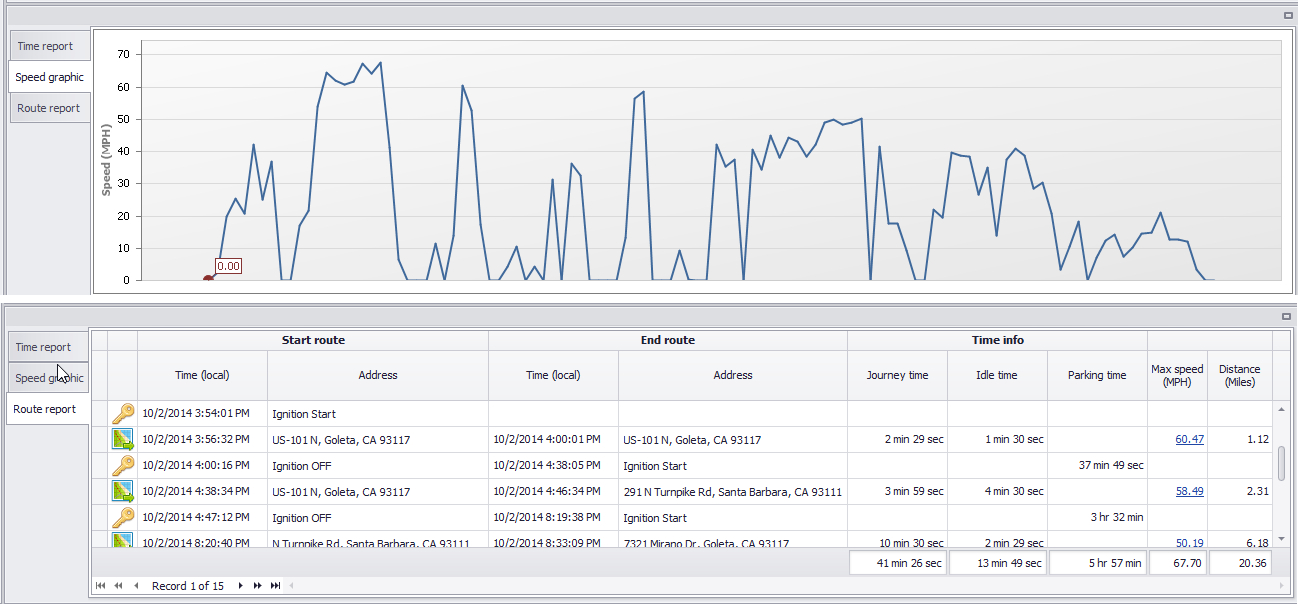
| − | + | Optional windows are Speed graphic and Route report... | |
| − | + | '''Speed Graphic''' | |
| + | Displays a graphical correspondence to the entire travel time associated directly to the coordinates displayed from the GPS coordinate column | ||
| − | |||
| − | + | '''Route report''' | |
| + | Displays times, addresses (beginning and ending), Journey time, Idle time, Parking time, Max speed, and Distance | ||
| − | |||
| − | + | <br/><br/><br/><br/><br/><br/><br/><br/><br/><br/><br/><br/> | |
| − | [ | + | ===GPS Tracker Search=== |
| + | [[File:38A.gps.jpg|thumb|750px]] | ||
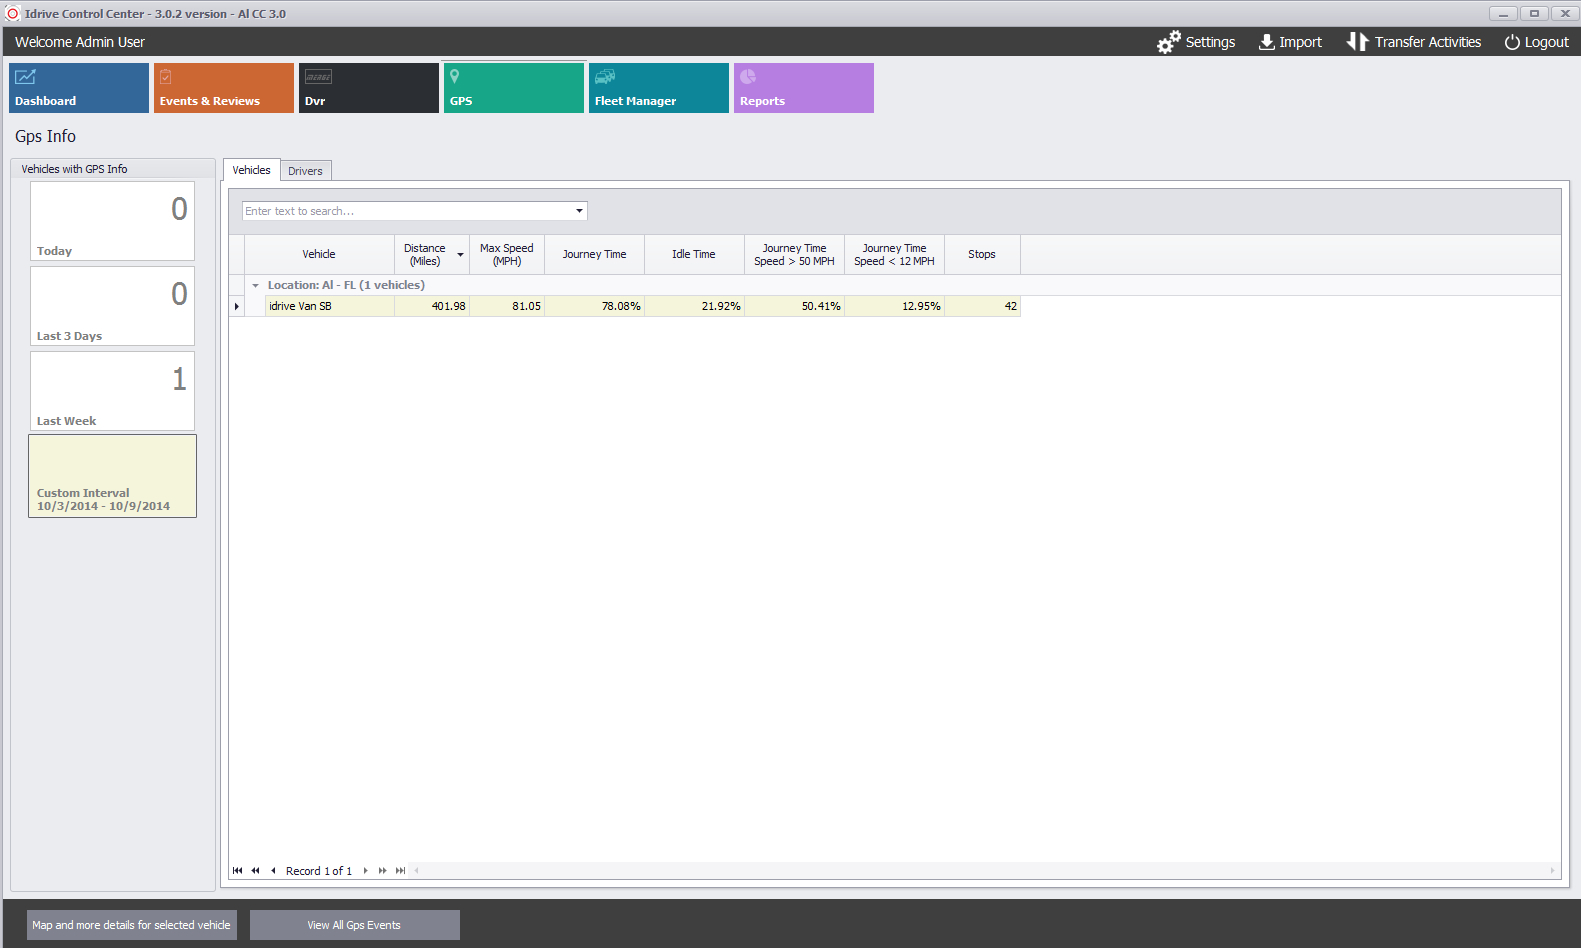
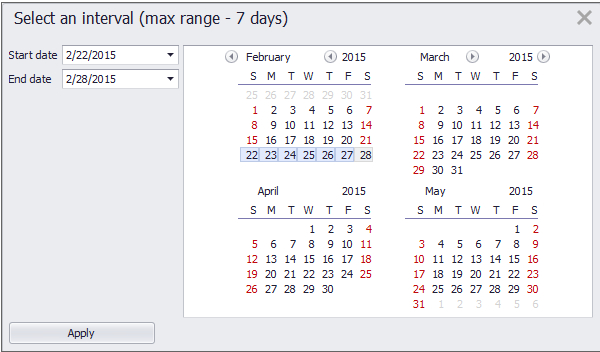
| − | + | Make a selection of either '''Vehicle View''' or '''Driver view''' and select the interval of days from between Today, Last 3 Days, Last Week (7 days) or a Custom Interval in which the Calendar menu will fly out and allow you to select a 7day interval from your systems history logs. | |
| − | |||
| − | + | [[File:38A.gps.date.jpg|left|450px]] | |
| − | + | <br/><br/><br/><br/><br/><br/><br/><br/><br/><br/><br/><br/><br/><br/><br/><br/> | |
| − | |||
| − | + | Select a Date range (up to 7 days) using either the calendar view; then click “Apply” | |
| − | |||
| − | + | To search for a specific vehicle or driver type the vehicle or driver name in the field and click "search" | |
| − | + | After the Date(s) selection is made, GPS and Event data will populate the Info Report and the GPS List columns. Vehicles or Drivers with valid GPS in this time period will be displayed in '''BOLD''' text. | |
| − | ''' | ||
| − | + | <br/><br/><br/><br/> | |
| − | GPS | + | ===Creating and reviewing a GPS Event=== |
| − | |||
| − | |||
| + | [[File:38b.gps.selected.jpg|thumb|750px]] | ||
| − | + | Multiple selection of GPS coordinates to “Show Only” those Events OR to Create a GPS Event | |
| − | * | + | *Select multiple GPS coordinates: |
| + | **Select a starting coordinate then Shift+ left click the desired ending coordinate (all coordinates in between will be selected) | ||
| + | **OR Hold Ctrl+ Left click each desired individual coordinate(s) (other coordinates will be omitted) | ||
| + | **Then select the '''Create GPS Event'' from the Function Buttons below | ||
| − | + | The multi-selected coordinates will highlight in light cream color showing the GPS Event that will be created from the those coordinates. | |
| − | + | <br/><br/><br/><br/><br/><br/><br/><br/><br/><br/><br/><br/> | |
| − | + | [[File:38c.gps.event.jpg|thumb|750px]] | |
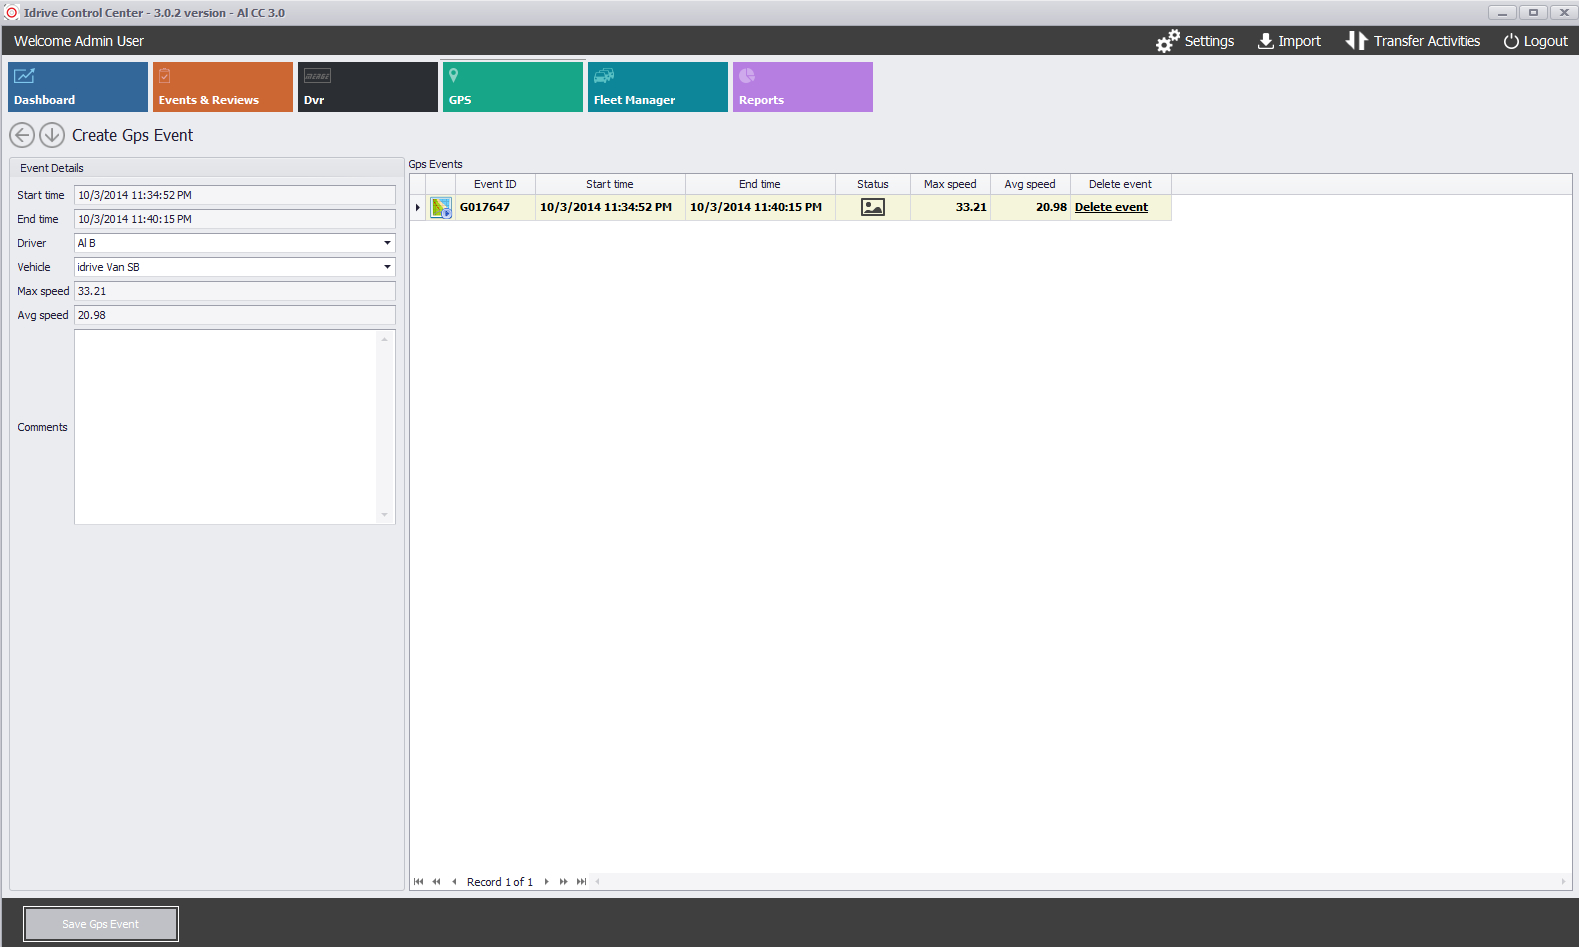
| − | + | A GPS Event may or may not have video captured during the coordinates that were selected; rather, a GPS Events is a grouping of GPS coordinates that can be commented on and saved for future reference or driver coaching. | |
| − | + | '''Reasons for GPS Events creation''' | |
| + | * Residential complaint about company vehicle driving fast through neighborhoods | ||
| + | * Unexplained deviation from set route for a company vehicle | ||
| + | * Sudden increase in fuel usage and GPS shows unplanned route paths | ||
| − | + | <br/><br/><br/><br/><br/><br/><br/><br/><br/><br/><br/><br/><br/><br/><br/><br/> | |
| − | |||
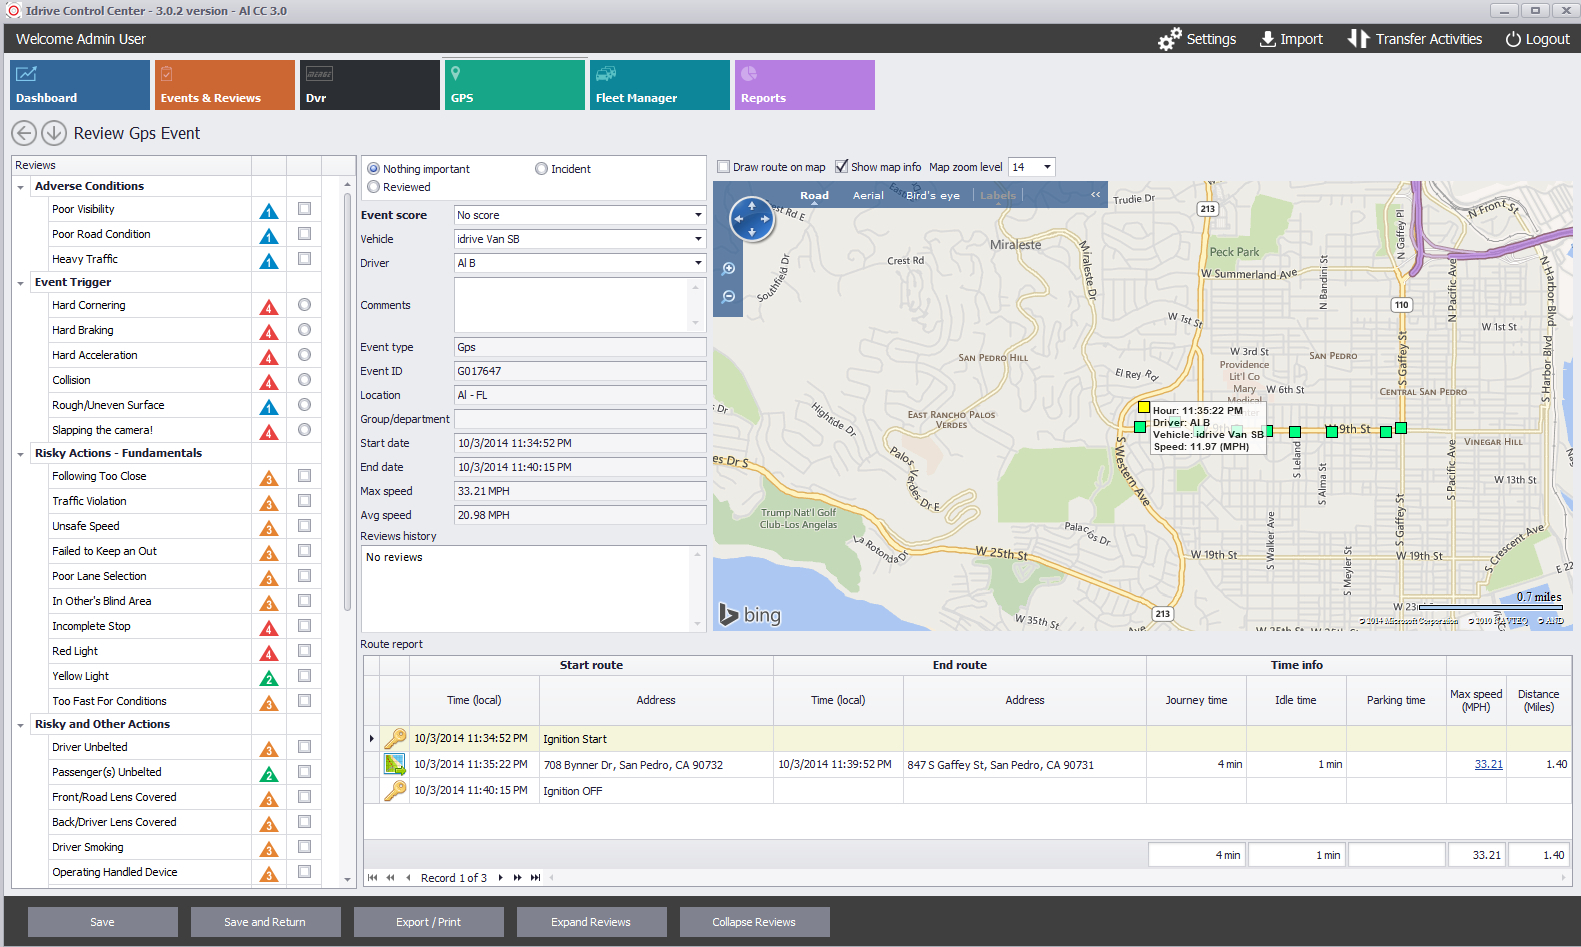
| − | + | Once created, the GPS Event can now be saved in the system as that grouping so it can be searched by vehicle or driver, (if the driver had been selected during creation of the GPS Event). | |
| + | The GPS Event can be reviewed and scored by the Safety Manager for the company by the scoring system and selected behaviors from the review screen of the GPS Event. | ||
| − | + | [[File:38d.gps.event.view.jpg|thumb|750px]] | |
| − | [[ | + | [[File:38e.gps.event.rev.jpg|thumb|750px]] |
| − | |||
| − | + | <br/><br/><br/><br/><br/><br/><br/><br/><br/><br/> | |
| − | |||
| + | ===Other Options=== | ||
| − | + | '''Speed Graphic''' | |
| − | |||
| − | + | '''Time Report''' | |
| − | |||
| − | |||
| − | + | This report displays | |
| + | * Journey Time - Green Data | ||
| + | * Idle Time - Red Data | ||
| + | * Parking Time - Grey Data | ||
| + | * The current GPS location is visible on the graphic via the vertical Blue line | ||
| − | |||
| + | '''Route Report''' | ||
| + | The Route Report prepares a comprehensive assembly of the data which then can be printed or exported as a PDF or other text management formats: | ||
| − | |||
| − | + | '''Export/Print''' | |
| − | |||
| − | |||
| − | |||
| − | |||
| − | <br | + | <br/><br/><br/><br/><br/><br/><br/><br/><br/><br/> |
| − | |||
| − | + | <br/><br/><br/> | |
| − | + | '''End of Section''' | |
| − | + | [[Idrive_Control_Center_3.0_User%E2%80%99s_Guide#Control Center 3.0 Dashboard View|Back To Dashboard]] | |
| + | ---- | ||
| + | <br\><br\><br\><br\><br\><br\><br\><br\><br\><br\><br\> | ||
| − | + | =='''FLEET MANAGER - Detailed'''== | |
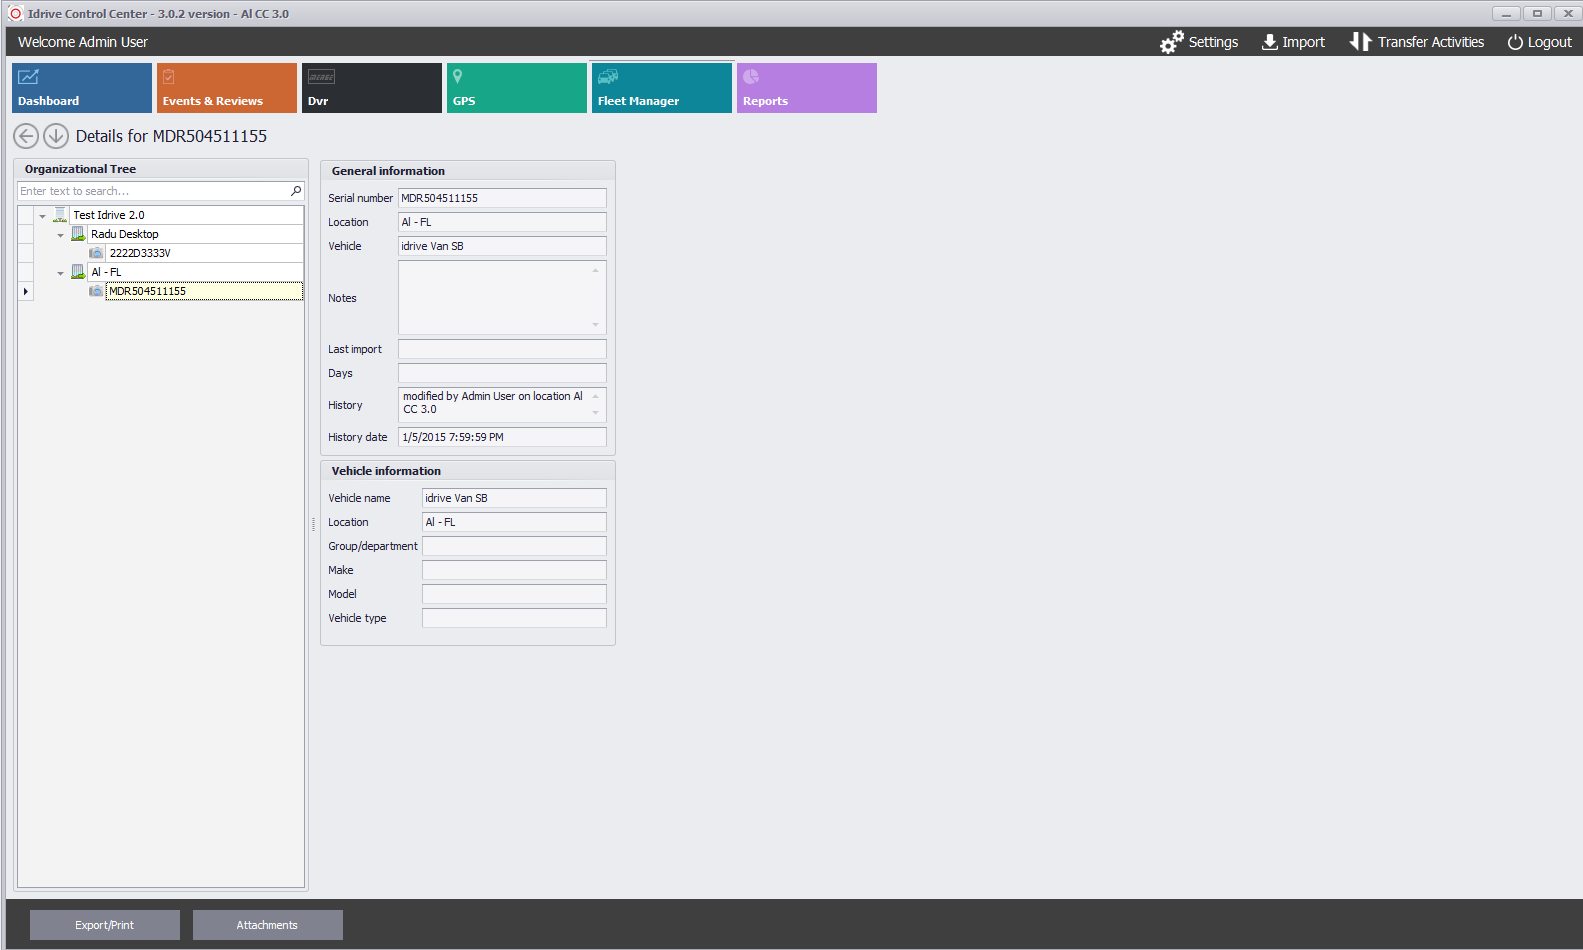
| − | + | ===Manage Your Vehicles=== | |
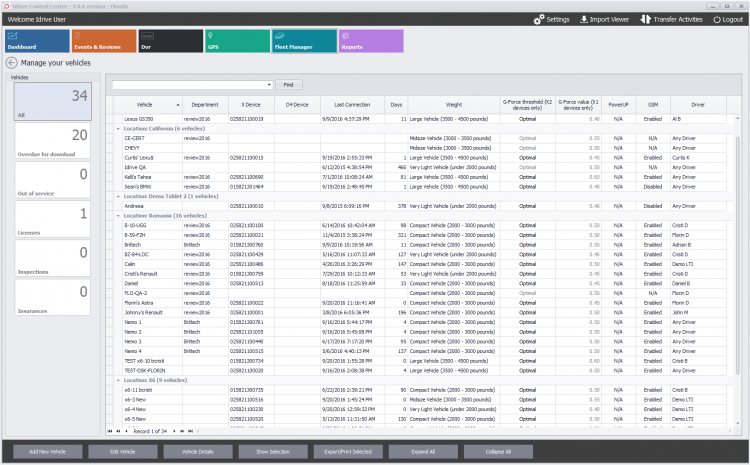
| + | [[File:fm_vehicles_main302.png|thumb|750px|]] | ||
| + | [[File:fm_icon_302.jpg|left|150px|]][[File:vehicles_icon_302.jpg|150px|]] | ||
| − | + | This section is used to create and manage information and settings for: | |
| + | * Vehicles in your fleet | ||
| + | * Vehicles for Organization | ||
| + | * Location or Group/Department will be displayed depending on your selection in the Organizational Tree | ||
| − | + | '''Note:''' The portion of the Organizational tree that can be viewed by each User is controlled by '''[[Idrive_Control_Center_2.0_User’s_Guide#User_Permissions|user’s permissions]]'''. This way the scope of how much of the organization's location(s) a user will see is controlled and only Vehicles in that location(s) will be seen. | |
| − | |||
| − | + | <br\><br\> | |
| − | [[File: | + | [[File:39bb.fleet.mgr.jpg||left|150px|]] |
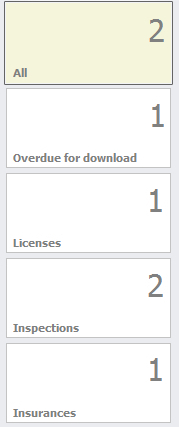
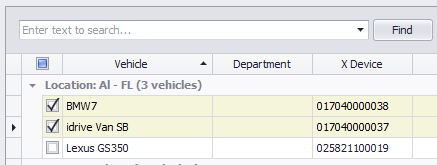
| + | Detailed view including: * Vehicles name, * Department, * X Device Serial #, * D4 Device (Mobile DVR - if assigned), * Last connection date and time (X Device only), * Weight, * G-Force and * Driver (If assigned) | ||
| − | |||
| − | + | Default setting is 7 days for Overdue vehicles (programmable under Edit Vehicle | |
| − | |||
| − | |||
| − | |||
| − | |||
| − | |||
| − | |||
| − | + | If programmed will show license(s) when expiration alert is set for a specific vehicle | |
| − | |||
| − | |||
| − | + | If programmed will show Inspection(s) when expiration alert is set for a specific vehicle | |
| − | |||
| − | |||
| + | If programmed will show Insurance(s) when expiration alert is set for a specific vehicle | ||
| + | |||
| + | <br\><br\> | ||
| − | + | Selecting any of the Function Buttons from the bottom of the page will permit the following: | |
| − | + | [[File:39b.fleet.mgr.vehicles.jpg|left}950px]] | |
| − | |||
| − | |||
| − | |||
| − | |||
| − | |||
| + | <br\><br\> | ||
| − | + | ====Adding / Editing Vehicles==== | |
| + | [[File:fm_icon_302.jpg|left|150px|]] | ||
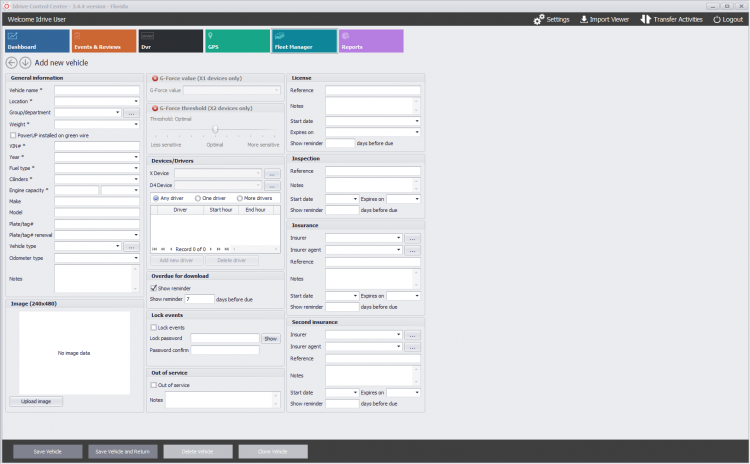
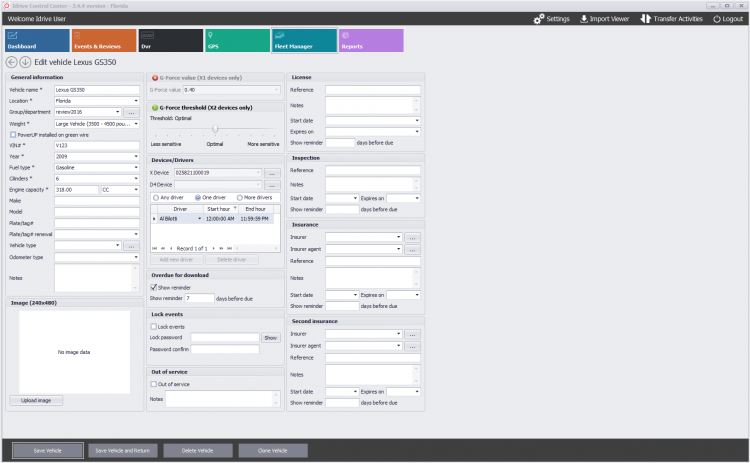
| − | + | [[File:39aa.add.veh.png|thumb|750px]] | |
| + | [[File:edit_vehicle_302.png|thumb|750px|]] | ||
| − | + | <br/><br/><br/><br/> | |
| − | + | '''General Information''' - The minimum required data that can entered for a vehicle are flagged with an asterisk " * " | |
| − | |||
| − | ''' | + | '''Note:''' although not needed to create a vehicle, assigning an X Device to the vehicle is required to View those Events by vehicle |
| + | * Devices/Drivers - Serial Number of Device installed in vehicle | ||
| − | + | <br/><br/> | |
| + | OPTIONAL DATA IS | ||
| − | + | * Image - A photo of the Vehicle | |
| + | * Drivers assigned | ||
| + | * Overdue For Download Sets the amount of days the system will wait before an Alert is placed for a vehicle that has not downloaded within the set number of days | ||
| + | * Inspection - Alerts can be programmed to provide reminders to the Safety Manager for vehicle inspections | ||
| + | * Insurance - Alerts can be programmed to provide reminders to the Safety Manager for vehicle insurance expiration | ||
| + | * Second Insurance - same | ||
| + | * Lock Events - For those vehicle's videos that are deemed to be sensitive, a view Lock can be placed on the events as they are downloaded into the Control Center so any user who has permissions to view Events will need an additional Lock code to permit viewing (can be placed unique on any vehicle, or reused on a group of vehicles reusing the same code | ||
| − | + | <br/><br/> | |
| − | + | '''Assigning an "X" device to a vehicle''' | |
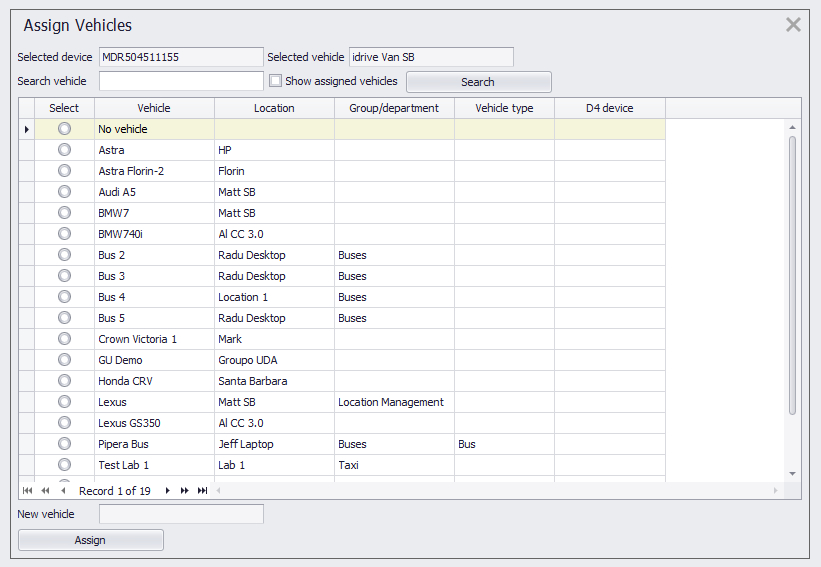
| − | + | From the center of the Edit window; | |
| + | * Select the button with three dots on it next to the place holder "X Device" | ||
| + | * Select the desired serial number (circular radio button) | ||
| + | * Selected serial number is placed in the "New Device" placeholder | ||
| + | * Click '''Assign''' at bottom of open window | ||
| − | + | <br/> | |
| − | : | + | [[File:39d.fleet.mgr.vehicles.png|left|500px]] |
| − | + | <br/><br/><br/><br/><br/><br/><br/><br/><br/><br/><br/><br/><br/><br/><br/><br/><br/><br/><br/><br/> | |
| − | + | Click on '''Save Vehicle''' from the function buttons at the bottom to commit changes before leaving Edit Vehicle | |
| − | : | + | [[File:39b.fleet.mgr.save.jpg|left|550px]] |
| − | + | <br/><br/><br/><br/> | |
| − | + | ====Mass / Editing Vehicles==== | |
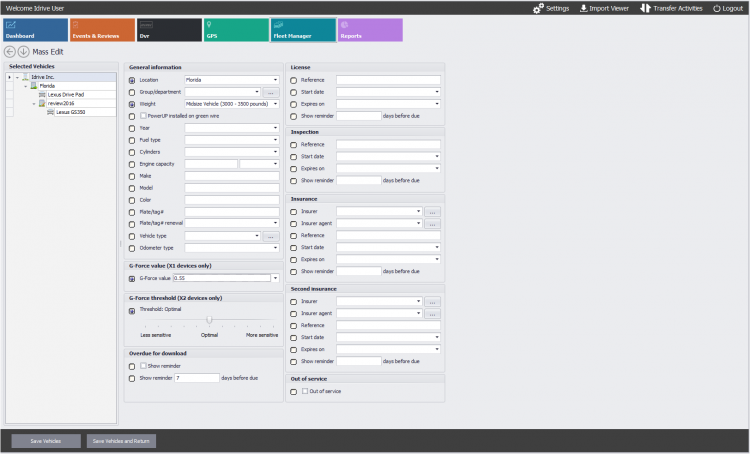
| − | + | After the creation of a vehicle, device assignment and G-Force Settings are saved... it is possible to edit a group of vehicles to all have the same setting rather than performing each individually. | |
| − | + | '''... From the Fleet Manager>Vehicles screen...''' | |
| + | <br/><br/><br/> | ||
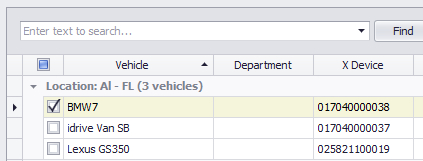
| − | : | + | :'''1. Click the "Show Selection" button on the bottom''' |
| − | : | + | [[File:39b.fleet.mgr.vehicles.jpg|1050px]] |
| + | <br/><br/><br/> | ||
| − | : | + | :'''2. Make a box selection; after the second selection, the "Edit" button at the bottom changes to "Mass Edit"''' |
| − | :: | + | [[File:39ee.fleet.mgr.vehicles.mass.jpg|350px]] [[File:39eg.fleet.mgr.vehicles.mass.jpg|350px]] |
| + | <br/><br/><br/> | ||
| − | : | + | :'''3. Click the "Mass Edit" button''' |
| − | <br | + | [[File:39eh.fleet.mgr.vehicles.mass.jpg|1050px]] |
| − | + | <br/><br/><br/> | |
| − | : | + | :'''4. Mass Edit window opens allowing you to configure a group of pre-selected vehicles settings simultaneously''' |
| − | : | + | [[File:39ei.fleet.mgr.vehicles.mass.png|750px]] |
| + | <br/><br/><br/> | ||
| − | : | + | :'''5. Always click "Save Vehicles" button or "Save Vehicles and Return" button at the bottom before leaving window''' |
| − | <br | + | <br/><br/><br/><br/> |
| − | === | + | ===Manage Your Personnel=== |
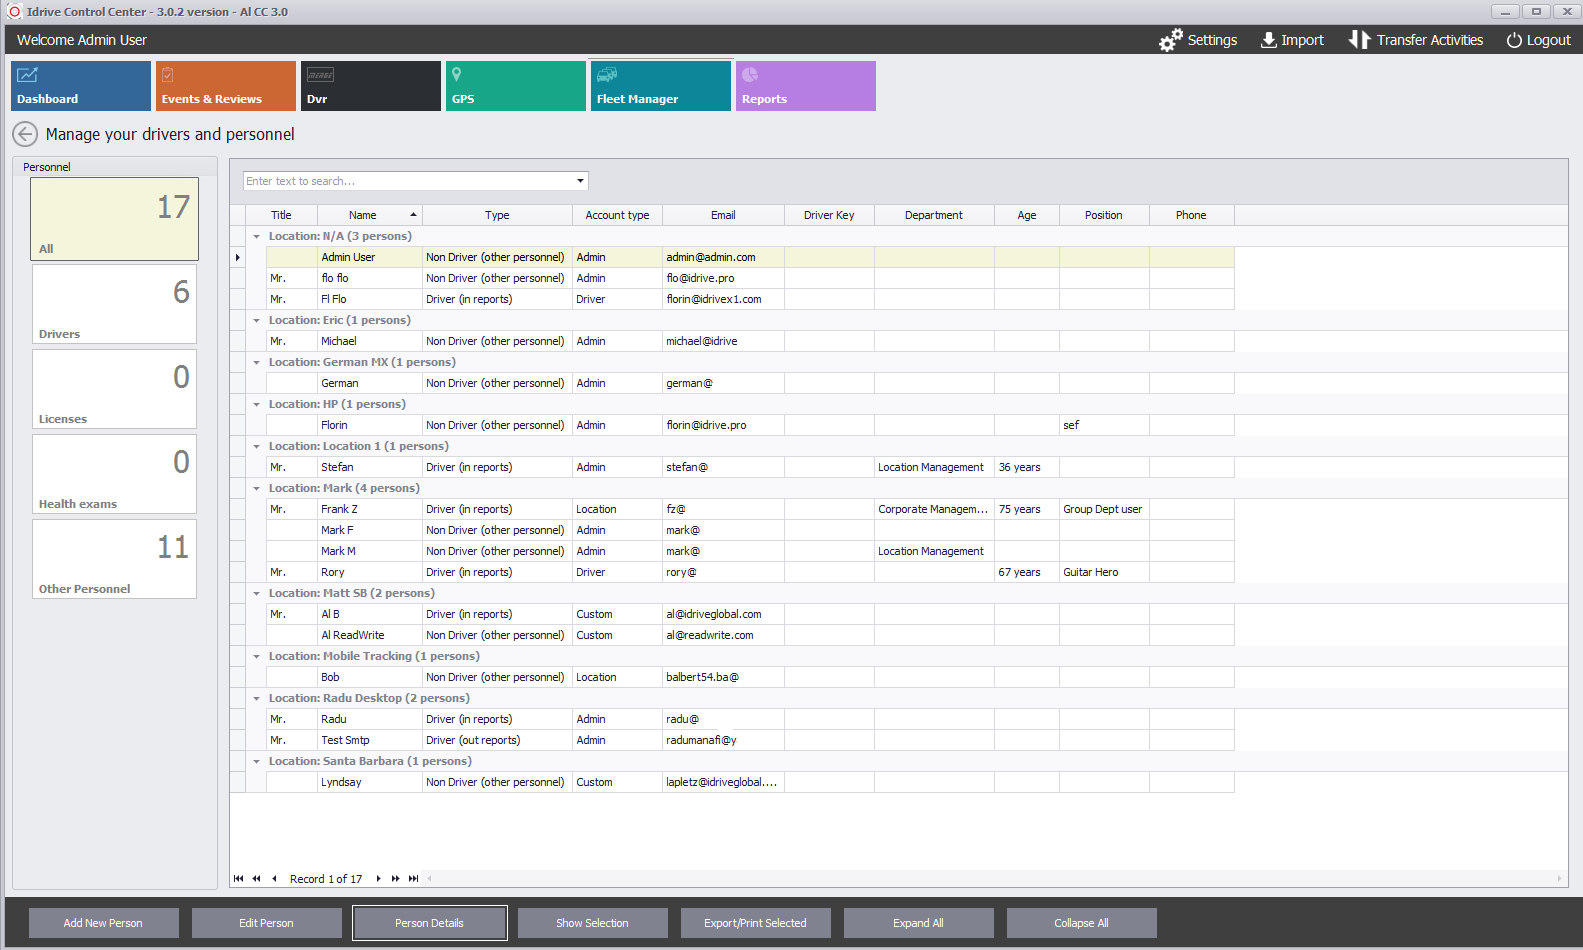
| − | + | This section is used for managing Personnel information and assignments.The portion of the Organization that can be viewed by each User is controlled by '''[[Idrive_Control_Center_3.0_User’s_Guide#User_Permissions|user’s permissions]]'''. This way the scope of how much of the organization's Location(s) a user will see is controlled and only Personnel in that Location(s) will be seen. | |
| − | + | To manage personnel click on Fleet Manager / Personnel. When the personnel management view opens you will be able to see all of the personnel in your organization that you are authorized to view. Each location can be expanded or collapsed to simplify viewing. | |
| − | :: | + | [[File:fm_icon_302.jpg|left|150px|]][[File:personnel_icon_302.jpg|150px|]] |
| − | : | + | [[File:fm_driver_main302.jpg|thumb|750px|]] |
| − | |||
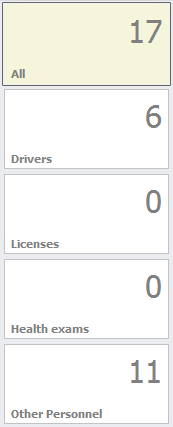
| − | : | + | Different sections of Personnel information may be viewed by selecting the appropriate Icon: |
| − | + | [[File:39gg.fleet.mgr.jpg|left|150px|]] | |
| − | |||
| − | + | Everyone in your organization; includes Drivers and authorized to view/manage | |
| − | + | <br/> | |
| + | |||
| + | Drivers in your organization | ||
| − | + | <br/><br/> | |
| − | + | Lists of Driver ID Keys assigned to Drivers (see Driver ID Management below - this is a feature available only with the X2 Cameras) | |
| + | <br/> | ||
| + | Drivers License (information can be entered set to alert you before expiration) | ||
| − | + | <br/> | |
| + | |||
| + | Health Exams (information can be entered set to alert you before expiration) | ||
| + | <br/> | ||
| + | Quick search for Driver ID Key numbers (you must know the ID number in advance) | ||
| + | <br/><br/> | ||
| − | <br/><br/><br/> | + | <br/><br/><br/><br/> |
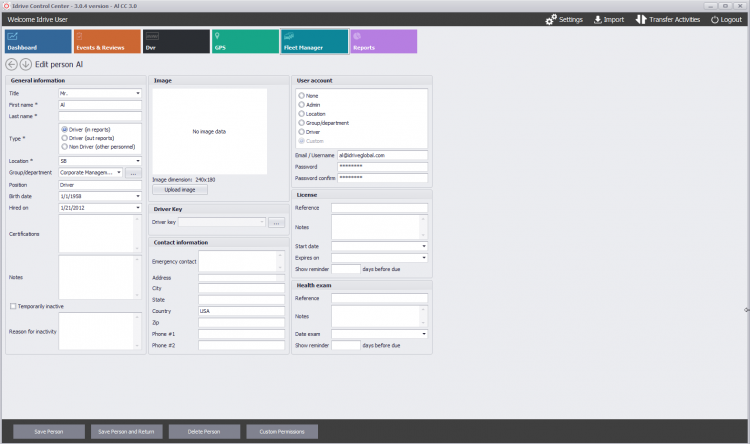
| − | == | + | ====Adding / Editing Personnel==== |
| + | [[File:edit_person_302.png|thumb|750px|]] | ||
| − | |||
| − | + | [[File:fm_icon_302.jpg|left|150px|]][[File:fm_add_new_pers_icon_302.jpg|150px]] or [[File:fm_edit_pers_icon_personnel_icon_302.jpg|150px|]] | |
| − | + | <br/><br/> | |
| − | |||
| − | |||
| − | '''* | + | '''* General Information''' - Enter persons Name, Location Department Etc. |
| − | '''* | + | '''* Image''' - A photo of the Driver |
| − | '''* [[ | + | '''* Driver Key''' - Driver ID Key Serial number. See Details [[Idrive_Control_Center_3.0_User’s_Guide#Driver_ID_Management|'''Here''']] |
| − | '''* | + | '''* Contact Information''' |
| − | + | '''* User Account''' -Select personal logical group in your organization, assign user name (email) and password | |
| − | + | '''* License''' - Employee's license information and expiration date | |
| + | '''* Health Exam''' - Employee's Heath Records | ||
| − | + | Click on Save Person to commit changes | |
| − | |||
| − | <br/><br/><br/><br/><br/><br/> | + | <br/><br/><br/><br/><br/><br/><br/><br/><br/><br/><br/><br/><br/><br/><br/> |
| + | ====User Permissions==== | ||
| + | [[File:39h.fleet.mgr.permissions.jpg|thumb|750px|]] | ||
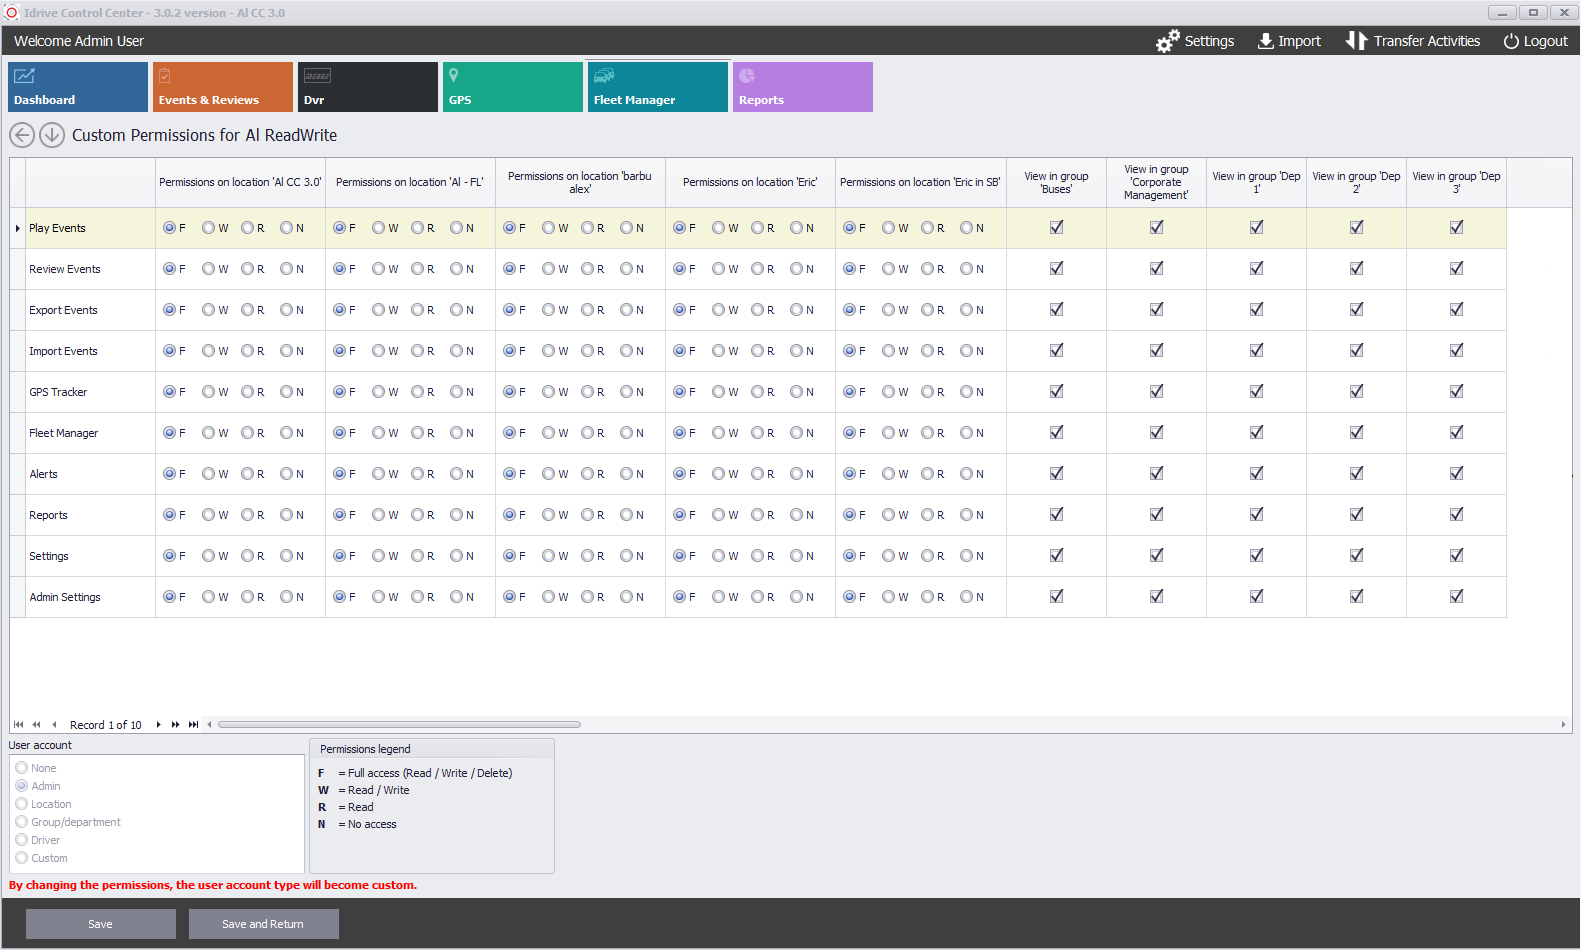
| − | + | • Full, Write, Read, No access | |
| − | |||
| + | • For the following data: Play Events, Review Events, Export Events, Import Events, GPS Tracker, Fleet Manager, Alerts, Reports, Settings, Admin Settings | ||
| − | + | Each location is shown in a column, plus if you have created departments (for a more granular permissions) then those Departments are listed and selectable in a user's permissions | |
| − | |||
| − | |||
| − | ''' | + | '''Note:''' Departments can be created in the Fleet Manager>Manage your Vehicles |
| − | + | <br/><br/><br/><br/><br/><br/><br/><br/><br/><br/><br/><br/><br/><br/><br/><br/><br/><br/><br/><br/> | |
| − | + | ====Driver ID Management==== | |
| − | + | The optional Driver ID functionality allows... | |
| − | + | An individual Key is assigned to each driver in the Fleet Manager> Personnel section. | |
| − | + | * Once assigned and the Driver ID receptacle is placed in the vehicle | |
| + | * The X2 Camera will beep after power up to remind the driver he needs to register his ID Key | ||
| + | * All events will be assigned to that driver automatically when the camera downloads to the Control Center software | ||
| − | + | [[File:driver_id_button_302.jpg|450px|]] | |
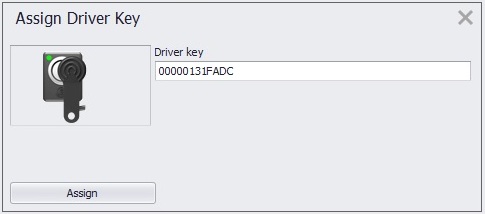
| − | + | This opens the serial number form | |
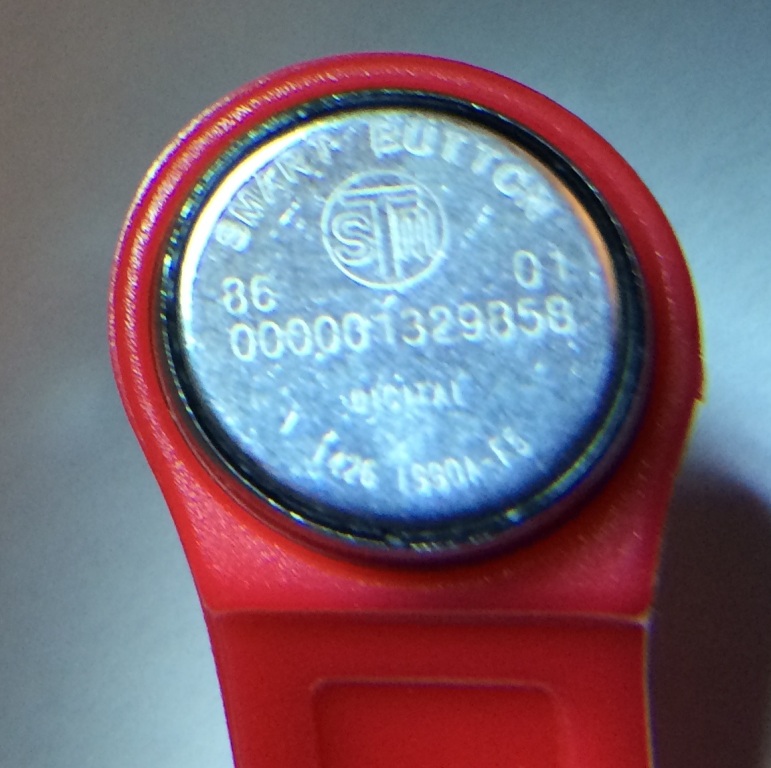
| − | [[File: | + | [[File:driver_id_key_scan_302.jpg|450px|]] [[File:driver_key_serial_number_302.jpg|thumb|350px|]] |
| − | + | :*Scan the Driver key and click Assign | |
| − | + | :*Manually enter the serial number and press enter and then click assign | |
| − | |||
| − | |||
| − | |||
| − | ''' | + | '''The Serial number of the Drive ID Key for manual entry is found on the Drive ID Key''' |
| − | |||
| − | |||
| − | + | <br\><br\><br\><br\><br\><br\><br\><br\><br\><br\><br\><br\><br\><br\> | |
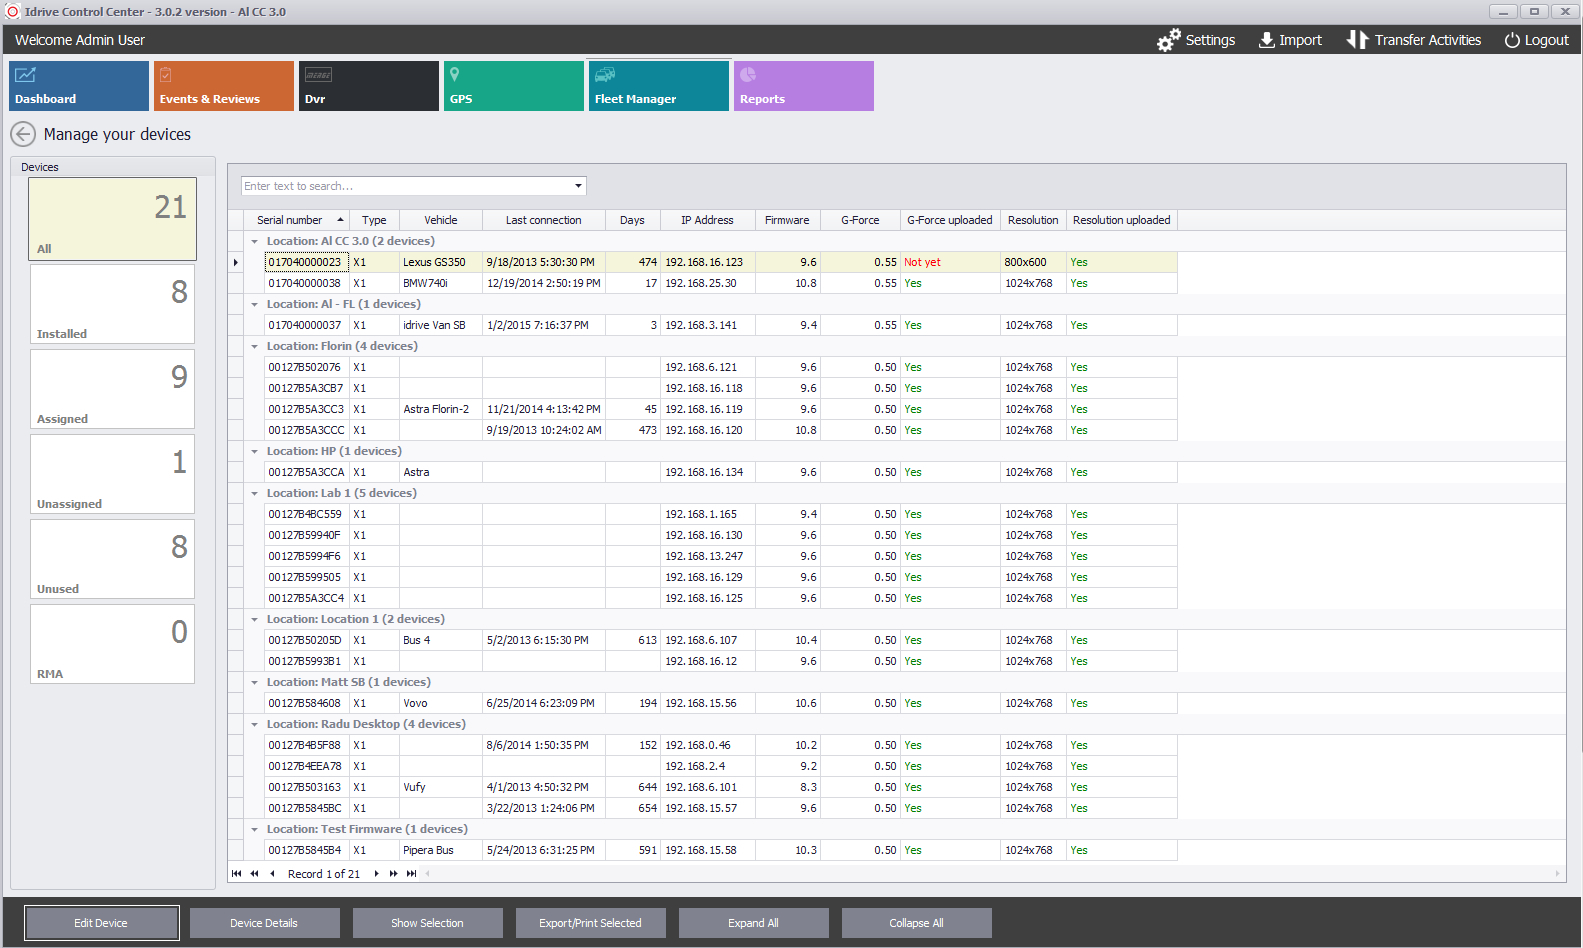
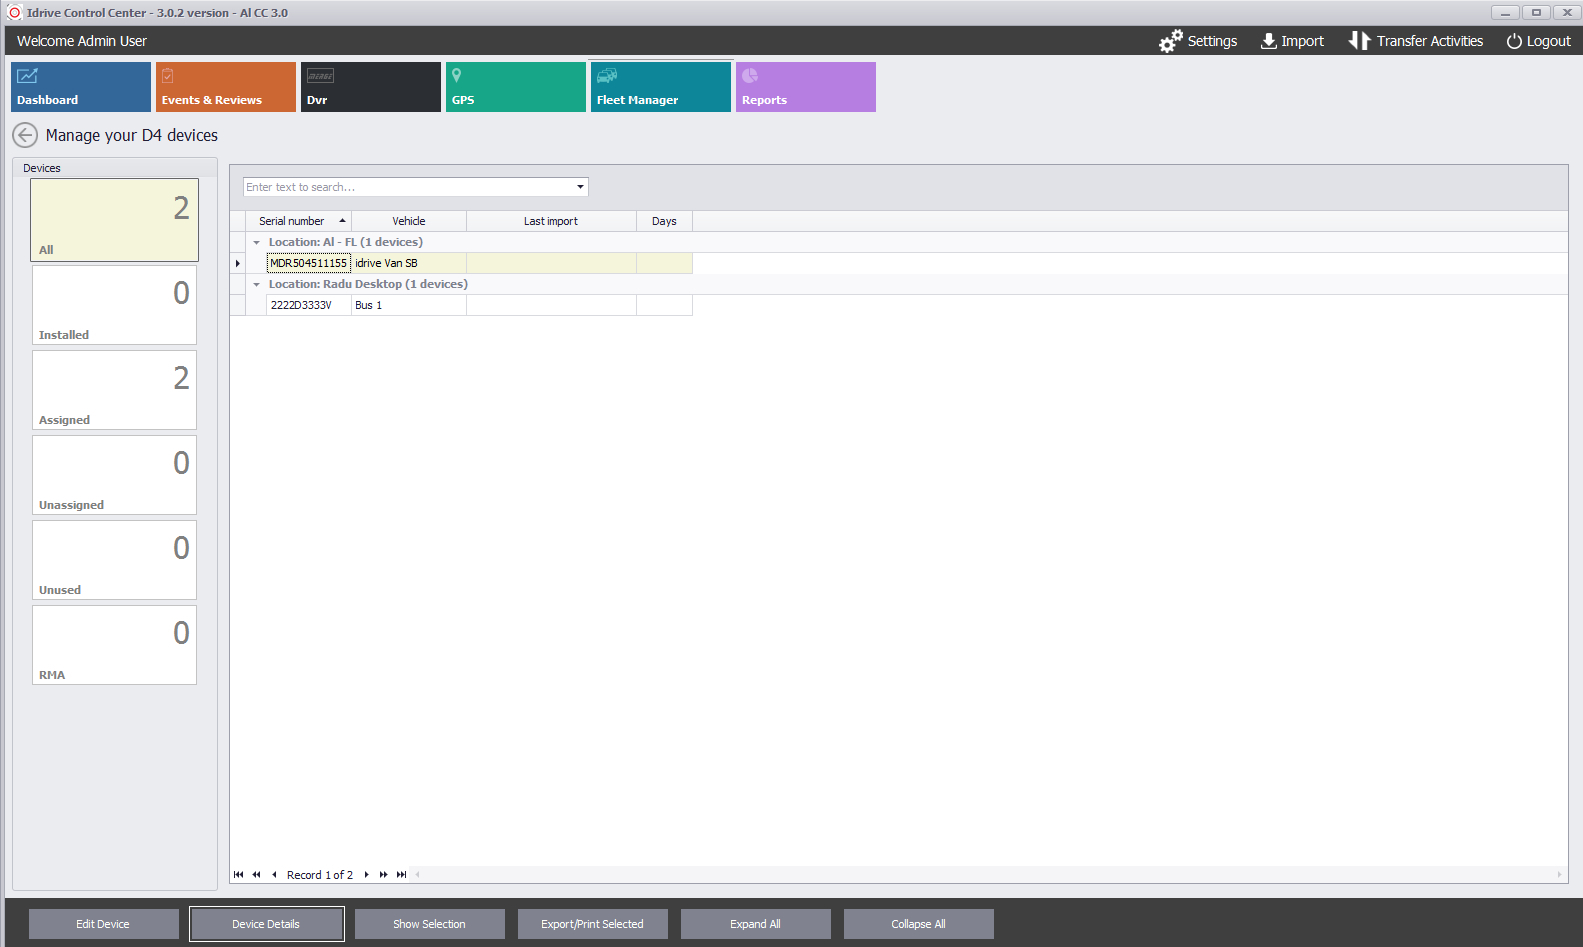
| − | + | ===X Devices=== | |
| + | These are Cameras from the series of X1, X1P and X2 | ||
| + | This section is used for managing X series Devices information, and Settings. | ||
| − | + | [[File:fm_icon_302.jpg|left|150px|]][[File:xdevices_icon_302.jpg|150px|]] | |
| − | + | [[File:fm_devices_main302.jpg|thumb|750px|]] | |
| − | + | [[File:39ii.fleet.mgr.devices.jpg|left|150px|]] | |
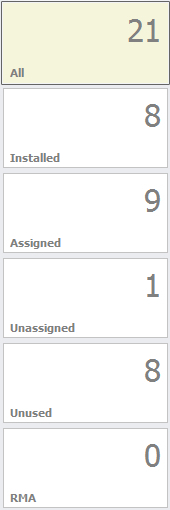
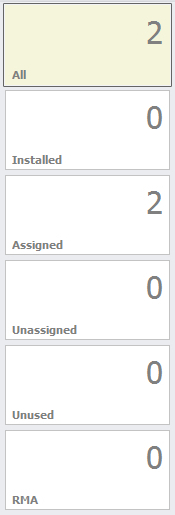
| + | '''All''' - Devices that are assigned to the client through the Idrive Servers appear under X Devices and can be assigned by the client to vehicles | ||
| + | <br\> | ||
| − | |||
| − | |||
| + | '''Installed''' - These Devices are Assigned to vehicles by the client and have communicated and have downloaded Events | ||
| + | <br\> | ||
| − | |||
| − | |||
| − | + | '''Assigned''' - These Devices are assigned to vehicles by the Client but have not yet communicated to the system via WiFi | |
| + | <br\> | ||
| − | |||
| − | |||
| − | |||
| − | ''' | + | '''Unassigned''' - These Devices have not been assigned to client vehicles (they may or may not have already transferred events via WiFi |
| + | <br\> | ||
| − | |||
| − | |||
| − | + | '''Unused''' - These devices will be placed as inactive so that they do not show up in reports of devices that need to be assigned | |
| + | <br\><br\> | ||
| − | |||
| − | ''' | + | '''RMA''' - For future use; should a device require "Return Merchandise Authorization" to diagnose an issue or operation |
| − | + | <br\><br\><br\><br\><br\><br\><br\><br\> | |
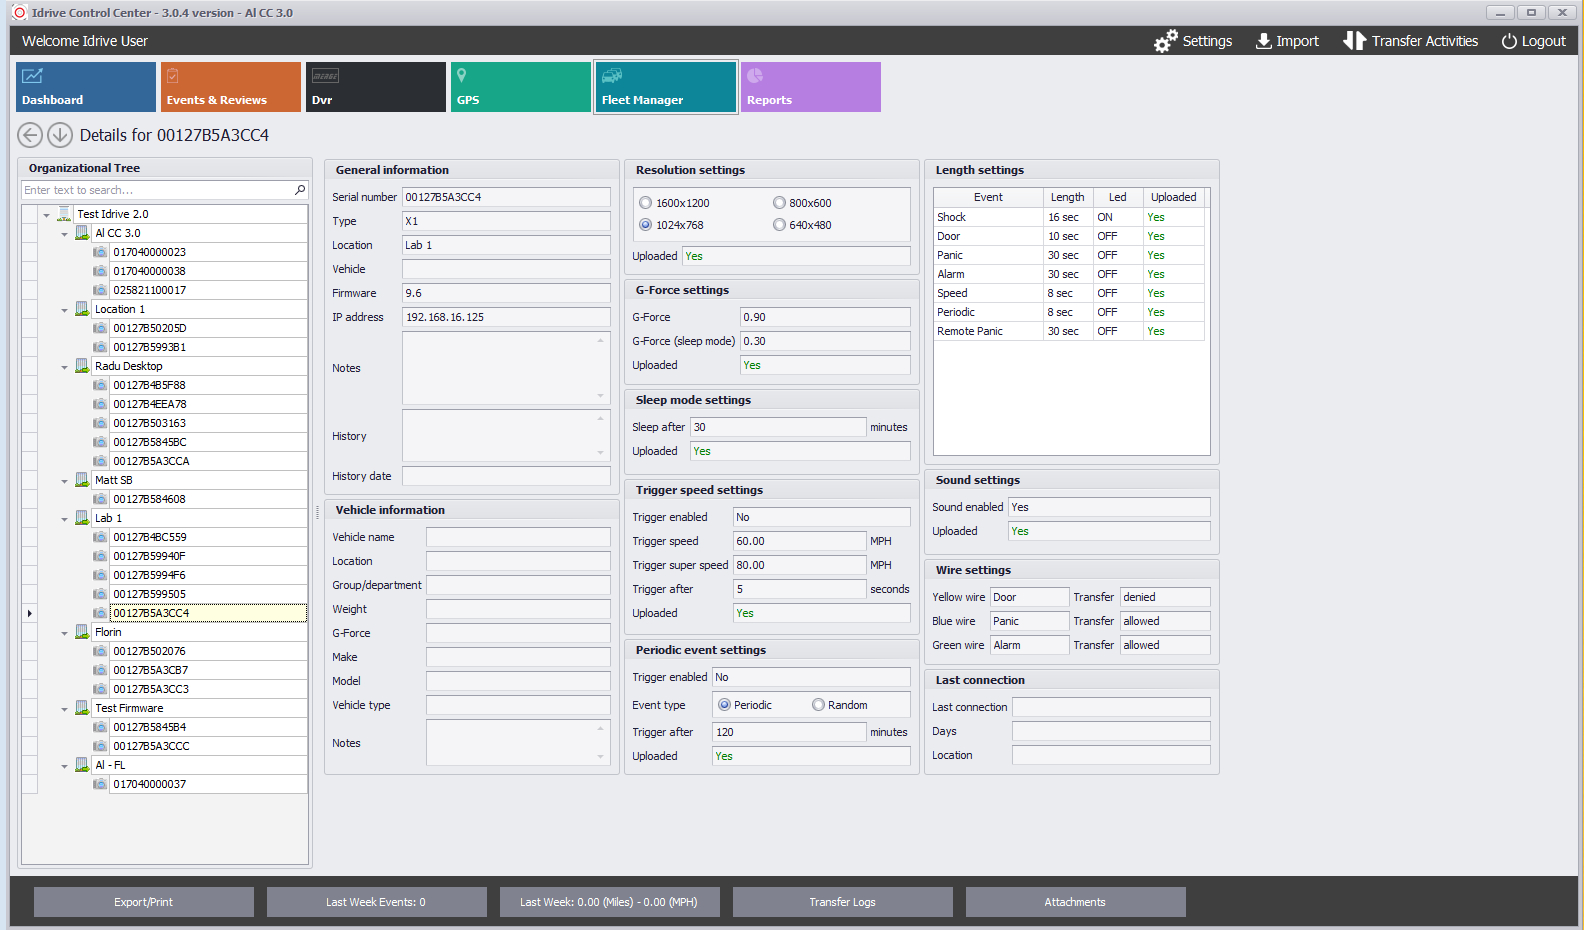
| − | ''' | + | Selecting '''Device Details''' from the Function Buttons at the bottom will display all the specific configuration and status for a device |
| − | + | [[File:39iii.fleet.mgr.devices.jpg|left|850px]] | |
| − | + | <br\><br\> | |
| − | + | [[File:39iz.fleet.mgr.devices.edit.jpg|thumb|750px]] | |
| − | + | <br\><br\> | |
| − | + | When changes are made to the configuration (under the Edit function Button below) the changes are flagged to the X Devices via WiFi upon the next connection. In the details view, those flag status are designated as "updated" yes or no | |
| − | + | <br\><br\><br\><br\><br\><br\><br\><br\><br\><br\><br\><br\><br\><br\><br\><br\><br\><br\><br\><br\><br\><br\><br\><br\><br\><br\><br\><br\> | |
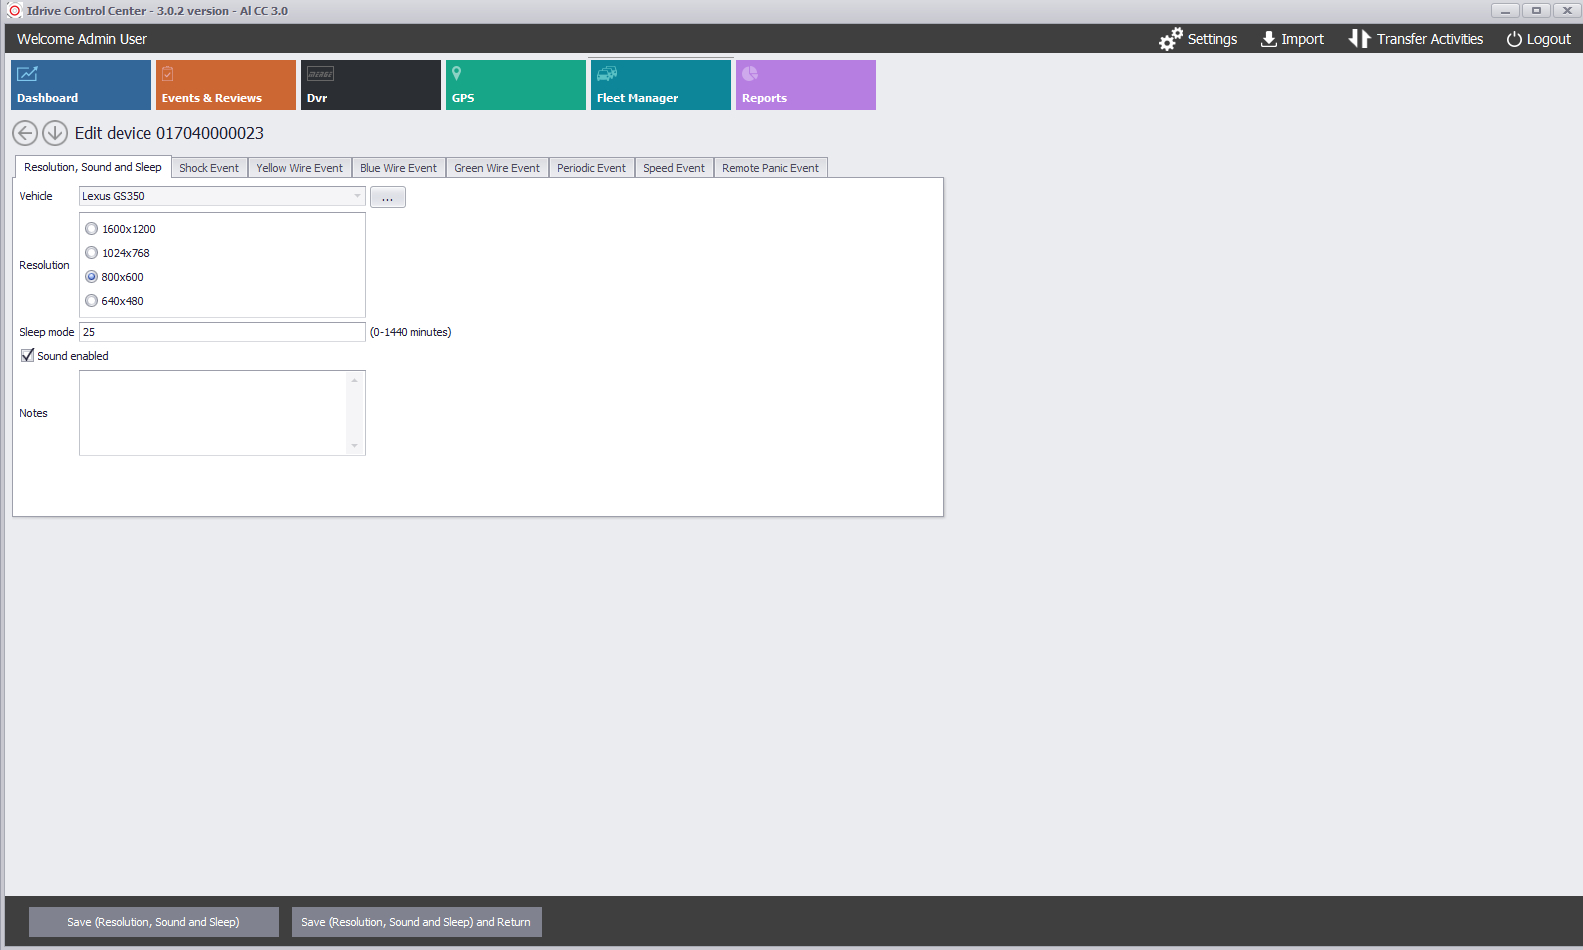
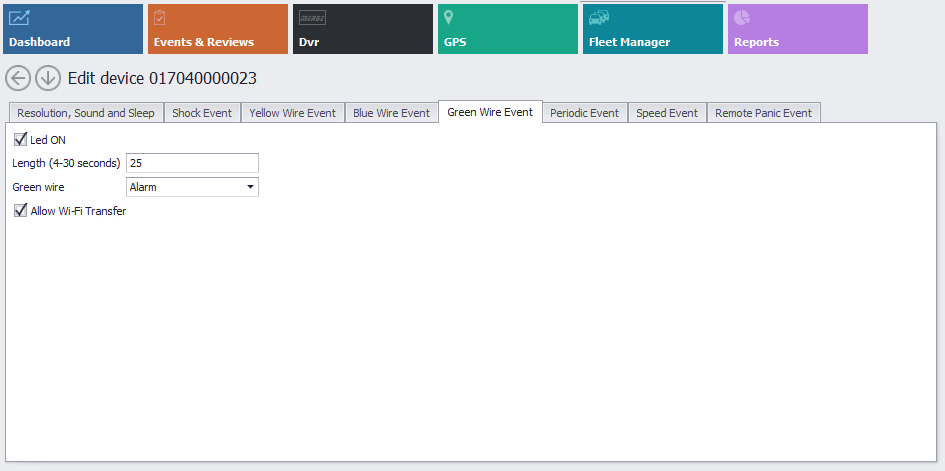
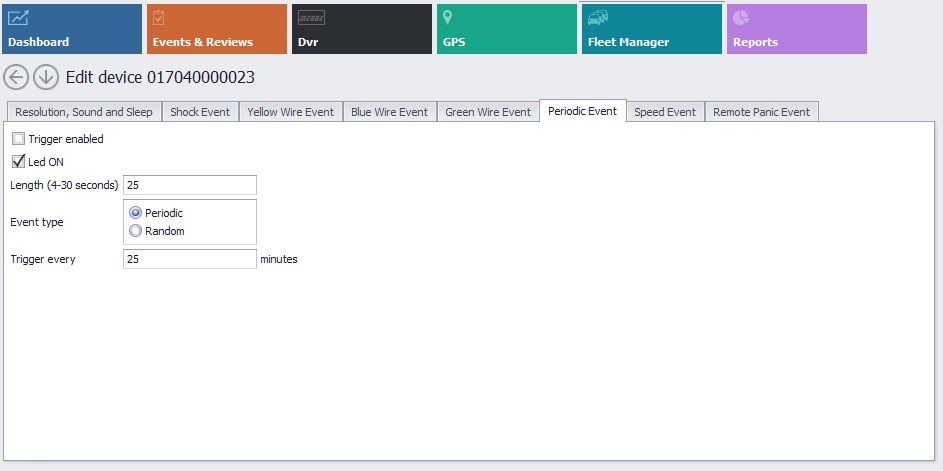
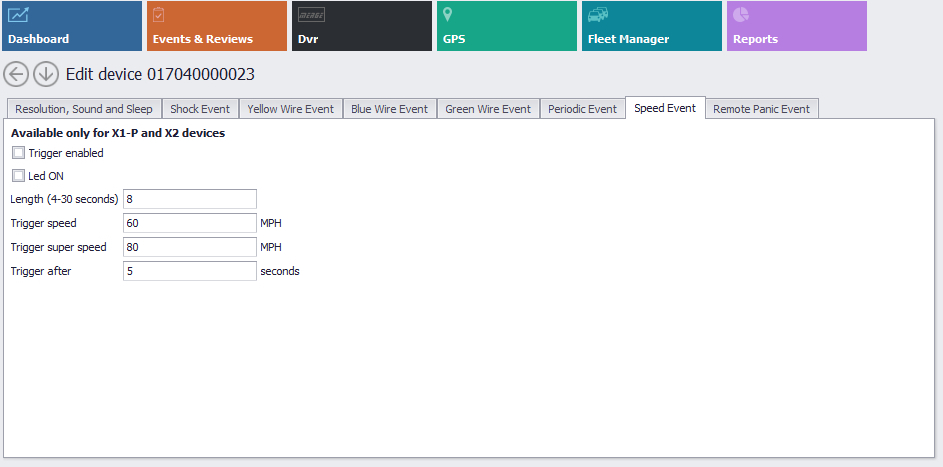
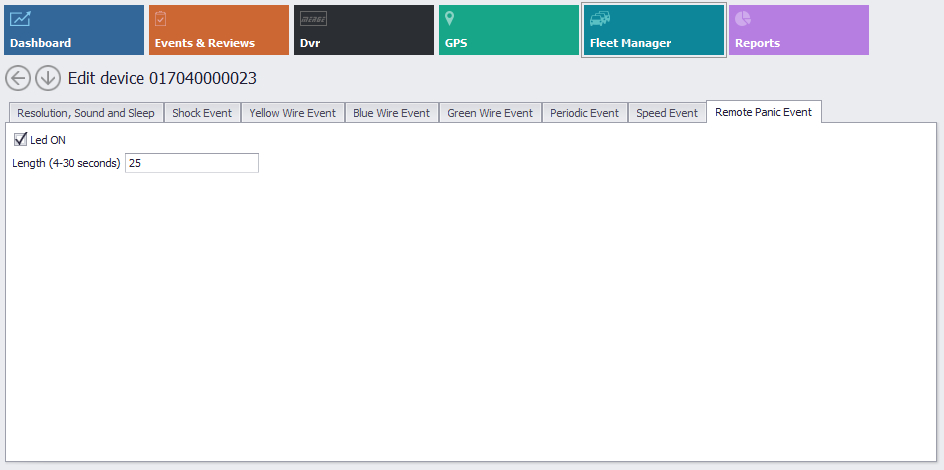
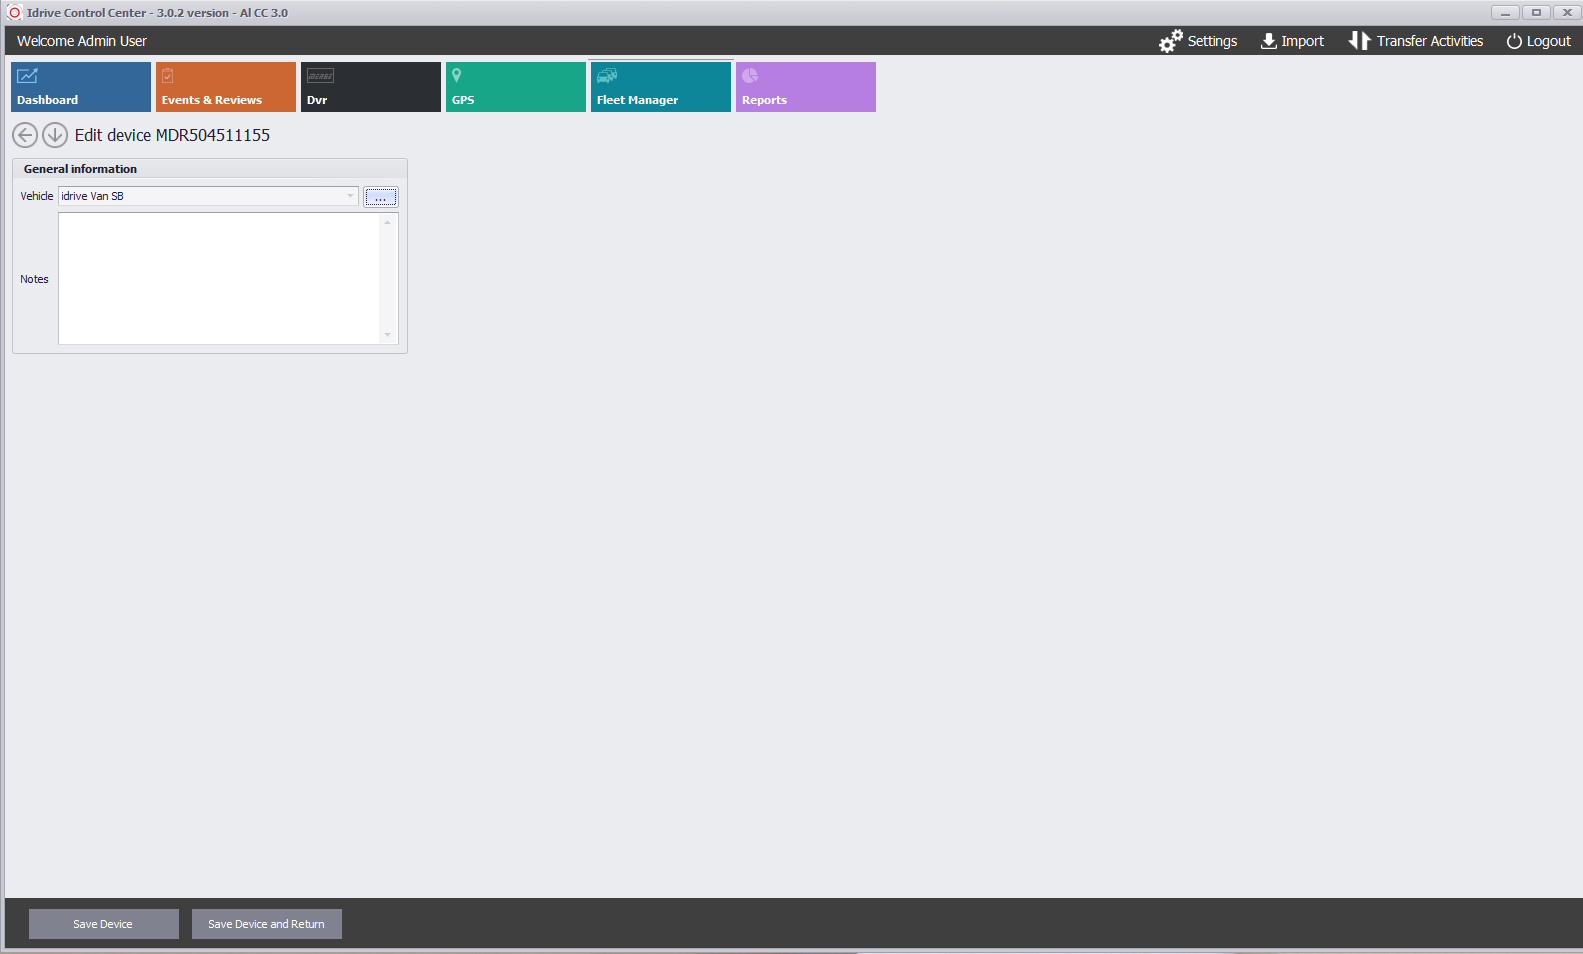
| − | ''' | + | Selecting '''Edit Device''' from the Function Buttons at the bottom will display a mufti-tab window where configurations for the following are made to a device |
| − | + | [[File:39iii.fleet.mgr.devices.jpg|left|850px]] | |
| − | + | <br\><br\> | |
| − | + | [[File:39j.fleet.mgr.devices.edit.jpg|thumb|750px]] | |
| − | + | <br\><br\> | |
| − | + | These tabs will allow you to customize your fleet for specific lengths of Events, LED behavior from triggers, Names for wired triggers and speeds at wich evetns can be triggered | |
| − | + | <br\><br\> | |
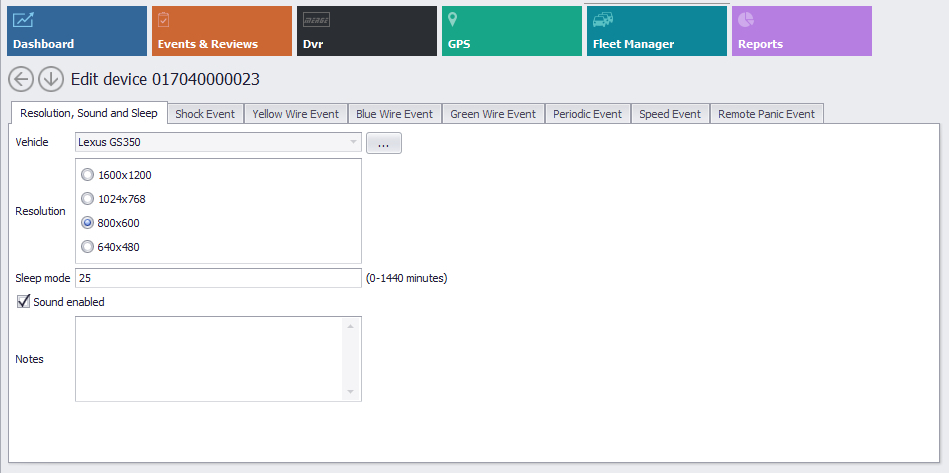
| + | '''Resolution, Sound and Sleep''' - | ||
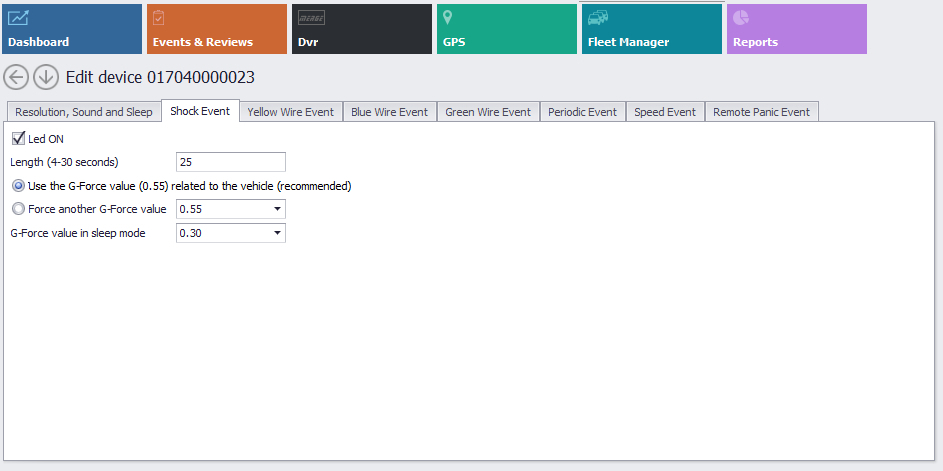
| + | '''Shock (G-Force triggers)''' - | ||
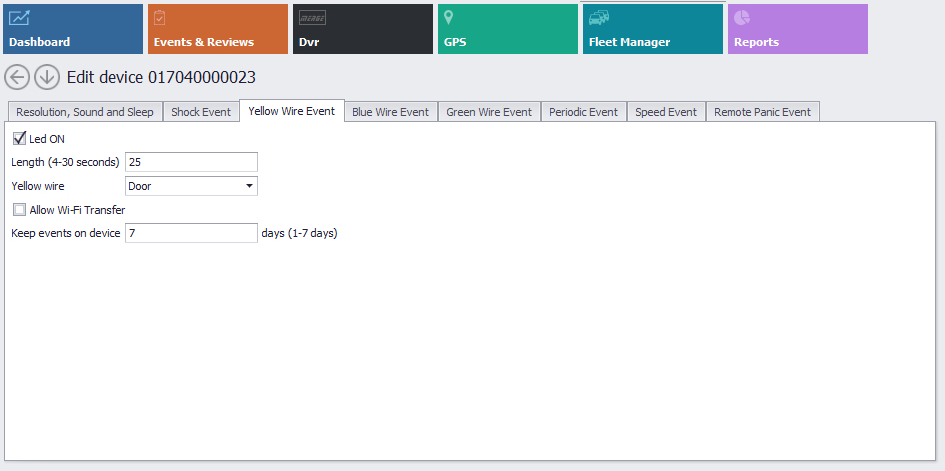
| − | + | '''Yellow Wire Event (typically Door)''' - | |
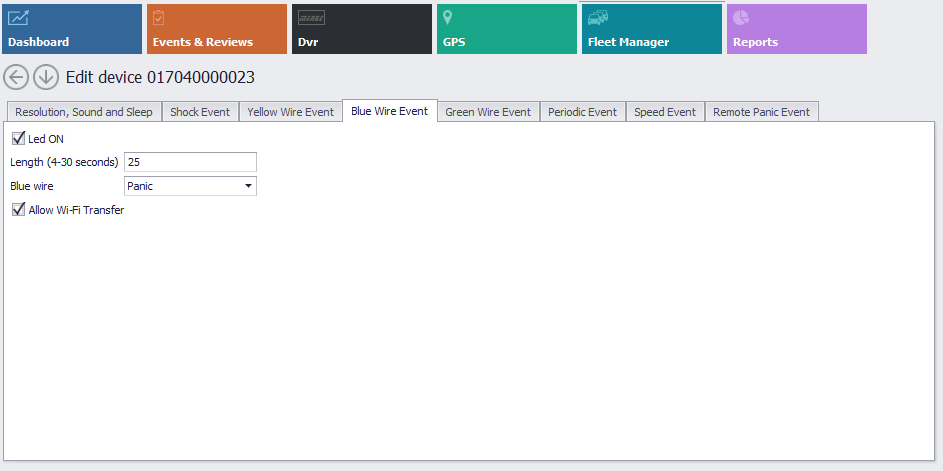
| − | + | '''Blue Wire Event (typically Panic)''' - | |
| − | + | '''Green Wire Event (typically Backup / Taxi Meter, Etc)''' - | |
| − | + | '''Periodic Event''' - | |
| − | + | '''Speed Event''' - | |
| + | |||
| + | '''Remote Panic Event (legacy wireless remotes)''' - | ||
| + | <br\><br\><br\><br\><br\><br\><br\><br\><br\><br\><br\> | ||
| − | + | ====Edit Device Tabs==== | |
| + | [[File:39ja.fleet.mgr.devices.jpg|right|750px]] | ||
| − | + | '''Resolution, Sound and Sleep''' | |
| − | |||
| + | * Verify there is a vehicle name assigned to the device, if not make an assignment | ||
| + | * Default resolution is 1024 X 768 (and is selected for optimum event clarity and speed of downloads) | ||
| + | * Sleep mode is set to default of 30 minutes after ignition is turned off and camera has completed WiFi download (or attempted); Max sleep time is 1440 min = 24 hours | ||
| + | ::- During Sleep, a camera can be triggered at a much lower G-Force (vehicle is at rest) and the other triggers can activate a recording just as if the camera was awake | ||
| − | + | * Sound and Inside Camera options are defaulted to ON | |
| + | <br\> | ||
| − | ''' | + | '''Note: Always click Save or Save and Return from the function Buttons below before changing to the next tab or exiting''' |
| − | |||
| − | |||
| − | |||
| − | |||
| − | + | <br\><br\><br\><br\><br\><br\><br\><br\><br\><br\><br\><br\> | |
| − | + | [[File:39k.fleet.mgr.devices.edit.jpg|right|750px]] | |
| + | '''Shock Event''' | ||
| − | + | Having 3 accelerometers, the G-Force at which a camera can sense shock to create an event (which is set in Fleet Manager>Manage my Vehicles) can be configured to: | |
| − | + | * Turn left LED RED during the triggered G-Force (making the driver aware of his/her driving habits and behaviors), or unchecked for no LED change during a shock Event trigger | |
| + | * Event Lengths can be set from 4 seconds to 30 seconds (the event center will be the trigger) | ||
| + | * Sleep G-Force is set to .30 by default (in nearly all cases this is the best setting) | ||
| + | * Optionally Idrive Support can enable the Client users to have access to the select three axis configurations (Forward, Lateral and Vertical) as needed | ||
| − | + | <br\> | |
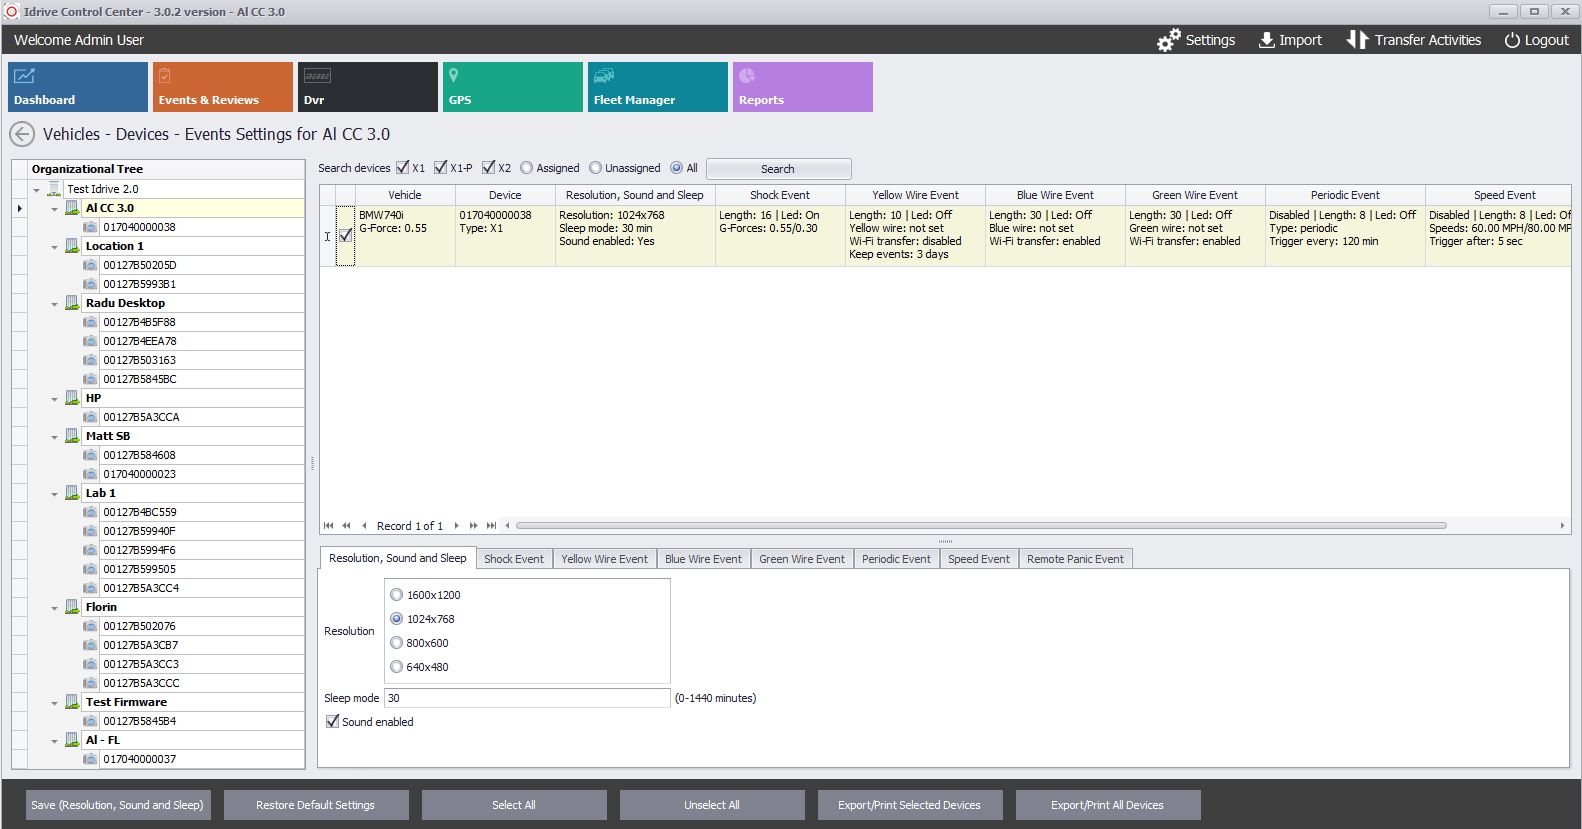
| − | ''' | + | '''Note: Always click Save or Save and Return from the function Buttons below before changing to the next tab or exiting''' |
| − | + | <br\><br\><br\><br\><br\><br\><br\><br\><br\><br\><br\><br\> | |
| + | [[File:39L.fleet.mgr.devices.edit.jpg|right|750px]] | ||
| + | '''Yellow Wire Events''' | ||
| − | + | Typically used to connect to a constant 12VDC+ that senses the voltage drop as the dome/interior light(s) are activated (usually from a door opening). Each vehicle may operate the interior lighting in various manners, a voltage meter should be used to test the circuit prior to connecting) | |
| − | + | * Left LED RED during door activation | |
| + | * Event Length 4-30 seconds | ||
| + | * Yellow Wire Event name (selectable options from drop down menu); This is the type of event as displayed in the Event Viewer | ||
| + | * Allow WiFi Transfer | ||
| + | ::- If checked every door event captured will transfer to the system (not recommended) | ||
| + | ::- Events will be kept on the Camera storage media and can be removed using the USB thumb Drive provided with the system | ||
| + | ::- Yellow Wire Events will be automatically deleted off of the Camera after 1-7 days (selectable) | ||
| − | + | <br\> | |
| − | ''' | + | '''Note: Always click Save or Save and Return from the function Buttons below before changing to the next tab or exiting''' |
| − | + | <br\><br\><br\><br\><br\><br\><br\><br\><br\><br\><br\><br\> | |
| − | ''' | + | [[File:39M.fleet.mgr.devices.edit.jpg|right|750px]] |
| + | '''Blue Wire Events''' | ||
| + | Designated for connection to the provided Panic Button within reach of the driver | ||
| + | * Left LED RED during Blue Wire (Panic) activation | ||
| + | * Event Length 4-30 seconds | ||
| + | * Blue Wire Event name recommended to select "Panic" (selectable options from drop down menu); This is the type of event as displayed in the Event Viewer | ||
| + | * Allow WiFi Transfer (recommended) otherwise will be kept on the Camera storage media and can be removed using the USB thumb Drive provided with the system | ||
| + | ::- Blue Wire Events will be automatically deleted off of the Camera after 1-7 days (selectable) (recommended to transfer via WiFi) | ||
| − | |||
| − | + | <br\> | |
| − | + | '''Note: Always click Save or Save and Return from the function Buttons below before changing to the next tab or exiting''' | |
| − | <br | + | <br\><br\><br\><br\><br\><br\><br\><br\><br\><br\><br\><br\> |
| − | + | [[File:39N.fleet.mgr.devices.edit.jpg|right|750px]] | |
| + | '''Green Wire Events''' | ||
| − | + | Designated for connection to 12VDC+ rising trigger (e.g. Back up light circuit or Taxi Meter, etc) | |
| − | + | * Left LED RED during Green Wire activation | |
| + | * Event Length 4-30 seconds | ||
| + | * Green Wire Event name recommended to select "Back up, Taxi Meter, Etc" (selectable options from drop down menu); This is the type of event as displayed in the Event Viewer | ||
| + | * Allow WiFi Transfer (recommended) otherwise will be kept on the Camera storage media and can be removed using the USB thumb Drive provided with the system | ||
| + | ::- Green Wire Events will be automatically deleted off of the Camera after 1-7 days (selectable) (recommended to transfer via WiFi) | ||
| + | <br\> | ||
| + | '''Note: Always click Save or Save and Return from the function Buttons below before changing to the next tab or exiting''' | ||
| − | + | <br\><br\><br\><br\><br\><br\><br\><br\><br\><br\><br\><br\> | |
| − | [[File: | + | [[File:39o.fleet.mgr.devices.edit.jpg|right|750px]] |
| + | '''Periodic Event''' | ||
| − | + | * Trigger Enabled / disabled | |
| + | * Select left LED RED (checked) during event or unchecked for NO LED indication of trigger | ||
| + | * Event Length 4-30 seconds (suggested 8 seconds) | ||
| + | * Event Type '''Periodic''' is recommended (based on time below) or completely '''Random''' (no discernible pattern) | ||
| + | * If Periodic is chosen, select interval in minutes | ||
| − | + | <br\> | |
| + | '''Note: Always click Save or Save and Return from the function Buttons below before changing to the next tab or exiting''' | ||
| + | <br\><br\><br\><br\><br\><br\><br\><br\><br\><br\><br\><br\> | ||
| − | + | [[File:39p.fleet.mgr.devices.edit.jpg|right|750px]] | |
| + | '''Speed Event''' | ||
| − | + | * Trigger Enabled / disabled | |
| + | * Select left LED RED (checked) during event or unchecked for NO LED indication of trigger | ||
| + | * Event Length 4-30 seconds (suggested 8 seconds) | ||
| + | * Event Type '''Speed''' (based on trigger threshold) and '''Super Speed''' (based on higher trigger threshold) | ||
| − | + | '''Notes:''' | |
| + | ** Minimum lowest speed is 40MPH and can be modified by Idrive Support upon request | ||
| + | ** Speed is registered in MPH and can be modified to register KM/H by the user; see Settings>My Settings | ||
| − | + | <br\> | |
| − | + | '''Note: Always click Save or Save and Return from the function Buttons below before changing to the next tab or exiting''' | |
| − | + | <br\><br\><br\><br\><br\><br\><br\><br\><br\><br\><br\><br\><br\> | |
| + | [[File:39q.fleet.mgr.devices.edit.jpg|thumb|750px]] | ||
| + | '''Remote Panic Event''' | ||
| + | '''This is a Legacy Device operated by a wireless Panic Button, no longer provided or supported''' | ||
| − | + | * Select left LED RED (checked) during event or unchecked for NO LED indication of trigger | |
| + | * Event Length 4-30 seconds (suggested 25 seconds) | ||
| − | + | <br\> | |
| − | + | '''Note: Always click Save or Save and Return from the function Buttons below before changing to the next tab or exiting''' | |
| + | <br\><br\><br\><br\><br\><br\><br\><br\><br\><br\><br\><br\><br\> | ||
| + | ===DVR Devices=== | ||
| − | + | This section is used for managing DVR Devices information and assignments. DVR refers to Digital Video Recorder, D4 and Merge are product names for the Idrive Mobile DVRs | |
| − | + | [[File:fm_icon_302.jpg|left|150px|]][[File:D4 devices icon 302.jpg|150px|]] | |
| − | + | [[File:40a.fleet.mgr.D4.jpg|thumb|750px|]] | |
| − | + | [[File:40aa.fleet.mgr.D4.jpg|left|150px|]] | |
| + | All - Devices that are assigned to the client through the Idrive Servers appear under DVR Devices and can be assigned by the client to vehicles | ||
| − | |||
| + | Installed - These Devices are Assigned to vehicles by the client and have Events imported into the Control Center software (manual process) | ||
| − | |||
| − | + | Assigned - These Devices are assigned to vehicles by the Client but have not yet imported any video events (manual process) | |
| − | |||
| − | + | Unassigned - These Devices have not been assigned to client vehicles | |
| − | |||
| − | + | Unused - These devices will be placed as inactive so that they do not show up in reports of devices that need to be assigned | |
| − | |||
| − | + | RMA - For future use; should a device require "Return Merchandise Authorization" to diagnose an issue or operation | |
| − | <br | + | <br\><br\><br\><br\><br\><br\><br\><br\><br\> |
| − | + | Clicking on the Edit Device from the Function Buttons below will open the next window and allow you to assign the serial number of the DVR to a vehicle that you have already created and named in the control center software under Fleet Manager>Manage my Vehicles | |
| − | [[File: | + | [[File:40aaa.fleet.mgr.D4.jpg|left|900px]] |
| − | <br | + | <br\><br\><br\><br\><br\> |
| − | |||
| − | + | [[File:40b.fleet.mgr.D4.edit.jpg|thumb|750px]] | |
| + | <br\><br\> | ||
| + | [[File:40c.fleet.mgr.D4.assign.jpg|left|550px]] | ||
| − | + | When you click the button with three dots on it (vehicle selection) this window opens giving you all the vehicles that you could use to assign the DVR to. | |
| + | * Select the round button next to the vehicle chosen | ||
| + | * Click the Assign button below | ||
| − | + | '''Afterward click the Save device or Save Device and Return function buttons below ''' | |
| − | + | <br\><br\><br\><br\><br\><br\><br\><br\><br\><br\><br\><br\><br\><br\><br\><br\><br\><br\><br\><br\><br\><br\><br\><br\><br\><br\><br\><br\><br\><br\><br\><br\><br\><br\><br\><br\><br\><br\><br\><br\> | |
| − | + | [[File:40d.fleet.mgr.D4.details.jpg|thumb|750px]] | |
| − | * | + | * Clicking on the Device Details from the Function Buttons will display the Organizational Tree with all the assigned devices |
| + | * Selecting one of the devices from the left Organizational Tree will display the serial number, assignment and history for the device | ||
| − | + | <br\><br\><br\><br\><br\><br\><br\><br\><br\><br\><br\><br\><br\><br\><br\><br\><br\><br\><br\><br\><br\><br\> | |
| − | + | '''End of Section''' | |
| − | + | [[Idrive_Control_Center_3.0_User%E2%80%99s_Guide#Control Center 3.0 Dashboard View|Back To Dashboard]] | |
| − | + | ---- | |
| − | + | <br\><br\><br\><br\> | |
| + | =='''Settings Detail'''== | ||
| + | [[File:05.settings.jpg|thumb|750px]] | ||
| − | + | [[File:05b.settings.jpg|left]] | |
| − | |||
| − | |||
| − | |||
| − | |||
| + | <br/><br/> | ||
| − | + | [[File:05c.settings.jpg|middle]] | |
| − | + | <br/><br/><br/><br/><br/><br/><br/><br/><br/><br/><br/><br/><br/><br/> | |
| + | ===My Settings=== | ||
| + | [[File:06.My.Settings.jpg|thumb|750px]] | ||
| + | In the My Settings Menu, you have the ability to change any personal settings for Control Center, these include: | ||
| − | |||
| − | + | '''• Application Templates''' - Change the Skin of the Control Center display / color by selecting from the drop-down menu | |
| − | |||
| − | |||
| − | |||
| − | |||
| − | |||
| + | <br/> | ||
| − | ''' | + | '''• Player Settings''' - Select the Date/Time option (local vs. UTC) as well as the Speed Options (MPH vs. Km/H) |
| − | + | <br/> | |
| − | + | '''• Auto Start on loaded event''' - In the Events viewer, you can have videos begin playing as soon as loaded; default is load and wait for user to click play | |
| − | + | <br/> | |
| − | + | '''• Allow Transitions effect''' - Windows tile transition effect is set ON as default | |
| − | + | <br/><br/><br/><br/><br/><br/><br/><br/><br/><br/><br/><br/> | |
| − | + | ---- | |
| − | + | ===Admin Settings=== | |
| − | |||
| − | + | ====Backup and Delete==== | |
| + | <span style="color:#ff0000">'''''It is your data, once deleted there is no way to restore an event without a Backup!'''''</span> | ||
| − | [[File: | + | [[File:07.Admin.Settings.jpg|thumb|750px]] |
| − | + | '''From the Control Center top menu bar click on Settings> Admin Settings> Backup and Delete''' | |
| − | |||
| − | |||
| − | + | * Set the number of days before events are automatically deleted from the Idrive Base Station for all X devices and D4 devices | |
| − | + | * There is also a disk space limitation feature where old events will be deleted when space is becoming limited. (recommended level for this setting is 25GB or more) | |
| − | |||
| − | ''' | + | *'''Options for Delete''' |
| − | + | '''Note:''' ''Square boxes are selectable or not'' | |
| + | *Keep Incidents | ||
| + | *Keep Locked Events | ||
| − | |||
| − | + | '''Note:''' ''Round selectable buttons allow only one of three choices'' | |
| + | * Keep all scored events | ||
| + | * Keep only high scores events (events scores of 3 or 4) | ||
| + | * Delete scored events | ||
| − | |||
| − | |||
| − | + | * Select “No Backup” or “Backup” (Backup is recommended) for deleted events | |
| + | * Choose a format for backups: “Keep original idrive format” (recommended - permits full restoration with high-res video) or select “Use video compression” (lower-res video) to save on space in archived location | ||
| − | |||
| − | + | '''Backup location selection''' | |
| − | + | * This can be a local drive connected directly to the base station or a resource available on your network. When using a network resource the location must be available to the system for backups to function. The backup location should be added in the UNC format (\\server\directory) and not as logical drive (z:\directory). If this resource requires authentication such as a domain account enter the user name and password in the fields provided. This will allow the system backup process to access the network resource even when no user is logged onto the base station. | |
| + | * D4 Videos (if used) can be large, a policy should be created for retention | ||
| + | * GPS files are generally very small and should only be considered for deletion if old or out dated | ||
| + | * Temporary Files represents Export folder located in C: Program Files\idrive\Export | ||
| + | ** This folder contains saved PDF files exported from printable reports | ||
| + | ** By default the pdf files older than 30 days will be removed. | ||
| − | |||
| − | : | + | '''NOTES:''' |
| − | + | * The Backup and Delete mechanism looks at the DOWNLOAD date and the not the EVENT date to perform deletions. (as some vehicles do not download regularly, this way the operator of the software will have equal time in the system to view before auto deleted) | |
| + | * When choosing to backup before deleting you have two options "keeping original format" vs. "use video compression". | ||
| − | + | * The Original format will allow you to "Import" all data back into the Control Center as it was originally before the delete; however, if you delete using video compression you can no longer import the video back into the system and the GPS data accompanied is lost. | |
| − | + | * The automatic delete process will run periodically even when no user logged onto the system | |
| − | : | + | * <span style="color:#ff0000">'''Events MUST be checked as an "Incident" to prevent automatic deletion!''' |
| − | : | + | <span style="color:#ff0000">'''''It is your data, once deleted there is no way to restore an event without a Backup!'''''</span> |
| + | <br\><br\> | ||
| − | + | ====Player Settings==== | |
| + | [[File:08.player.settings.jpg|thumb|750px]] | ||
| − | + | Settable options for the Idrive Player. You are able to disable or enable the following by checking or un-checking the box; | |
| − | |||
| − | + | :: * Show inside camera | |
| + | |||
| + | :: * Enable sound'' (for all devices at your location) Individual control for devices can be found in Vehicles-Devices-Events section | ||
| − | + | :: * Include Map in snapshot | |
| − | + | :: * Include graphic in snapshot | |
| − | + | <br/><br/><br/><br/><br/><br/><br/> | |
| − | ''' | + | '''<span style="color:#ff0000">Note: Audio recording in some states may be prohibited. Please check the local and state regulations for your location.</span>''' |
| − | + | <br/><br/><br/> | |
| − | + | '''End of Section''' | |
| − | + | [[Idrive_Control_Center_3.0_User%E2%80%99s_Guide#Control Center 3.0 Dashboard View|Back To Dashboard]] | |
| + | ---- | ||
| + | <br\><br\><br\><br\> | ||
| − | + | ===Login History=== | |
| − | + | [[File:09.login.history.jpg|thumb|750px]] | |
| − | + | Idrive Control Center software Users should regularly sign out after their usage | |
| − | + | Failure to do so could result in: | |
| + | * Other users with lessor permissions to have access to sensitive data | ||
| + | * Accidental or purposeful permanent deletion of events and or data | ||
| + | * Access to drivers and or company data stored in the system | ||
| − | |||
| − | ''' | + | '''Benefits of Signing out regularly from a finished session:''' |
| − | <br><br><br | + | Administrators can see from the Login History the following |
| + | * When a user last signed in | ||
| + | * The length of the last sign in | ||
| + | * Where the last sign in or history of dated sign ins took place | ||
| + | ::* Local on "Control Center" | ||
| + | ::* Remotely on another multi-location organization "Control Center" | ||
| + | ::* Remotely on "Idrive Terminal" Sold separately, stand alone software across client LAN | ||
| + | ::* Remotely on "Idrive Global Center" (client or private Internet access PC connected to the Idrive Cloud Global Center) | ||
| + | |||
| + | <br/><br/><br/> | ||
| − | + | '''End of Section''' | |
| − | + | [[Idrive_Control_Center_3.0_User%E2%80%99s_Guide#Control Center 3.0 Dashboard View|Back To Dashboard]] | |
| + | ---- | ||
| + | <br\><br\><br\><br\> | ||
| − | + | ===Transfer Activities Detailed=== | |
| − | + | [[File:transfer_activities_302.jpg|thumb|800px|]] | |
| − | + | Allows for monitoring and review of Event transfers that happen at this location. Vehicles that transfer at other locations in your organization (Base Station) must be viewed at that location. | |
| − | |||
| − | + | This is a dynamic display of the WiFi activity at this physical location. This is an active display of current and recent transfer activity and not the results of a search. | |
| − | + | *The Transfer Activity List can be sorted by any criteria by clicking on the appropriate column head | |
| + | *The Transfer Activities window is broken into 2 sections: | ||
| − | ''' | + | '''Transfer Logs''' Select the interval for the logs you wish to view |
| − | + | [[ File:12a.transf.act.jpg|left|150px|]] | |
| + | <br\><br\> | ||
| − | + | Show transfers from the last 24 hours | |
| + | <br\><br\><br\> | ||
| − | + | Show transfers from the last 3 days | |
| + | <br\><br\><br\> | ||
| − | + | Show transfers from the last 7 days | |
| + | <br\><br\><br\> | ||
| + | Click to perform a custom search | ||
| + | <br\><br\><br\> | ||
| − | <br><br | + | [[File:transfer_custom_302.jpg|150px|]] |
| + | Show transfers in the date range selected | ||
| + | <br\><br\> | ||
| − | + | [[File:transfer_custom2_302.jpg|400px|]] | |
| + | select the date range | ||
| + | <br\><br\> | ||
| − | + | Matching results will be displayed in Transfer Logs windows. Each vehicle may be expanded or collapsed. | |
| − | + | [[File:transfer_logs_search_302.jpg|900px|]] | |
| − | + | <br\><br\> | |
| − | |||
| − | + | About Device WiFi transfer behavior | |
| − | + | The Transfer mode is initiated when the ignition switch for the vehicle is shut off. The X series device will search for the Idrive wireless network. Once the idrive network is contacted the following actions take place: | |
| − | + | ::*Verify the Device belongs to the Company / Location by checking the serial number assignment | |
| − | + | ::*Only if the device belongs to the location begin download of events | |
| − | + | :::-download the most recent event | |
| − | + | :::-verify the event downloaded completely and is valid | |
| − | + | :::-If the event correctly downloaded delete it from the device | |
| − | + | :::-download the next event | |
| − | |||
| − | ''' | + | ::'''Upon successful download of all events''' (all events are transferred successfully the first time via WiFi): |
| − | + | :::* The connection will close | |
| − | + | :::* The camera will shut down (or enter sleep mode depending on your settings) | |
| − | + | :::* The number of tries will be shown as 1 in the Connection Column | |
| − | |||
| − | |||
| − | + | ::'''If the download is interrupted''' - (either due to loss of connection or the vehicle ignition being turned on)''' | |
| − | + | :::* The device will retry the connection up to 15 times over the next 3 ½ minutes | |
| − | + | :::* Simultaneous downloads are limited to 3 devices at a time to improve overall download efficiency.If there are three devices connected the access point the camera will wait indefinitely for an open slot and begin downloading when a slot becomes available. | |
| − | :: | + | :::* After successful download The connection will close |
| − | :: | + | :::* The camera will shut down (or enter sleep mode depending on your settings) |
| − | |||
| − | + | <br\><br\> | |
| − | + | ====Transfer Logs Detail==== | |
| − | + | [[File:xferlogs246.jpg|1000px|]] | |
| − | + | The Transfer Logs window will display detailed information about the files transferred between the Idrive Devices and the Idrive Base Station. | |
| + | |||
| + | '''The following information about transfers is available in the logs:''' | ||
| + | |||
| + | ::* Detailed Log (Click Gear for more Details about the transfer) | ||
| + | |||
| + | :::- [[File:greengear246.jpg|25px|]] All events Transferred | ||
| + | :::- [[File:yellowgear246.jpg|25px|]] Transferred was interrupted before completion | ||
| + | ::* Transfer Type | ||
| + | :::- [[File:wifiicon246.jpg|25px|]] Transfer from WiFi network | ||
| − | + | :::- [[File:usbicon246.jpg|25px|]] Transfer from Import (Import details '''[[Idrive_Control_Center_2.0_User’s_Guide#Import|Here]]''') | |
| − | = | + | ::* Vehicle assignment '''<span style="color: red">(a Vehicle MUST be assigned to the Device for events to be reviewed)''' |
| − | + | ::* Device serial number | |
| + | ::* Router (Access Point name or MAC ID the transfer come over) | ||
| − | + | ::* Start date (Beginning of transfer) | |
| − | + | ::* End Date (End of transfer) | |
| − | + | ::* Time (Total Time of Transfer) | |
| − | + | ::* Total Events | |
| − | + | ||
| − | + | ::* Transferred Events (successfully transferred and verified) | |
| − | |||
| − | |||
| − | |||
| − | |||
| − | |||
| − | |||
| − | |||
| − | |||
| − | |||
| − | |||
| − | |||
| − | |||
| − | |||
| − | |||
| − | |||
| − | |||
| − | |||
| + | ::* Pending Events (Number of Events remaining on the device) | ||
| − | + | ::* Total skipped wire events (download of wire events is optional) | |
| − | + | ::* Max Rate – Highest wireless transfer rate | |
| − | + | ::* Min Rate – Lowest wireless transfer rate | |
| − | + | ::* Avg Rate – Average transfer rate | |
| − | |||
| − | |||
| − | |||
| − | |||
| − | |||
| − | |||
| − | |||
| − | |||
| − | |||
| − | |||
| − | |||
| − | |||
| − | |||
| − | |||
| − | |||
| − | |||
| − | |||
| − | |||
| − | |||
| − | |||
| − | |||
| − | + | ::* Conn. – (number of connections attempted for the device) | |
| + | The results of your search can be sorted by any criteria by clicking on the appropriate column head. | ||
| − | + | '''Note: Event Transfer logs older than one month will be deleted automatically''' | |
| + | <br/><br/><br/> | ||
| + | '''End of Section''' | ||
| − | <br | + | [[Idrive_Control_Center_3.0_User%E2%80%99s_Guide#Control Center 3.0 Dashboard View|Back To Dashboard]] |
| + | ---- | ||
| + | <br\><br\><br\><br\> | ||
| − | == | + | ===Vehicles-Device-Events Settings=== |
| + | [[File:15.vehicle.devices.events1.jpg|thumb|750px]] | ||
| − | + | Vehicles-Device-Events Settings is used to control, display or customize the settings for the Idrive X devices in your fleet. | |
| + | Changes can be made to any or all of the devices depending on your selection. | ||
| − | + | When opened the current settings for vehicle(s) at your location will be displayed. in a detail column format displaying every event type and trigger configuration including LED behaviors for that event type | |
| + | '''Device(s) without a vehicle assignment will be greyed out and cannot be modified.''' | ||
| − | + | [[File:15a.vehicle.devices.events1.jpg|1200px]] | |
| + | |||
| + | <br\><br\> | ||
| + | '''Resolution, Sound and Sleep''' | ||
| + | [[File:15bb.vehicle.devices.events.jpg|right|750px]] | ||
| − | + | * Verify there is a vehicle name assigned to the device, if not make an assignment | |
| + | * Default resolution is 1024 X 768 (and is selected for optimum event clarity and speed of downloads) | ||
| + | * Sleep mode is set to default of 30 minutes after ignition is turned off and camera has completed WiFi download (or attempted); Max sleep time is 1440 min = 24 hours | ||
| + | ::- During Sleep, a camera can be triggered at a much lower G-Force (vehicle is at rest) and the other triggers can activate a recording just as if the camera was awake | ||
| − | + | * Sound and Inside Camera options are defaulted to ON | |
| − | + | <br\> | |
| − | + | '''Note: Always click Save or Save and Return from the function Buttons below before changing to the next tab or exiting''' | |
| − | + | <br\><br\><br\><br\><br\><br\> | |
| − | : | + | [[File:15bc.vehicle.devices.events.jpg|right|750px]] |
| + | '''Shock Event''' | ||
| − | + | Having 3 accelerometers, the G-Force at which a camera can sense shock to create an event (which is set in Fleet Manager>Manage my Vehicles) can be configured to: | |
| − | + | * Turn left LED RED during the triggered G-Force (making the driver aware of his/her driving habits and behaviors), or unchecked for no LED change during a shock Event trigger | |
| + | * Event Lengths can be set from 4 seconds to 30 seconds (the event center will be the trigger) | ||
| + | * Sleep G-Force is set to .30 by default (in nearly all cases this is the best setting) | ||
| + | * Optionally Idrive Support can enable the Client users to have access to the select three axis configurations (Forward, Lateral and Vertical) as needed | ||
| + | <br\> | ||
| − | + | '''Note: Always click Save or Save and Return from the function Buttons below before changing to the next tab or exiting''' | |
| + | <br\><br\><br\><br\><br\><br\> | ||
| + | [[File:15bd.vehicle.devices.events.jpg|right|750px]] | ||
| + | '''Yellow Wire Events''' | ||
| − | + | Typically used to connect to a constant 12VDC+ that senses the voltage drop as the dome/interior light(s) are activated (usually from a door opening). Each vehicle may operate the interior lighting in various manners, a voltage meter should be used to test the circuit prior to connecting) | |
| − | + | * Left LED RED during door activation | |
| + | * Event Length 4-30 seconds | ||
| + | * Yellow Wire Event name (selectable options from drop down menu); This is the type of event as displayed in the Event Viewer | ||
| + | * Allow WiFi Transfer | ||
| + | ::- If checked every door event captured will transfer to the system (not recommended) | ||
| + | ::- Events will be kept on the Camera storage media and can be removed using the USB thumb Drive provided with the system | ||
| + | ::- Yellow Wire Events will be automatically deleted off of the Camera after 1-7 days (selectable) | ||
| − | + | <br\> | |
| − | + | '''Note: Always click Save or Save and Return from the function Buttons below before changing to the next tab or exiting''' | |
| − | + | <br\><br\><br\><br\><br\><br\> | |
| − | + | [[File:15be.vehicle.devices.events.jpg|right|750px]] | |
| + | '''Blue Wire Events''' | ||
| − | + | Designated for connection to the provided Panic Button within reach of the driver | |
| − | + | * Left LED RED during Blue Wire (Panic) activation | |
| + | * Event Length 4-30 seconds | ||
| + | * Blue Wire Event name recommended to select "Panic" (selectable options from drop down menu); This is the type of event as displayed in the Event Viewer | ||
| + | * Allow WiFi Transfer (recommended) otherwise will be kept on the Camera storage media and can be removed using the USB thumb Drive provided with the system | ||
| + | ::- Blue Wire Events will be automatically deleted off of the Camera after 1-7 days (selectable) (recommended to transfer via WiFi) | ||
| − | |||
| − | + | <br\> | |
| − | : | + | '''Note: Always click Save or Save and Return from the function Buttons below before changing to the next tab or exiting''' |
| − | + | <br\><br\><br\><br\><br\><br\> | |
| − | [[File: | + | [[File:15bf.vehicle.devices.events.jpg|right|750px]] |
| + | '''Green Wire Events''' | ||
| + | Designated for connection to 12VDC+ rising trigger (e.g. Back up light circuit or Taxi Meter, etc) | ||
| − | + | * Left LED RED during Green Wire activation | |
| + | * Event Length 4-30 seconds | ||
| + | * Green Wire Event name recommended to select "Back up, Taxi Meter, Etc" (selectable options from drop down menu); This is the type of event as displayed in the Event Viewer | ||
| + | * Allow WiFi Transfer (recommended) otherwise will be kept on the Camera storage media and can be removed using the USB thumb Drive provided with the system | ||
| + | ::- Green Wire Events will be automatically deleted off of the Camera after 1-7 days (selectable) (recommended to transfer via WiFi) | ||
| + | <br\> | ||
| + | '''Note: Always click Save or Save and Return from the function Buttons below before changing to the next tab or exiting''' | ||
| + | <br\><br\><br\><br\><br\><br\> | ||
| − | + | [[File:15bg.vehicle.devices.events.jpg|right|750px]] | |
| + | '''Periodic Event''' | ||
| − | + | * Trigger Enabled / disabled | |
| + | * Select left LED RED (checked) during event or unchecked for NO LED indication of trigger | ||
| + | * Event Length 4-30 seconds (suggested 8 seconds) | ||
| + | * Event Type '''Periodic''' is recommended (based on time below) or completely '''Random''' (no discernible pattern) | ||
| + | * If Periodic is chosen, select interval in minutes | ||
| + | <br\> | ||
| + | '''Note: Always click Save or Save and Return from the function Buttons below before changing to the next tab or exiting''' | ||
| + | <br\><br\><br\><br\><br\><br\> | ||
| + | [[File:15bh.vehicle.devices.events.jpg|right|750px]] | ||
| + | '''Speed Event''' | ||
| + | * Trigger Enabled / disabled | ||
| + | * Select left LED RED (checked) during event or unchecked for NO LED indication of trigger | ||
| + | * Event Length 4-30 seconds (suggested 8 seconds) | ||
| + | * Event Type '''Speed''' (based on trigger threshold) and '''Super Speed''' (based on higher trigger threshold) | ||
| − | + | '''Notes:''' | |
| + | ** Minimum lowest speed is 40MPH and can be modified by Idrive Support upon request | ||
| + | ** Speed is registered in MPH and can be modified to register KM/H by the user; see Settings>My Settings | ||
| − | + | <br\> | |
| − | + | '''Note: Always click Save or Save and Return from the function Buttons below before changing to the next tab or exiting''' | |
| + | <br\><br\><br\><br\><br\><br\> | ||
| − | ''' | + | [[File:15bi.vehicle.devices.events.jpg|right|750px]] |
| + | '''Remote Panic Event''' | ||
| − | + | '''This is a Legacy Device operated by a wireless Panic Button, no longer provided or supported''' | |
| − | + | * Select left LED RED (checked) during event or unchecked for NO LED indication of trigger | |
| + | * Event Length 4-30 seconds (suggested 25 seconds) | ||
| − | + | <br\> | |
| − | + | '''Note: Always click Save or Save and Return from the function Buttons below before changing to the next tab or exiting''' | |
| − | + | <br/><br/><br/> | |
| + | '''End of Section''' | ||
| + | [[Idrive_Control_Center_3.0_User%E2%80%99s_Guide#Control Center 3.0 Dashboard View|Back To Dashboard]] | ||
| + | ---- | ||
| + | <br\><br\><br\><br\> | ||
| − | + | ===Access Point Settings=== | |
| + | [[ File:14.routers.jpg|thumb|700px]] | ||
| − | + | This section helps monitor and control the wireless access that make up your Idrive Wireless Network. | |
| + | When a device connects to the Base Station via WiFi the access point that is used has its MAC Address is registered and displayed in the Router Settings list. | ||
| − | + | When a router connects the first time Status will show "IP not defined" | |
| − | |||
| − | + | Enter a name for the router such as "Lot 1" to define the location. | |
| − | + | Once a router has registered in the list it can be given a name as well as have the status tracked. | |
| + | ::- The router name is replacing the mac address in all Transfer Activities lists. | ||
| − | + | ::- IP address: The status of each router (online/offline) is now verified by Sync Service every 6 hours. | |
| − | + | ||
| − | + | ::- “Find IP by Mac” option trays to automatically get the IP address. | |
| − | + | ||
| − | + | The status column will show the device as "online" or Offline" | |
| − | + | ||
| − | + | Once a router has registered in the list it can be given a name as well as have the status tracked. | |
| − | + | ||
| − | + | At the beginning, all clients will see the router’s list like first line from the image. They/We have to edit each line and add a proper value for each field. | |
| − | + | ||
| − | + | ||
| − | '''To | + | For status checking to work the IP address of the router must be inserted because the service tries to ping the ip address and write the status in the database. |
| − | + | ||
| − | ::* | + | |
| − | + | ||
| − | ::* | + | <br/><br/><br/> |
| − | + | ||
| − | ::* | + | '''End of Section''' |
| − | + | ||
| − | + | [[Idrive_Control_Center_3.0_User%E2%80%99s_Guide#Control Center 3.0 Dashboard View|Back To Dashboard]] | |
| + | ---- | ||
| + | <br\><br\><br\><br\><br\> | ||
| + | |||
| + | =='''Import Detailed'''== | ||
| + | |||
| + | |||
| + | ===Import Events=== | ||
| + | [[File:import_events_302.jpg|thumb|650px|]] | ||
| + | |||
| + | |||
| + | '''The Import View is used to manually transfer event from a device with a USB stick or to restore events to the system that have previously been backed up and deleted.''' | ||
| + | |||
| + | Select Import to open the Import View | ||
| + | |||
| + | Click on the Import tile to open the navigation pane | ||
| + | |||
| + | Navigate to the location on the system where the event(s)are located and select the desired events. | ||
| + | |||
| + | Select open and the events will load into the Control Center. | ||
| + | |||
| + | <br/> | ||
| + | |||
| + | '''Note:''' To identify the event(s) you wish to import please see the event naming convention '''[[Idrive_Control_Center_3.0_User’s_Guide#Idrive_Event_File_Naming_Convention|Here]]''' | ||
| + | |||
| + | <br\><br\><br\><br\> | ||
| + | |||
| + | '''Prepare the USB Thumb Drive'''''' | ||
| + | |||
| + | # Before Starting the process below, verify that you have a only one file on the USB memory stick having the file “idrive” as a “CERT file” type | ||
| + | # if yes proceed to the step 4 | ||
| + | # If the file is missing or you believe it to be corrupt: | ||
| + | ::- Delete the file from the memory stick | ||
| + | ::- Save the file attached to this email and write it to the memory stick in its place | ||
| + | |||
| + | |||
| + | '''Download via USB from X Device Cameras''' | ||
| + | |||
| + | # With the X1 Camera OFF (ignition OFF) | ||
| + | # Place the USB thumb drive with the “gold fingers” toward the windshield into the left side of the camera (assuming the camera is still mounted to the windshield mount) | ||
| + | # Turn the Ignition ON and wait for the LEDS to go Green - Green | ||
| + | # Wait for 1 minute (this allows the X1 Camera time to “hand shake” with the thumb drive and verify the CERT file on the thumb drive is authentic | ||
| + | # Turn the ignition off and the X1 Camera LEDs will change to solid Amber (Yellow) – Green (then the Amber will flicker very fast) | ||
| + | # After the transfer is complete (fast flicker on left LED will go out – right LED may still be Green or out) remove the thumb drive and take back to the Base Station | ||
| + | ::- (this is a 8GB storage stick and can download from 2 full cameras having 4GB storage or many cameras having minimal events totaling under 8GB) | ||
| + | |||
| + | |||
| + | '''NOTES:''' If the Amber LED begins to flash slowly, the USB stick or the CERT file was not recognized and the Camera is now looking for the WiFi Access Point | ||
| + | |||
| + | * If that happens, turn the ignition back ON and wait for the Green Green LEDs | ||
| + | * Remove the thumb drive verify you had the contacts facing the windshield | ||
| + | * Now start at step 1 (make sure the USB Thumb drive is inserted a full ½ inch) | ||
| + | |||
| + | |||
| + | '''Steps to IMPORT Events into the idrive Base Station''' | ||
| + | |||
| + | '''IMPORTANT:''' to IMPORT from a USB thumb drive, you must be physically at one of the idrive Base Stations (not remotely operated) | ||
| + | # At the Base Station insert the USB into the drive computer | ||
| + | # At the idrive Control Center select Import | ||
| + | # Select X1 Events and Data | ||
| + | # Next window select Import now | ||
| + | # Using your mouse OPEN the drive location that the USB thumb drive appears as (e.g. Drive E. or F. etc) | ||
| + | # Select all files (click one file to select it, then hold CTRL+A to select all) | ||
| + | # Select OPEN; the software will upload all recognized events to the Base Station | ||
| + | # Close import window and go to Play and Review and verify Imported files | ||
| + | # After verifying Import, delete all files (except the idrive CERT file) from the USB Thumb Drive using Windows to navigate to the drive | ||
| + | |||
| + | '''End of Section''' | ||
| + | |||
| + | [[Idrive_Control_Center_3.0_User%E2%80%99s_Guide#Control Center 3.0 Dashboard View|Back To Dashboard]] | ||
| + | |||
| + | or | ||
| + | |||
| + | [[Idrive_Control_Center_3.0_User%E2%80%99s_Guide#Idrive_Event_File_Naming_Convention|Files Naming Conventions Detailed Discussion]] | ||
| + | ---- | ||
| + | <br\><br\><br\><br\><br\> | ||
| + | |||
| + | =='''Best Practices Managing the volume of event data'''== | ||
| + | |||
| + | The Idrive system is not a crash recorder; it is a driver behavior modification system. To get the full benefit of your Idrive system events should be regularly reviewed so that the performance of your drivers can be monitored. This will allow for behavior modification measures to be taken to improve safety of your fleet. If there are too many false events this task can becomes much more difficult. Settings are available to help make sure that the cameras are only collecting events that you really want to review. There are several settings available to help control the number and size of events | ||
| + | |||
| + | |||
| + | '''Event Video Resolution''' – Use the lowest setting you require. This will make for faster downloads as well as few issues with system space | ||
| + | |||
| + | '''Download only desired event types''' – Do not download them if they are not being reviewed. If you need a specific event it will still be on the device up to 7 days base on your settings '''[[Idrive_Control_Center_2.0_User’s_Guide#Yellow_Wire_Event|Here]]'''. | ||
| + | |||
| + | '''Event Lengths''' - excessive event length results in larger files which take longer to transfer and review | ||
| + | |||
| + | '''Recommended Event Lengths''' | ||
| + | {| class="wikitable" | ||
| + | |- | ||
| + | !Event Type ||Suggested Length | ||
| + | |- | ||
| + | | Shock event length || 14 Seconds | ||
| + | |- | ||
| + | |Door open event length || 10 seconds | ||
| + | |- | ||
| + | |Alarm event length || 20 seconds | ||
| + | |- | ||
| + | |Wired Panic event length || 20 seconds | ||
| + | |- | ||
| + | |Periodic Event Length || 8 seconds | ||
| + | |- | ||
| + | |Speed Event Length || 8 seconds | ||
| + | |- | ||
| + | |Panic event length || 20 seconds | ||
| + | |- | ||
| + | |} | ||
| + | |||
| + | |||
| + | '''G-Force settings''' - set the correct trigger level for each type of vehicle and driving condition to avoid generating excessive Shock Events. Start with the Vehicle Class as shown in table below and fine tune it from these values based on loading of the vehicles, road conditions etc. | ||
| + | |||
| + | It is recommended that the G-Force setting for all of the vehicles be set very high initially until the correct setting for each type of vehicle has been determined. Once this determination has been made the rest of the vehicles of similar type can then be set to the proper setting. | ||
| + | |||
| + | Select one vehicle of each type and lower the G-force for this vehicle only. Observe the number of events that are captured over the course of the vehicles operation interval and adjust the G-Force level accordingly. Once satisfied with the setting for the test vehicle apply the setting to all the vehicles of that type. | ||
| + | |||
| + | '''Typical G-Force settings based on vehicle Weight''' | ||
| + | {| class="wikitable" | ||
| + | |- | ||
| + | !Vehicle Type || Weight Range || G-Force | ||
| + | |- | ||
| + | | Very Light Vehicle || Under 2,000 pounds || 0.4 | ||
| + | |- | ||
| + | |Compact car || 2,000 - 3,000 pounds|| .5 | ||
| + | |- | ||
| + | |Midsize car || 3,000 – 3,500 pounds|| .55 | ||
| + | |- | ||
| + | |Large car || 3,500 - 4,500 pounds || .6 | ||
| + | |- | ||
| + | |Compact truck & SUV || 4,500 - 5,500 pounds || .65 | ||
| + | |- | ||
| + | |Midsize truck || 5,500 – 7,000 pounds || .7 | ||
| + | |- | ||
| + | |Large truck || 7,000 – 8,500 pounds || .75 | ||
| + | |- | ||
| + | |Very Heavy Vehicle || Over 8,500 pounds || .8 | ||
| + | |- | ||
| + | |} | ||
| + | |||
| + | Delete and Auto Delete Events. Using the Control Center software, the best and most effective measure of protecting your data is maintaining a healthy data storage system. Routinely view and manually or automatically delete events from the Idrive Control Center with a recommended backup solution. This will prevent your Base Station from filling up and missing event downloads. | ||
| + | |||
| + | |||
| + | See '''[[Idrive_Control_Center_2.0_User’s_Guide#Delete_Events_Settings|Deletion Settings]]''' | ||
| + | |||
| + | |||
| + | |||
| + | <br/><br/><br/> | ||
| + | |||
| + | '''End of Section''' | ||
| + | |||
| + | [[Idrive_Control_Center_3.0_User%E2%80%99s_Guide#Control Center 3.0 Dashboard View|Back To Dashboard]] | ||
| + | ---- | ||
| + | <br\><br\><br\><br\><br\> | ||
| + | |||
| + | |||
| + | ===Files and Naming Conventions=== | ||
| + | |||
| + | Files downloaded from an Idrive device are one of two types: | ||
| + | |||
| + | |||
| + | '''GPS tracker files''' | ||
| + | |||
| + | These files contain the minute by minute GPS coordinates of the vehicle as well as ignition ON/Off actions - an example name is 00127B4B5F81.gps | ||
| + | |||
| + | |||
| + | |||
| + | '''Event Files''' | ||
| + | |||
| + | Each Event file contains the video, audio, GPS coordinates and G-Force information for one event. When searching for an event in a backup location you will need to understand the naming convention for the files. | ||
| + | |||
| + | Take for example a this file name 017040000025^180914^111213.2 | ||
| + | |||
| + | {| class="wikitable" | ||
| + | |- | ||
| + | ====Idrive Event File Naming Convention==== | ||
| + | {| class="wikitable" | ||
| + | |- | ||
| + | !Serial Number ||Event Date||Event Time (GMT)||Event type | ||
| + | |- | ||
| + | |017040000025 || 18 Sept 2014 || 11:12:13 GMT || 2 | ||
| + | |- | ||
| + | | Serial Number || Day/Month/Year || Hour/Minute/Seconds || See below | ||
| + | |- | ||
| + | |} | ||
| + | |||
| + | |||
| + | |||
| + | '''Event Types''' | ||
| + | |||
| + | ::* 1= Door | ||
| + | |||
| + | ::* 2= Shock | ||
| + | |||
| + | ::* 4= Power Off (Obsolete) | ||
| + | |||
| + | ::* 8 =Panic | ||
| + | |||
| + | ::* 16 =Wired Panic | ||
| + | |||
| + | ::* 32= Alarm | ||
| + | |||
| + | ::* 130= Periodic | ||
| + | |||
| + | ::* 131= Speed | ||
| + | |||
| + | ::* 132= Super Speed | ||
| + | |||
| + | |||
| + | <br/><br/><br/><br/> | ||
| + | |||
| + | ====D4 DVR Event Naming Convention==== | ||
| + | |||
| + | In order to find a video file from a specific date and time you must understand the file naming convention. A video file name has the following format: | ||
| + | |||
| + | [X]_YYYYMMDD-hhmmss_[ZZZZZZ]_[serial_number].avi | ||
| + | |||
| + | [X] represents a digit used for an internal representation in the DVR firmware | ||
| + | |||
| + | YYYYMMDD represents the start date of the video (4 digits for the year, 2 digits for the month and 2 digits for the day) | ||
| + | |||
| + | hhmmss represents the start time of the video (2 digits for the hour, 2 digits for the minute and 2 digits for the second) | ||
| + | |||
| + | [ZZZZZZ] represents 6 digits used for an internal representation in the DVR firmware. | ||
| + | |||
| + | [serial_number] represents the serial number of the D4 device. | ||
| + | |||
| + | Example: 1_20120419-135053_f001p4_2222D3333V.avi | ||
| + | <br/><br/><br/> | ||
| + | |||
| + | '''End of Section''' | ||
| + | |||
| + | [[Idrive_Control_Center_3.0_User%E2%80%99s_Guide#Control Center 3.0 Dashboard View|Back To Dashboard]] | ||
| + | ---- | ||
| + | <br\><br\><br\><br\><br\> | ||
| − | : | + | =='''Global Center'''== |
| + | [[File:42. Global Center.jpg|right|750px]] | ||
| + | The Idrive Global Center is a temporary copy of a clients most recent events, condensed and placed on the Idrive Cloud servers for 1 1/2 to 2 months depending on the quantity. The origianl files are on the clients Base Station and are owned by the client. These are simply a replica temporarily located here for remote Viewing and Reviewing of Events and GPS. | ||
| − | + | A User signs into the Global Center from any PC with an internet connection at; | |
| + | * Type into your Internet Browser address line - "globalcenter.idriveglobal.com" | ||
| + | * Sign in using your email address and password that you use to sign into the Idrive Control Center Software | ||
| + | * Each user will have the same privileges on the Global Center that they had on the Control Center Software | ||
| + | * If a user signs into the Global Center and performs any views and reviews of events, then his/her Login History can be seen on the Control Center; Settings> Login History | ||
| − | |||
| − | + | '''Dashboard''' - Synced data from the Control Center shows recent data uploaded from the Control Center to the Global Center | |
| + | * If a client has more than one location, each location can be viewed under events and the location tab | ||
| − | + | <br/><br/><br/><br/><br/><br/><br/><br/><br/> | |
| − | |||
| + | [[ File:42a. Global Center.jpg|thumb|750px]] | ||
| − | ''' | + | '''Events''' - Clicking on Events will yield the last history of 3 days, 7 days or you can place an interval search |
| − | : | + | There is an advanced search tab on top that drops down to reveal search features such as: |
| + | * Search by Vehicle Name | ||
| + | * Search by Driver Name | ||
| + | * Search by event type, etc... | ||
| − | + | <br/><br/><br/><br/><br/><br/><br/><br/><br/><br/><br/><br/><br/><br/><br/> | |
| − | |||
| − | |||
| − | |||
| − | |||
| − | <br/><br/> | ||
| − | |||
| − | |||
| − | |||
| − | |||
| − | |||
| − | |||
| − | |||
| − | |||
| − | |||
| − | <br/><br/> | ||
| − | |||
| − | |||
| − | |||
| − | |||
| − | |||
| − | |||
| − | |||
| − | |||
| − | <br/><br/> | ||
| + | [[File:42c Global Center.jpg|thumb|750px]] | ||
| − | + | Clicking on any dual camera image will open the video to play in the browser | |
| + | <br/><br/><br/><br/><br/><br/><br/><br/><br/><br/><br/><br/><br/><br/><br/><br/><br/><br/><br/><br/> | ||
| − | [[File: | + | [[File:42d Global Center.jpg|thumb|650px]] |
| + | Clicking on the Pyramid Icon with the tree bars will allow you to Place comments and Review then save the Event. | ||
| − | + | Every 12 minutes all data is synced back with the Base Station Control Center Software and vise versa | |
| − | + | <br/><br/><br/><br/><br/><br/><br/><br/><br/><br/><br/><br/><br/><br/><br/><br/><br/><br/><br/><br/><br/><br/><br/><br/><br/><br/><br/><br/><br/> | |
| − | + | [[File:42b Global Center.jpg|thumb|750px]] | |
| − | - | + | '''GPS''' - Click on the top tab for GPS and you can view a reduced coordinate version of the Control Center software (so it will load faster) |
| − | + | You must know the date and vehicle to search for as the browser cannot load all the data the Control Center maintains | |
| − | + | <br/><br/><br/><br/><br/><br/><br/><br/><br/><br/><br/><br/><br/><br/><br/><br/><br/><br/><br/><br/><br/><br/><br/><br/> | |
| − | |||
| + | '''End of Section''' | ||
| − | + | [[Idrive_Control_Center_3.0_User%E2%80%99s_Guide#Control Center 3.0 Dashboard View|Back To Dashboard]] | |
| − | + | <br/><br/><br/><br/><br/><br/><br/><br/><br/> | |
Latest revision as of 17:00, 3 April 2023
Copyright Information
This document contains proprietary information that is protected by copyright. No part of this document may be photocopied, reproduced, or translated to another language without the prior written consent of Idrive Global Inc. Copyright © 2023 Idrive Global Inc. This product incorporates copyright protected technology. Use of this copyright protected technology must be authorized by Idrive Global Inc. Reverse engineering or disassembly is prohibited. The information in this document is subject to change without notice...
About the Idrive Control Center 3.0
(Rev 3.4.4 and up)
The Idrive Control Center 3.0 is the new generation of Professional Event Data Recorder management software which allows you to monitor and control all of the devices in your fleet. It has the capabilities to manage all of the data events, personnel, vehicle documents and scheduling. It performs downloads from the vehicles and can be used to review the events.
The types of data that are recorded or downloaded are controlled by the operator using the Idrive Control Center 3.0. This allows the company to manage the number of events that are downloaded or to remove elements from events (audio or inside video) to meet legal or privacy concerns.
The Idrive Control Center allows for the setting of event trigger thresholds and LED behavior for the Idrive devices in the fleet.
Starting the Idrive Control Center 3.0
The Idrive Control Center can be opened by double clicking the Idrive Control Center icon on the Base Station desktop or by selecting it from the Start> All Programs Menu> Idrive Tools> Idrive Control Center3.0
To log into the Idrive Control Center enter your user name (email address) and password. The system defaults are username:admin@admin.com and password: admin.
This user name and password can be managed along with all of the other users in the Fleet Manager section of the Control Center.
If you have forgotten or misplaced your log in information please contact the Idrive Support Team at support@idriveglobal.com
At first login you will be asked to agree to and accept the End License User Agreement to continue...
At login or any time you access the Dashboard you may receive an alert window informing you that you have unassigned Devices.
You can click the "X" to close this window but until you assign the device to a vehicle you will continue to get this Alert at sign in.
The Alert is necessary; unassigned devices will not show up in the Events and Reviews section unless they have a Vehicle Name assigned to the Device.
Control Center 3.0 Dashboard View
After logging into the Control Center the Dashboard view of the control center is opened. This view allows you to quickly navigate to the correct section of the Control Center that your user permissions allow access to. (administrator views are shown in this manual) You can return to this view at any time by clicking on the Dashboard Icon.
Clicking this tile when visible takes you right back to the main Dashboard selection page
Accesses saved Events for viewing and allows Event Scoring and Commenting to be stored in the saved Events Click Here
Access to DVR Videos with ability to clip and save into the Control Center software. Afterward you can Review them and save scores and comments. Click Here
Access to previously downloaded GPS data permits tracking a vehicle by Ignition On/Off times, day and speed plus compilation of stored data to build route reports including addresses and travel times. Click Here
Access to idrive Devices (Cameras), Vehicles (by name, weight, location, etc) and Personnel including those with access to the system and non-access driver's details. Click Here
Access to "on demand" full-color reports based on Vehicles, Drivers, Incidents, Scored Events and specific day. Plus coaching reports for individuals and comparison reports from early system days to present Click Here
View active and recent device transfers by vehicle or device; View and manage active settings for cameras and event lengths; and Router Settings (Access Point - Antenna) Click Here
Import data from sources such as USB sticks, DVRs etc. See the Detailed instructions Click Here
Displays recent transfer activities and transfer log information. See the Detailed instructions Click Here
Always Log Out when walking away from the software, as another user might make comments into an Event, and under your credentials that persons comments would be shown that you made them. There is also a Login History that shows your log in dates and times. For this to be accurate, always remember to sign out.
The Left hand side of the dashboard view has 4 icons with scrolling information on the status of your fleet, drives and system.
Quick access to Events Click Here
Quick access to system devices such as Cameras or DVRs (one level deeper than just Fleet Manager) Click Here
Quick access to your vehicles or personnel (one level deeper than just Fleet Manager) Click Here
Admin Settings, At-a-glance system resources such as Hard Drive space, WiFi health and configuration of data backup plus quick access to these settings
(one level deeper than just Settings) Click Here
Events and Reviews
Events and Reviews is a full featured player and review module that plays your events in full motion and sound showing both front and rear facing cameras simultaneously and permits complete user administration of the received data to comment into and save the event. Full GPS mapping, speed and G-Force values are viewable and coincide to every visible and matched piece of data for the event.
Events that have not been viewed, reviewed or scored
Events that have been reviewed and marked as an INCIDENT receive a high score of 4 and can be quick searched as Incidents
Events that have been viewed and reviewed and as such marked with a high score of 3 or 4
Events that have been viewed and marked as reviewed (with out any score)
Events ALL (viewed, reviewed, not viewed, scored, not scored, Incidents, etc.)
Advanced Search opens the fly-out menu for future searches based on previously viewed and marked type of event, event behavior, vehicle, driver, day, time, speed, etc...
Extended Video
Events displaying the EV icon notify the user that Extended Video is captured and available for download from the Camera storage
Read more about Extended Video in the Detailed Discussion below
<br\><br\><br\><br\><br\><br\><br\><br\><br\><br\><br\><br\><br\><br\><br\><br\>
End of Section
or
<br\><br\><br\><br\><br\>
Merge - DVR
Also Known as DVR Digital Video Recorder, MDVR Mobile Digital (or Data) Video Recorder
- Up to 4 simultaneously recording cameras the DVR is saving Video and optional Audio to a Hard Drive in a mobile Hard Drive DVR. Typically up to 250 hours of constant 4 channel recordings can be saved on the DVR hard drive and videos can be imported, viewed and saved in the Idrive Control Center software.
- DVR events can be created and saved, then specific clips can be created of up to 30 seconds from a longer segments of video; showing the most important segment of the video in the center or beginning of the 30 second clip.
- After saving the clip into the idrive Control Center the Video Event can then be viewed, reviewed and marked with specific behavior and user comments just like the X1 and X2 Video Events review section.
<br\><br\><br\><br\><br\><br\><br\>
End of Section
or
<br\><br\><br\><br\><br\>
GPS
GPS coordinates are saved and downloaded to the Idrive Control Center after each device connects via WiFi. Coordinates can be viewed in an interactive map displaying the location, speed and time that the coordinate was captured.
Converged data is displayed to create a time report showing Journey time, Idle time and Parking time. Click Here
Selections can be made based on received and stored data from previous downloads.
<br\><br\>
GPS activity from the last 3 days
<br\><br\>
GPS activity from the last 7 days
<br\><br\><br\>
Select a specific 7 day range from GPS history logs Click Here
<br\><br\><br\><br\><br\><br\>
<br\><br\><br\><br\><br\><br\><br\><br\><br\><br\><br\><br\><br\><br\><br\><br\><br\><br\><br\><br\><br\><br\><br\><br\>
End of Section
or
<br\><br\><br\><br\><br\>
Fleet Manager
Fleet Manager is used for management of information about your fleet operations as well as controlling the behavior of Idrive devices.
List of all Vehicles in the Idrive Control Center that already have or need Idrive devices assigned to them Click Here
<br\><br\><br\>
List of Personnel in the Idrive Control Center including users at varying levels of Control Center Permission and non-users such as drivers that can later be assigned and searched in Events and Reports Click Here
<br\><br\><br\>
X Devices are varying models of Idrive Cameras such as X1, X1P and X2. Each having increased capabilities of the previous version and all viewable for configuration Click Here
<br\><br\>
D4 or DVR Devices are multichannel simultaneous and continuous recording units that can assigned to the Control Center. Afterward videos can be viewed and clips stored in the Control Center for viewing and review purposes Click Here
<br\><br\><br\><br\><br\>
End of Section
or
<br\><br\><br\><br\><br\>
Reports
Designed to condense all the data on events, drivers, vehicles and incidents into one all inclusive report or individual reports for your fleet supervisor to manage your fleet's daily operations and compare them to previous dates.
Coach reports can be generated for prevention of future incidents based on driver behaviors in scored events. <br\><br\>
Review reports provide a detail into the numbers of reviewed events <br\><br\>
Incidents are easily viewed in detail <br\><br\>
Scored events at a glance providing a graph view <br\><br\>
GPS reports show detailed journey, distance, idle and speed so you can get a better handle on fuel needs and waste elimination <br\>
Detail of entire fleet in one conclusive report
<br\><br\><br\><br\>
End of Section
No detailed discussion necessary
<br\><br\><br\>
Settings
Quick access to Transfer Activities by Vehicles (those vehicles pre-assigned by the client into the system with an associated Idrive Camera serial number)
Quick access to Transfer Activities by Devices (Idrive Cameras pre-assigned by the Idrive into the system with or without an associated client vehicle name assignment)
Quick access to the configuration of Idrive Cameras' configuration in relationship to the client software. Displaying and allowing customization of Event recording lengths, LED behaviors in relationship to triggers and G-Force interactivity
Check the health of your outdoor Access Points (AP). Plus the ability to "name" your AP locations; e.g. Wash-bay, NE Parking, Tower 7, Fuel Station, etc. Naming your AP locations will allow you to optimize your vehicle parking for the best downloads
Customize the look of your Control Center with color templates from recent Windows colors and contrast. Decide to use Local Date or UTC, choose between MPH or KM/H and allow or disallow windows transition effects
Manage your storage and backup settings for the system. Can be set to Auto-Delete your oldest events that are not marked as Incidents. A/V settings for turning off inside Camera and Audio off fleet wide
Administrators can view the frequency and length that their employees (who are assigned to system responsibilities) have signed into the software and at which location
End of Section
or
<br\><br\><br\><br\><br\>
Import
On occasion a vehicle may become disabled and not return to the client location where it would connect to the Access Point and download its Events and GPS Data. In these situations a secure method is provided to safely download the files from a camera at a remote location onto a Micro USB Thumb Drive.
Afterward, the Events and GPS Data can be imported into the Idrive Control Center via the USB and software sections named IMPORT.
Imported Events and GPS Data can then be viewed like any other data in the Play and Review Section.
There are "soft Keys" found on the bottom left of the window representing two methods to Import, Please see the Import Detailed section to select what works best for you.
End of Section
or
<br\><br\><br\><br\><br\>
Transfer Activities
View the status and current activity of WiFi downloads from the cameras installed and assigned to your vehicles. Downloads take place after they arrive back in your parking lot and ignition-off near the designated Access Points
View transfer activity from the last 3 days
<br\><br\>
View transfer activity from the last 7 days
<br\><br\><br\>
Select a specific 7 day range from transfer history logs
End of Section
or
<br\><br\><br\><br\><br\>
THIS ENDS THE ABBREVIATED VERSION OF THE SOFTWARE MANUAL
Below is a detailed discussion of each Software Tile and fly-out window in the Control Center Software
In each section is a "Click here" link that will take you to the detailed discussion for that section.
After reading a section click the "Back To Dashboard" link provided at the end to return; then scroll to the next area that you wish to read
<br\><br\><br\><br\><br\>
Detailed Discussions
<br\><br\>
EVENTS and REVIEWS - Idrive Player
Selecting a dual image thumbnail of the event you wish to view will populate the main viewer and the map section below
The player buttons are similar to those you would find on many video players and are as follows
<br\><br\>
- Go to beginning
- Go to previous second
- Go to previous frame
- Play/Pause
- Stop
- Go to next frame
- Go to next second
- Go to end
- Go to Event Trigger
- Snapshot (captures both camera images, GPS Map and Speed Chart to export as jpg image to file location of your choice
<br\><br\>
<br\><br\>
Map - Speed Chart - G-Force Chart
The default viewer window displays an interactive Map; selectable Viewer windows are:
- Speed Chart
- G-Force Chart
Map Graphic panel displays the information about the location of the event.
• Pan the map by "click and drag".
• Zoom in / out using the mouse scroll wheel.
• You can also use the pan and zoom buttons in the left upper corner.
Speed Graphic -shows the speed of the vehicle over time during the event.
G-Force Graphic -shows the G-Forces levels for the vehicle over the time period for the event. Forward, Lateral and Vertical Axis may be selected for display.
Note: This graphic is only available with the Idrive X1P cameras with Firmware version 10.5 or higher.
- By default, the vertical G-Force is not visible.
- The horizontal red line represents the trigger G-Force (in many cases, the graphic shows 2 horizontal lines: one for positive trigger and another for negative trigger). In this example, the positive line is higher than the max positive value of the G-Forces, so it is not displayed on the graphic.
- The vertical red line represents the trigger moment (not necessary the max value).
- The vertical green line represents the current second of the event. When you play the event, the line is changing the value (similar with speed graphic / map). Also, you can drag the green line and the player will seek to the most appropriate second.
Note: Each second has around 300 values on each axis (you can see the values if you click on “More Info” link from the player). For a “single core” computer, the animation of the G-Force graphic produces a significant delay between sound and images! (Because of the number of values) For those computers, the green line is not displayed! So, in order to see the “animation”, you must have at least a dual core computer!
Viewing Options
Click the right mouse button over the desired image to select viewing options.
- Play Full Screen
- Expand Video
- Zoom Image
- Sharpen Image
- Video Effects
- Playback Speed
- Export Event
- Email Event
Expand Video Mode
- This is the same as full screen mode except both views are enlarged side by side
- Viewer controls and shortcuts are the same as in Full Screen Mode
Zoom Image Mode
- You can select the location to zoom into by selecting it with the left mouse button
- Clicking the right mouse button will bring up the zoom level menu
Navigation when zoomed in on and image is accomplished:
- By the sliders at the side and bottom of the image
- By dragging the “frame selection window” image inside the small zoom image window
- When finished with the zoom image, press ESC on your keyboard to escape zoom window
Play Full Screen Mode
- You can view an event in full screen mode by right clicking on the desired view from the event.
- When in full screen mode the video controls are displayed by clicking in the video frame.
Shortcuts in full screen mode:
P – Play
S – Stop
Home – Go to first second
End – Go to last second
Right Arrow – Go to the next frame
CTRL + Right Arrow – Go to the next second
Left Arrow – Go to previous frame
CTRL + Left Arrow – Go to previous second
C – Toggle between the driver side and road side views
H – Hide the second camera window
ESC – Exit full screen mode
By clicking the Advanced Search tile the screen displays an extensive search window. Here you can select:
- Event ID
- Specific dates and or times
- search by Record date or download date
- Event Status or Score
- Only New or Sleep events
- Fleet Search by Vehicle, Driver, Location, group or device
- Speed
- G-force
Event Types
- Shock, Periodic, Panic, Speed, etc
Reviews (only after previously clicking and saving a Review can you the search the following)
- Adverse Conditions
- Event Trigger
- Risky Actions - Fundamentals
- Risky and Other Actions, etc.
<br\><br\><br\><br\>
Left Clicking the Maximize/Minimize icon will fly-out the details view of the events to be viewed
<br\>
<br\><br\><br\><br\><br\><br\><br\><br\><br\><br\><br\><br\><br\>
Left clicking any icon will expand for extensive data views, column sorting and multiple selections for printing or manually deleting
<br\><br\><br\><br\><br\><br\><br\><br\><br\><br\><br\>
Status Icons Definitions
Not Yet Viewed – no explanation necessary
Viewed – when an event is viewed, the icon will change to the “eye”
Reviewed – once reviewed, scored and saved (see window image next page)
Incident – once reviewed and “Incident” selection is made and saved (see window image next page)
Important Note: Always check the "Incident" box to ensure the event is not automatically deleted by the software. Events tagged with Incident will Never be auto deleted from the system (See Also: Deleting Events)
Events saved with any of these specific parameters or selections can be advance searched quickly by a user to perform driver reviews or needing to quickly locate an event for corporate or insurance purposes
With the Expanded view a user can select a function via the icons inline with the event or by the fixed function buttons at the bottom of the Event window
Review an Event
Selections made will be stored within the Event and can be reviewed whenever the event is opened.
At a glance, the Review icon shows the score previously saved for that Event.
The icon variables in the Search Window show a rating of "NO SCORE, 1, 2, 3, or 4"
- 1 being the least severe
- 4 the most severe
The Reviews Window provides the most frequent Event Triggers:
- Adverse Conditions
- Risky Actions (Fundamental and Other)
- Root Cause (Distractions and Poor Awareness)
These pre-selectable items have a base Event Score that will accumulate for the total Event Score when saved.
Note: Before saving you can lower or raise the overall Event Score this will over-ride the system pre-selected Review Score
Note: The G-Force graphic will only populate when Reviewing X1-P or higher cameras
Optionally you can attach a file as a written report
- Click on the Attachments tab and choose the path the file you wish to attach to the event
- After you make a selection click the Save file button
Export an Event
- Click the Export icon and the Export Events form will open
- Select the options and click Export
Export file options
- Output folder location
- Enable Sound
- Show outside camera
- Show inside camera
Export file format
- H.264 *(see format info below)
- Uncompressed AVI (large files)
- Original Format
- Frame by Frame
Export file video Resolution
- 400x300
- 800x600
About file formats
- Ucompressed AVI - An industry standard format however the file size is very large.
- H.264 or MPEG-4 Part 10, Advanced Video Coding (MPEG-4 AVC) is a video compression format that is currently one of the most commonly used formats for the recording, compression, and distribution of video content. The final drafting work on the first version of the standard was completed in May 2003, and various extensions of its capabilities have been added in subsequent editions.
- -A free “open-source” Media player can be downloaded from VideoLan at http://www.videolan.org/vlc
- Original Format - Proprietary format that can only be viewed with Idrive Software (not recommended)
- -Full feature event file as downloaded from the X1 device
- -Viewable only on Idrive Control Center or Idrive Direct View software
- Frame by Frame -Individual jpg pictures of each frame in the event
- -8 Frames per second of video (4 from the inside camera & 4 from the outside camera)
- -Files named by second, frame number, camera. Example: S_03_f_2_in.jpg (3rd second, 2nd frame, inside camera)
| Comparison of Export File Sizes | for 30 Second Event | ||
|---|---|---|---|
| Export Type | Resolution | File Size | Note |
| H.264 | 400 x 300 | 0.9 MB | |
| H.264 | 800 x 600 | 2.55 MB | |
| Uncompressed AVI | 400 x 300 | 83.3 MB | Too Large to email |
| Uncompressed AVI | 800 x 600 | 330 MB | Too Large to email |
| Original Format | N/A | 7.9 MB | Can only viewed with Idrive Software |
| Frame by Frame | N/A | N/A | Produces pictures rather than video |
Select the appropriate file format and size for Email, DVD, Thumb drive ETC.
Lock / Unlock an Event
On occasion you may wish to secure an Event so it cannot be viewed. Once the event is locked a password is required to open it for viewing.
- Locking an Event on the Control Center will also cause it to be locked on the Global Center as well
- Only the User(s) (having privileges and knowing the Lock Code) will be permitted to View a Locked Event
- Only the User that Locked the event can remove the lock.
- Lock codes can be alpha numeric characters up to 10 digits in length
Once an event is locked the "Play" Icon showing the Event preview image is replaced with a Lock icon in both the regular Event screen list and the maximized Event screen list
To Unlock the Event click the UnLock button at the bottom and insert the password and click unlock
Deleting Event(s)
It is your data, once deleted there is no way to restore an event without a Backup!
More details on "Auto Delete" settings are available; see Admin Settings
Delete events from the Control Center “Events & Review” window containing the events lists. You can select single or multiple events to delete.
Single Event Delete
- Select an event by left clicking the Status Icon or Event Type (clicking the thumb nail images causes the event to open on screen)
- Left mouse click the “Delete selected event(s)” from the three Function buttons below
- The Control Center identifies the backup location (if pre-selected) and presents 3 options:
- - Perform Delete
- - Perform Delete with backup (visible only if the backup location has been set)
- - Close (closes window and no delete function was performed)''
Note: if the selected item to delete is marked as an Incident or Locked or Scored (1,2,3 or 4) then the appropriate options will populate in the Deleting Events Window allowing or blocking the delete operation
Multiple Events Delete (two ways to select multiple events)
- Hold the “CTRL” key down on your keyboard, then
- Simultaneously left mouse click each of the event icons you choose to delete (Windows multiple selection)
OR
- Hold the “SHIFT” key down on your keyboard, then
- Simultaneously left mouse click a start event and an end event
- All the events including the start and end event will be selected (Windows consecutive selection)
THEN
- Left mouse click the “Delete selected event(s)” from the three Function buttons below
Note: if the selected items to delete are marked as an Incident or Locked or Scored (1,2,3 or 4) then the appropriate check box options will populate in the Deleting Events Window (see above) allowing or blocking the delete operation on the selected items
The Control Center identifies the backup location (if selected) and presents 3 options:
- Perform Delete
- Perform Delete with backup (visible only if the backup location is pre-specified)
- Close (closes window and no delete function was performed)
Additional Notes:
• In order to have the option “Perform Delete with backup” you must have this preset in the Control Center Dashboard under:
- "Settings > Admin Settings > “Automatically delete events” tab > Backup"
• The Delete selected event(s) option is enabled only for Admin users or the users having full permissions on "Play Events" module
Important consideration for those users that operate their idrive Base Station in conjunction with mapped network drive(s) as the backup location:
• The “Delete feature with backup to a “network drive” will only be active when a user is logged in having credentials that map the network drive to the idrive Base Station
• For those Base Stations having an additional internal HDD or an external HDD (USB or eSata) that is physically connected to the idrive Base Station, then the Auto Delete with backup can perform because the drive is still connected even after logoff
It is your data, once deleted there is no way to restore an event without a Backup!
Attachments
Selecting the Attachments function button allows you to link into an Event a file of your choosing from most of the popular windows files extensions, such as:
- Image (picture) files
- Word, Text and PDF files etc.
You can upload a new file to the software at any time to attach it to an event (max 5MB size)
<br\><br\><br\><br\><br\><br\><br\><br\><br\><br\><br\><br\><br\><br\><br\><br\><br\><br\><br\><br\><br\>
EV - Extended Video
Events displaying the EV icon notify the user that Extended Video is captured and available for download from the Camera storage
<br\><br\>
With the Expanded view a user can select a function via the icons inline with the event or by the fixed function buttons at the bottom of the Event window
<br\><br\><br\><br\><br\><br\>
To place a request for an EV Extended Video;
- select the EV icon for the event of your choice OR
- click on the grey button below that states EXT. Video Requests
- when the next window opens; make your selection from the bottom left side to submit the request for the Extended Events
- This will take place the next time the camera connects via WiFi
<br\><br\><br\><br\><br\><br\><br\><br\><br\><br\><br\><br\><br\><br\><br\><br\>
You may also retrieve EV "based on date and time" using the option for “Specific Date” EV retrieval
- If these files still exist on the camera, then a WiFi connection will retrieve the EV
<br\><br\><br\><br\><br\><br\><br\><br\><br\>
End of Section
<br\><br\><br\><br\><br\><br\>
DVR Usage and Management
DVR Videos and Events
Files must be transferred in advance from the DVRs to the Idrive PC (where the Control Center Software is installed). These files are entirely too big to be transferred Via WiFi. Use either the network port on the front of the DVR or remove the hard drive and connect it to the Base Station. Please see the Idrive D4 Installation and Operation guide for more details.
Selection of DVR Events for Import
Once the DVR files have been transferred to the Idrive Base Station they can be imported into the the Idrive Control Center as event files.
- Launch Control Center
- Select DVR
- Type or select the path where the DVR files are stored. (Typical Backed up files from an Idrive D4 DVR will be located in C:\Users\Documents\SDFile\Record - then select the folder for the "YYYYMMDD")
- Select Check DVR Path function button at the bottom
The available files from that DVR path will populate the left column above and the Serial Number of the DVR will appear in lower left side of the window
Note: You must have a serial number assigned to a vehicle, use the drop down vehicle place holder to assign these videos to what you will perform next
- You can select a video to preview before creating an DVR Event by hitting the play button on a selected video
- Selecting the Go To Frame function button from the bottom will open a window allowing you to search based on the video start date and time. The application tries to identify the video from the list that matches your criteria. If found the video is loaded in the DVR Player tab and the application seeks the video to match your input time. If the application is unable to find a video matching your criteria, it will return an error message.
Once the file(s) selection, date and time has been made you can then Create DVR Events from the function button at the bottom
Backup/Delete Selected
Backup
The viewed DVR files are not presently imported into the system, they are being read from a remote directory on the PC or from an external attached DVR Hard Drive (HDD). If you wish to have them permanently stored in the PC through the Control Center software;
- Click the function button for Backup/Delete selected
- Choose you file location
- Click Backup
the original file will be stored in the software so it can open it on demand in future without having to manually attach the DVR HDD or search for the files in other directories
Delete
Self explanatory
Create DVR Events
- From the previous screen, Click the Create DVR Events (while on the current loaded video)
- This window opens and gives you the ability to create a 30 second extracted video event with two options:
- Current second will become the center of the video
- Current second will start the event
- After your selection above, click the Create event button and the Control Center Software will split the video and create the DVR Event
- Your new DVR Event will populate the lower left window and you can double click it to view it
- If you are happy with your production you can exit
- If you wish to delete it and start over, select the left back arrow to go back on window , then click Delete event and confirm delete
View DVR Events
From the main DVR window select View DVR Events from the function buttons at the bottom of the page
When this page loads you can select from the available Event Icons on the right, then:
- View them as you would an X-Camera Event
- Review then with your comments
- Scores as well
You can Maximize the events window by clicking the Max/Min icon in the upper right side of the event column window to reveal the option icons to:
- Play
- Review (Comment and Score)
- Export
- Email Keep in mind the original files were too large to email, but the clipped event of 30 seconds can be attached to most email clients because of its compressed reduced size
- Lock
The Function buttons are also available at the bottom for quick access
End of Section
<br\><br\><br\><br\><br\>
GPS Tracker (Vehicle or Driver Views)
GPS Tracker has two modules for viewing GPS data by Vehicle or by Driver
Both Vehicle View or Driver View modules look similar; the only difference is the vehicle name is populated rather than the persons name.
GPS Tracker displays information about a vehicle/driver location selectable into Vehicles or Drivers view .
GPS Data includes:
- Ignition triggers both on and off
- Location of events triggers (viewable in the GPS window)
- Speeds and times recorded
The GPS Tracker module uses the GPS data file that is downloaded from the X-device along with the events. After each transfer, the GPS file is removed from the device and a new file is generated when the vehicle’s ignition is turned On. If no transfer occurs the current GPS file will continue to be appended with coordinates so that no data is lost.
Make a selection form the provided data and click the function button at the bottom for Map and more details for selected vehicle or View All GPS Events (more on GPS Events below...
Once selected, the the detailed data for the GPS file is revealed.
- Each time and coordinate are converged into a green square on the map
- When you click on a specific time coordinate from the left column coordinate list
- that location is shown on the map as a yellow square and centered in the map.
- Each marker point shows the location in the selected intervals
- The Detailed View shows vehicle/driver information in 30 second intervals
- The Standard View shows the vehicle/driver information in 10 minute intervals
- A vehicle MUST be assigned in advance of the data download to the device for the GPS tracking tool to function
- A driver MUST be assigned in advance of the data download to the vehicle/device for the GPS tracking tool to function
The default player window shows the Time Report in the lower section of the window displaying:
- Journey time in hours, minutes and seconds (percentage of over all time)
- Idle time in hours, minutes and seconds (percentage of over all time)
- Parking time in hours, minutes seconds (percentage of over all time)
GPS Mapping
A Selected GPS time is highlighted as a yellow block and centered on the map indication the vehicles / driver location at that moment
Location, Ignition records and Event Triggers are displayed in the map window
Map options
- Show only Events - only event triggers will be shown on the map
- Draw Route on Map: displays a pink line over the route on the map
- Show info on map: to display the additional info textbox on the map
- Map zoom level - sets the zoom level of the map
All options can be changed to any required needs at the time of viewing.
<br:/><br:/>
Optional windows are Speed graphic and Route report...
Speed Graphic Displays a graphical correspondence to the entire travel time associated directly to the coordinates displayed from the GPS coordinate column
Route report
Displays times, addresses (beginning and ending), Journey time, Idle time, Parking time, Max speed, and Distance
GPS Tracker Search
Make a selection of either Vehicle View or Driver view and select the interval of days from between Today, Last 3 Days, Last Week (7 days) or a Custom Interval in which the Calendar menu will fly out and allow you to select a 7day interval from your systems history logs.
Select a Date range (up to 7 days) using either the calendar view; then click “Apply”
To search for a specific vehicle or driver type the vehicle or driver name in the field and click "search"
After the Date(s) selection is made, GPS and Event data will populate the Info Report and the GPS List columns. Vehicles or Drivers with valid GPS in this time period will be displayed in BOLD text.
Creating and reviewing a GPS Event
Multiple selection of GPS coordinates to “Show Only” those Events OR to Create a GPS Event
- Select multiple GPS coordinates:
- Select a starting coordinate then Shift+ left click the desired ending coordinate (all coordinates in between will be selected)
- OR Hold Ctrl+ Left click each desired individual coordinate(s) (other coordinates will be omitted)
- Then select the 'Create GPS Event from the Function Buttons below
The multi-selected coordinates will highlight in light cream color showing the GPS Event that will be created from the those coordinates.
A GPS Event may or may not have video captured during the coordinates that were selected; rather, a GPS Events is a grouping of GPS coordinates that can be commented on and saved for future reference or driver coaching.
Reasons for GPS Events creation
- Residential complaint about company vehicle driving fast through neighborhoods
- Unexplained deviation from set route for a company vehicle
- Sudden increase in fuel usage and GPS shows unplanned route paths
Once created, the GPS Event can now be saved in the system as that grouping so it can be searched by vehicle or driver, (if the driver had been selected during creation of the GPS Event).
The GPS Event can be reviewed and scored by the Safety Manager for the company by the scoring system and selected behaviors from the review screen of the GPS Event.
Other Options
Speed Graphic
Time Report
This report displays
- Journey Time - Green Data
- Idle Time - Red Data
- Parking Time - Grey Data
- The current GPS location is visible on the graphic via the vertical Blue line
Route Report
The Route Report prepares a comprehensive assembly of the data which then can be printed or exported as a PDF or other text management formats:
Export/Print
End of Section
<br\><br\><br\><br\><br\><br\><br\><br\><br\><br\><br\>
FLEET MANAGER - Detailed
Manage Your Vehicles
This section is used to create and manage information and settings for:
- Vehicles in your fleet
- Vehicles for Organization
- Location or Group/Department will be displayed depending on your selection in the Organizational Tree
Note: The portion of the Organizational tree that can be viewed by each User is controlled by user’s permissions. This way the scope of how much of the organization's location(s) a user will see is controlled and only Vehicles in that location(s) will be seen.
<br\><br\>
Detailed view including: * Vehicles name, * Department, * X Device Serial #, * D4 Device (Mobile DVR - if assigned), * Last connection date and time (X Device only), * Weight, * G-Force and * Driver (If assigned)
Default setting is 7 days for Overdue vehicles (programmable under Edit Vehicle
If programmed will show license(s) when expiration alert is set for a specific vehicle
If programmed will show Inspection(s) when expiration alert is set for a specific vehicle
If programmed will show Insurance(s) when expiration alert is set for a specific vehicle
<br\><br\>
Selecting any of the Function Buttons from the bottom of the page will permit the following:
<br\><br\>
Adding / Editing Vehicles
General Information - The minimum required data that can entered for a vehicle are flagged with an asterisk " * "
Note: although not needed to create a vehicle, assigning an X Device to the vehicle is required to View those Events by vehicle
- Devices/Drivers - Serial Number of Device installed in vehicle
OPTIONAL DATA IS
- Image - A photo of the Vehicle
- Drivers assigned
- Overdue For Download Sets the amount of days the system will wait before an Alert is placed for a vehicle that has not downloaded within the set number of days
- Inspection - Alerts can be programmed to provide reminders to the Safety Manager for vehicle inspections
- Insurance - Alerts can be programmed to provide reminders to the Safety Manager for vehicle insurance expiration
- Second Insurance - same
- Lock Events - For those vehicle's videos that are deemed to be sensitive, a view Lock can be placed on the events as they are downloaded into the Control Center so any user who has permissions to view Events will need an additional Lock code to permit viewing (can be placed unique on any vehicle, or reused on a group of vehicles reusing the same code
Assigning an "X" device to a vehicle
From the center of the Edit window;
- Select the button with three dots on it next to the place holder "X Device"
- Select the desired serial number (circular radio button)
- Selected serial number is placed in the "New Device" placeholder
- Click Assign at bottom of open window
Click on Save Vehicle from the function buttons at the bottom to commit changes before leaving Edit Vehicle
Mass / Editing Vehicles
After the creation of a vehicle, device assignment and G-Force Settings are saved... it is possible to edit a group of vehicles to all have the same setting rather than performing each individually.
... From the Fleet Manager>Vehicles screen...
- 1. Click the "Show Selection" button on the bottom
- 2. Make a box selection; after the second selection, the "Edit" button at the bottom changes to "Mass Edit"
- 3. Click the "Mass Edit" button
- 4. Mass Edit window opens allowing you to configure a group of pre-selected vehicles settings simultaneously
- 5. Always click "Save Vehicles" button or "Save Vehicles and Return" button at the bottom before leaving window
Manage Your Personnel
This section is used for managing Personnel information and assignments.The portion of the Organization that can be viewed by each User is controlled by user’s permissions. This way the scope of how much of the organization's Location(s) a user will see is controlled and only Personnel in that Location(s) will be seen.
To manage personnel click on Fleet Manager / Personnel. When the personnel management view opens you will be able to see all of the personnel in your organization that you are authorized to view. Each location can be expanded or collapsed to simplify viewing.
Different sections of Personnel information may be viewed by selecting the appropriate Icon:
Everyone in your organization; includes Drivers and authorized to view/manage
Drivers in your organization
Lists of Driver ID Keys assigned to Drivers (see Driver ID Management below - this is a feature available only with the X2 Cameras)
Drivers License (information can be entered set to alert you before expiration)
Health Exams (information can be entered set to alert you before expiration)
Quick search for Driver ID Key numbers (you must know the ID number in advance)
Adding / Editing Personnel
* General Information - Enter persons Name, Location Department Etc.
* Image - A photo of the Driver
* Driver Key - Driver ID Key Serial number. See Details Here
* Contact Information
* User Account -Select personal logical group in your organization, assign user name (email) and password
* License - Employee's license information and expiration date
* Health Exam - Employee's Heath Records
Click on Save Person to commit changes
User Permissions
• Full, Write, Read, No access
• For the following data: Play Events, Review Events, Export Events, Import Events, GPS Tracker, Fleet Manager, Alerts, Reports, Settings, Admin Settings
Each location is shown in a column, plus if you have created departments (for a more granular permissions) then those Departments are listed and selectable in a user's permissions
Note: Departments can be created in the Fleet Manager>Manage your Vehicles
Driver ID Management
The optional Driver ID functionality allows...
An individual Key is assigned to each driver in the Fleet Manager> Personnel section.
- Once assigned and the Driver ID receptacle is placed in the vehicle
- The X2 Camera will beep after power up to remind the driver he needs to register his ID Key
- All events will be assigned to that driver automatically when the camera downloads to the Control Center software
This opens the serial number form
- Scan the Driver key and click Assign
- Manually enter the serial number and press enter and then click assign
The Serial number of the Drive ID Key for manual entry is found on the Drive ID Key
<br\><br\><br\><br\><br\><br\><br\><br\><br\><br\><br\><br\><br\><br\>
X Devices
These are Cameras from the series of X1, X1P and X2 This section is used for managing X series Devices information, and Settings.
All - Devices that are assigned to the client through the Idrive Servers appear under X Devices and can be assigned by the client to vehicles <br\>
Installed - These Devices are Assigned to vehicles by the client and have communicated and have downloaded Events <br\>
Assigned - These Devices are assigned to vehicles by the Client but have not yet communicated to the system via WiFi <br\>
Unassigned - These Devices have not been assigned to client vehicles (they may or may not have already transferred events via WiFi
<br\>
Unused - These devices will be placed as inactive so that they do not show up in reports of devices that need to be assigned <br\><br\>
RMA - For future use; should a device require "Return Merchandise Authorization" to diagnose an issue or operation
<br\><br\><br\><br\><br\><br\><br\><br\>
Selecting Device Details from the Function Buttons at the bottom will display all the specific configuration and status for a device
<br\><br\>
<br\><br\>
When changes are made to the configuration (under the Edit function Button below) the changes are flagged to the X Devices via WiFi upon the next connection. In the details view, those flag status are designated as "updated" yes or no
<br\><br\><br\><br\><br\><br\><br\><br\><br\><br\><br\><br\><br\><br\><br\><br\><br\><br\><br\><br\><br\><br\><br\><br\><br\><br\><br\><br\>
Selecting Edit Device from the Function Buttons at the bottom will display a mufti-tab window where configurations for the following are made to a device
<br\><br\>
<br\><br\>
These tabs will allow you to customize your fleet for specific lengths of Events, LED behavior from triggers, Names for wired triggers and speeds at wich evetns can be triggered
<br\><br\>
Resolution, Sound and Sleep -
Shock (G-Force triggers) -
Yellow Wire Event (typically Door) -
Blue Wire Event (typically Panic) -
Green Wire Event (typically Backup / Taxi Meter, Etc) -
Periodic Event -
Speed Event -
Remote Panic Event (legacy wireless remotes) -
<br\><br\><br\><br\><br\><br\><br\><br\><br\><br\><br\>
Edit Device Tabs
Resolution, Sound and Sleep
- Verify there is a vehicle name assigned to the device, if not make an assignment
- Default resolution is 1024 X 768 (and is selected for optimum event clarity and speed of downloads)
- Sleep mode is set to default of 30 minutes after ignition is turned off and camera has completed WiFi download (or attempted); Max sleep time is 1440 min = 24 hours
- - During Sleep, a camera can be triggered at a much lower G-Force (vehicle is at rest) and the other triggers can activate a recording just as if the camera was awake
- Sound and Inside Camera options are defaulted to ON
<br\>
Note: Always click Save or Save and Return from the function Buttons below before changing to the next tab or exiting
<br\><br\><br\><br\><br\><br\><br\><br\><br\><br\><br\><br\>
Shock Event
Having 3 accelerometers, the G-Force at which a camera can sense shock to create an event (which is set in Fleet Manager>Manage my Vehicles) can be configured to:
- Turn left LED RED during the triggered G-Force (making the driver aware of his/her driving habits and behaviors), or unchecked for no LED change during a shock Event trigger
- Event Lengths can be set from 4 seconds to 30 seconds (the event center will be the trigger)
- Sleep G-Force is set to .30 by default (in nearly all cases this is the best setting)
- Optionally Idrive Support can enable the Client users to have access to the select three axis configurations (Forward, Lateral and Vertical) as needed
<br\>
Note: Always click Save or Save and Return from the function Buttons below before changing to the next tab or exiting
<br\><br\><br\><br\><br\><br\><br\><br\><br\><br\><br\><br\>
Yellow Wire Events
Typically used to connect to a constant 12VDC+ that senses the voltage drop as the dome/interior light(s) are activated (usually from a door opening). Each vehicle may operate the interior lighting in various manners, a voltage meter should be used to test the circuit prior to connecting)
- Left LED RED during door activation
- Event Length 4-30 seconds
- Yellow Wire Event name (selectable options from drop down menu); This is the type of event as displayed in the Event Viewer
- Allow WiFi Transfer
- - If checked every door event captured will transfer to the system (not recommended)
- - Events will be kept on the Camera storage media and can be removed using the USB thumb Drive provided with the system
- - Yellow Wire Events will be automatically deleted off of the Camera after 1-7 days (selectable)
<br\>
Note: Always click Save or Save and Return from the function Buttons below before changing to the next tab or exiting
<br\><br\><br\><br\><br\><br\><br\><br\><br\><br\><br\><br\>
Blue Wire Events
Designated for connection to the provided Panic Button within reach of the driver
- Left LED RED during Blue Wire (Panic) activation
- Event Length 4-30 seconds
- Blue Wire Event name recommended to select "Panic" (selectable options from drop down menu); This is the type of event as displayed in the Event Viewer
- Allow WiFi Transfer (recommended) otherwise will be kept on the Camera storage media and can be removed using the USB thumb Drive provided with the system
- - Blue Wire Events will be automatically deleted off of the Camera after 1-7 days (selectable) (recommended to transfer via WiFi)
<br\>
Note: Always click Save or Save and Return from the function Buttons below before changing to the next tab or exiting
<br\><br\><br\><br\><br\><br\><br\><br\><br\><br\><br\><br\>
Green Wire Events
Designated for connection to 12VDC+ rising trigger (e.g. Back up light circuit or Taxi Meter, etc)
- Left LED RED during Green Wire activation
- Event Length 4-30 seconds
- Green Wire Event name recommended to select "Back up, Taxi Meter, Etc" (selectable options from drop down menu); This is the type of event as displayed in the Event Viewer
- Allow WiFi Transfer (recommended) otherwise will be kept on the Camera storage media and can be removed using the USB thumb Drive provided with the system
- - Green Wire Events will be automatically deleted off of the Camera after 1-7 days (selectable) (recommended to transfer via WiFi)
<br\>
Note: Always click Save or Save and Return from the function Buttons below before changing to the next tab or exiting
<br\><br\><br\><br\><br\><br\><br\><br\><br\><br\><br\><br\>
Periodic Event
- Trigger Enabled / disabled
- Select left LED RED (checked) during event or unchecked for NO LED indication of trigger
- Event Length 4-30 seconds (suggested 8 seconds)
- Event Type Periodic is recommended (based on time below) or completely Random (no discernible pattern)
- If Periodic is chosen, select interval in minutes
<br\>
Note: Always click Save or Save and Return from the function Buttons below before changing to the next tab or exiting
<br\><br\><br\><br\><br\><br\><br\><br\><br\><br\><br\><br\>
Speed Event
- Trigger Enabled / disabled
- Select left LED RED (checked) during event or unchecked for NO LED indication of trigger
- Event Length 4-30 seconds (suggested 8 seconds)
- Event Type Speed (based on trigger threshold) and Super Speed (based on higher trigger threshold)
Notes:
- Minimum lowest speed is 40MPH and can be modified by Idrive Support upon request
- Speed is registered in MPH and can be modified to register KM/H by the user; see Settings>My Settings
<br\>
Note: Always click Save or Save and Return from the function Buttons below before changing to the next tab or exiting
<br\><br\><br\><br\><br\><br\><br\><br\><br\><br\><br\><br\><br\>
Remote Panic Event
This is a Legacy Device operated by a wireless Panic Button, no longer provided or supported
- Select left LED RED (checked) during event or unchecked for NO LED indication of trigger
- Event Length 4-30 seconds (suggested 25 seconds)
<br\>
Note: Always click Save or Save and Return from the function Buttons below before changing to the next tab or exiting
<br\><br\><br\><br\><br\><br\><br\><br\><br\><br\><br\><br\><br\>
DVR Devices
This section is used for managing DVR Devices information and assignments. DVR refers to Digital Video Recorder, D4 and Merge are product names for the Idrive Mobile DVRs
All - Devices that are assigned to the client through the Idrive Servers appear under DVR Devices and can be assigned by the client to vehicles
Installed - These Devices are Assigned to vehicles by the client and have Events imported into the Control Center software (manual process)
Assigned - These Devices are assigned to vehicles by the Client but have not yet imported any video events (manual process)
Unassigned - These Devices have not been assigned to client vehicles
Unused - These devices will be placed as inactive so that they do not show up in reports of devices that need to be assigned
RMA - For future use; should a device require "Return Merchandise Authorization" to diagnose an issue or operation
<br\><br\><br\><br\><br\><br\><br\><br\><br\>
Clicking on the Edit Device from the Function Buttons below will open the next window and allow you to assign the serial number of the DVR to a vehicle that you have already created and named in the control center software under Fleet Manager>Manage my Vehicles
<br\><br\><br\><br\><br\>
<br\><br\>
When you click the button with three dots on it (vehicle selection) this window opens giving you all the vehicles that you could use to assign the DVR to.
- Select the round button next to the vehicle chosen
- Click the Assign button below
Afterward click the Save device or Save Device and Return function buttons below
<br\><br\><br\><br\><br\><br\><br\><br\><br\><br\><br\><br\><br\><br\><br\><br\><br\><br\><br\><br\><br\><br\><br\><br\><br\><br\><br\><br\><br\><br\><br\><br\><br\><br\><br\><br\><br\><br\><br\><br\>
- Clicking on the Device Details from the Function Buttons will display the Organizational Tree with all the assigned devices
- Selecting one of the devices from the left Organizational Tree will display the serial number, assignment and history for the device
<br\><br\><br\><br\><br\><br\><br\><br\><br\><br\><br\><br\><br\><br\><br\><br\><br\><br\><br\><br\><br\><br\>
End of Section
<br\><br\><br\><br\>
Settings Detail
My Settings
In the My Settings Menu, you have the ability to change any personal settings for Control Center, these include:
• Application Templates - Change the Skin of the Control Center display / color by selecting from the drop-down menu
• Player Settings - Select the Date/Time option (local vs. UTC) as well as the Speed Options (MPH vs. Km/H)
• Auto Start on loaded event - In the Events viewer, you can have videos begin playing as soon as loaded; default is load and wait for user to click play
• Allow Transitions effect - Windows tile transition effect is set ON as default
Admin Settings
Backup and Delete
It is your data, once deleted there is no way to restore an event without a Backup!
From the Control Center top menu bar click on Settings> Admin Settings> Backup and Delete
- Set the number of days before events are automatically deleted from the Idrive Base Station for all X devices and D4 devices
- There is also a disk space limitation feature where old events will be deleted when space is becoming limited. (recommended level for this setting is 25GB or more)
- Options for Delete
Note: Square boxes are selectable or not
- Keep Incidents
- Keep Locked Events
Note: Round selectable buttons allow only one of three choices
- Keep all scored events
- Keep only high scores events (events scores of 3 or 4)
- Delete scored events
- Select “No Backup” or “Backup” (Backup is recommended) for deleted events
- Choose a format for backups: “Keep original idrive format” (recommended - permits full restoration with high-res video) or select “Use video compression” (lower-res video) to save on space in archived location
Backup location selection
- This can be a local drive connected directly to the base station or a resource available on your network. When using a network resource the location must be available to the system for backups to function. The backup location should be added in the UNC format (\\server\directory) and not as logical drive (z:\directory). If this resource requires authentication such as a domain account enter the user name and password in the fields provided. This will allow the system backup process to access the network resource even when no user is logged onto the base station.
- D4 Videos (if used) can be large, a policy should be created for retention
- GPS files are generally very small and should only be considered for deletion if old or out dated
- Temporary Files represents Export folder located in C: Program Files\idrive\Export
- This folder contains saved PDF files exported from printable reports
- By default the pdf files older than 30 days will be removed.
NOTES:
- The Backup and Delete mechanism looks at the DOWNLOAD date and the not the EVENT date to perform deletions. (as some vehicles do not download regularly, this way the operator of the software will have equal time in the system to view before auto deleted)
- When choosing to backup before deleting you have two options "keeping original format" vs. "use video compression".
- The Original format will allow you to "Import" all data back into the Control Center as it was originally before the delete; however, if you delete using video compression you can no longer import the video back into the system and the GPS data accompanied is lost.
- The automatic delete process will run periodically even when no user logged onto the system
- Events MUST be checked as an "Incident" to prevent automatic deletion!
It is your data, once deleted there is no way to restore an event without a Backup!
<br\><br\>
Player Settings
Settable options for the Idrive Player. You are able to disable or enable the following by checking or un-checking the box;
- * Show inside camera
- * Enable sound (for all devices at your location) Individual control for devices can be found in Vehicles-Devices-Events section
- * Include Map in snapshot
- * Include graphic in snapshot
Note: Audio recording in some states may be prohibited. Please check the local and state regulations for your location.
End of Section
<br\><br\><br\><br\>
Login History
Idrive Control Center software Users should regularly sign out after their usage
Failure to do so could result in:
- Other users with lessor permissions to have access to sensitive data
- Accidental or purposeful permanent deletion of events and or data
- Access to drivers and or company data stored in the system
Benefits of Signing out regularly from a finished session:
Administrators can see from the Login History the following
- When a user last signed in
- The length of the last sign in
- Where the last sign in or history of dated sign ins took place
- Local on "Control Center"
- Remotely on another multi-location organization "Control Center"
- Remotely on "Idrive Terminal" Sold separately, stand alone software across client LAN
- Remotely on "Idrive Global Center" (client or private Internet access PC connected to the Idrive Cloud Global Center)
End of Section
<br\><br\><br\><br\>
Transfer Activities Detailed
Allows for monitoring and review of Event transfers that happen at this location. Vehicles that transfer at other locations in your organization (Base Station) must be viewed at that location.
This is a dynamic display of the WiFi activity at this physical location. This is an active display of current and recent transfer activity and not the results of a search.
- The Transfer Activity List can be sorted by any criteria by clicking on the appropriate column head
- The Transfer Activities window is broken into 2 sections:
Transfer Logs Select the interval for the logs you wish to view
<br\><br\>
Show transfers from the last 24 hours <br\><br\><br\>
Show transfers from the last 3 days <br\><br\><br\>
Show transfers from the last 7 days <br\><br\><br\>
Click to perform a custom search <br\><br\><br\>
 Show transfers in the date range selected
<br\><br\>
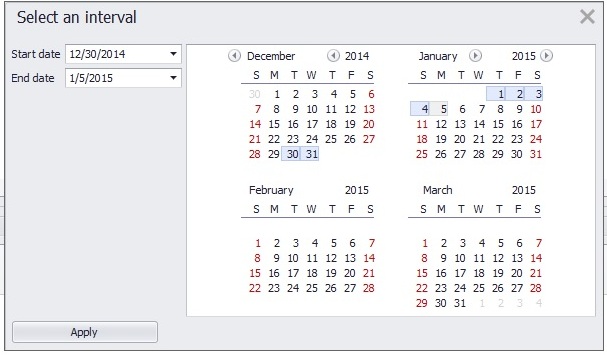 select the date range
<br\><br\>
Matching results will be displayed in Transfer Logs windows. Each vehicle may be expanded or collapsed.
<br\><br\>
About Device WiFi transfer behavior
The Transfer mode is initiated when the ignition switch for the vehicle is shut off. The X series device will search for the Idrive wireless network. Once the idrive network is contacted the following actions take place:
- Verify the Device belongs to the Company / Location by checking the serial number assignment
- Only if the device belongs to the location begin download of events
- -download the most recent event
- -verify the event downloaded completely and is valid
- -If the event correctly downloaded delete it from the device
- -download the next event
- Upon successful download of all events (all events are transferred successfully the first time via WiFi):
- The connection will close
- The camera will shut down (or enter sleep mode depending on your settings)
- The number of tries will be shown as 1 in the Connection Column
- If the download is interrupted - (either due to loss of connection or the vehicle ignition being turned on)
- The device will retry the connection up to 15 times over the next 3 ½ minutes
- Simultaneous downloads are limited to 3 devices at a time to improve overall download efficiency.If there are three devices connected the access point the camera will wait indefinitely for an open slot and begin downloading when a slot becomes available.
- After successful download The connection will close
- The camera will shut down (or enter sleep mode depending on your settings)
<br\><br\>
Transfer Logs Detail
The Transfer Logs window will display detailed information about the files transferred between the Idrive Devices and the Idrive Base Station.
The following information about transfers is available in the logs:
- Detailed Log (Click Gear for more Details about the transfer)
- Transfer Type
- -
 Transfer from Import (Import details Here)
- -
- Vehicle assignment (a Vehicle MUST be assigned to the Device for events to be reviewed)
- Device serial number
- Router (Access Point name or MAC ID the transfer come over)
- Start date (Beginning of transfer)
- End Date (End of transfer)
- Time (Total Time of Transfer)
- Total Events
- Transferred Events (successfully transferred and verified)
- Pending Events (Number of Events remaining on the device)
- Total skipped wire events (download of wire events is optional)
- Max Rate – Highest wireless transfer rate
- Min Rate – Lowest wireless transfer rate
- Avg Rate – Average transfer rate
- Conn. – (number of connections attempted for the device)
The results of your search can be sorted by any criteria by clicking on the appropriate column head.
Note: Event Transfer logs older than one month will be deleted automatically
End of Section
<br\><br\><br\><br\>
Vehicles-Device-Events Settings
Vehicles-Device-Events Settings is used to control, display or customize the settings for the Idrive X devices in your fleet. Changes can be made to any or all of the devices depending on your selection.
When opened the current settings for vehicle(s) at your location will be displayed. in a detail column format displaying every event type and trigger configuration including LED behaviors for that event type
Device(s) without a vehicle assignment will be greyed out and cannot be modified.
<br\><br\>
Resolution, Sound and Sleep
- Verify there is a vehicle name assigned to the device, if not make an assignment
- Default resolution is 1024 X 768 (and is selected for optimum event clarity and speed of downloads)
- Sleep mode is set to default of 30 minutes after ignition is turned off and camera has completed WiFi download (or attempted); Max sleep time is 1440 min = 24 hours
- - During Sleep, a camera can be triggered at a much lower G-Force (vehicle is at rest) and the other triggers can activate a recording just as if the camera was awake
- Sound and Inside Camera options are defaulted to ON
<br\>
Note: Always click Save or Save and Return from the function Buttons below before changing to the next tab or exiting
<br\><br\><br\><br\><br\><br\>
Shock Event
Having 3 accelerometers, the G-Force at which a camera can sense shock to create an event (which is set in Fleet Manager>Manage my Vehicles) can be configured to:
- Turn left LED RED during the triggered G-Force (making the driver aware of his/her driving habits and behaviors), or unchecked for no LED change during a shock Event trigger
- Event Lengths can be set from 4 seconds to 30 seconds (the event center will be the trigger)
- Sleep G-Force is set to .30 by default (in nearly all cases this is the best setting)
- Optionally Idrive Support can enable the Client users to have access to the select three axis configurations (Forward, Lateral and Vertical) as needed
<br\>
Note: Always click Save or Save and Return from the function Buttons below before changing to the next tab or exiting
<br\><br\><br\><br\><br\><br\>
Yellow Wire Events
Typically used to connect to a constant 12VDC+ that senses the voltage drop as the dome/interior light(s) are activated (usually from a door opening). Each vehicle may operate the interior lighting in various manners, a voltage meter should be used to test the circuit prior to connecting)
- Left LED RED during door activation
- Event Length 4-30 seconds
- Yellow Wire Event name (selectable options from drop down menu); This is the type of event as displayed in the Event Viewer
- Allow WiFi Transfer
- - If checked every door event captured will transfer to the system (not recommended)
- - Events will be kept on the Camera storage media and can be removed using the USB thumb Drive provided with the system
- - Yellow Wire Events will be automatically deleted off of the Camera after 1-7 days (selectable)
<br\>
Note: Always click Save or Save and Return from the function Buttons below before changing to the next tab or exiting
<br\><br\><br\><br\><br\><br\>
Blue Wire Events
Designated for connection to the provided Panic Button within reach of the driver
- Left LED RED during Blue Wire (Panic) activation
- Event Length 4-30 seconds
- Blue Wire Event name recommended to select "Panic" (selectable options from drop down menu); This is the type of event as displayed in the Event Viewer
- Allow WiFi Transfer (recommended) otherwise will be kept on the Camera storage media and can be removed using the USB thumb Drive provided with the system
- - Blue Wire Events will be automatically deleted off of the Camera after 1-7 days (selectable) (recommended to transfer via WiFi)
<br\>
Note: Always click Save or Save and Return from the function Buttons below before changing to the next tab or exiting
<br\><br\><br\><br\><br\><br\>
Green Wire Events
Designated for connection to 12VDC+ rising trigger (e.g. Back up light circuit or Taxi Meter, etc)
- Left LED RED during Green Wire activation
- Event Length 4-30 seconds
- Green Wire Event name recommended to select "Back up, Taxi Meter, Etc" (selectable options from drop down menu); This is the type of event as displayed in the Event Viewer
- Allow WiFi Transfer (recommended) otherwise will be kept on the Camera storage media and can be removed using the USB thumb Drive provided with the system
- - Green Wire Events will be automatically deleted off of the Camera after 1-7 days (selectable) (recommended to transfer via WiFi)
<br\>
Note: Always click Save or Save and Return from the function Buttons below before changing to the next tab or exiting
<br\><br\><br\><br\><br\><br\>
Periodic Event
- Trigger Enabled / disabled
- Select left LED RED (checked) during event or unchecked for NO LED indication of trigger
- Event Length 4-30 seconds (suggested 8 seconds)
- Event Type Periodic is recommended (based on time below) or completely Random (no discernible pattern)
- If Periodic is chosen, select interval in minutes
<br\>
Note: Always click Save or Save and Return from the function Buttons below before changing to the next tab or exiting
<br\><br\><br\><br\><br\><br\>
Speed Event
- Trigger Enabled / disabled
- Select left LED RED (checked) during event or unchecked for NO LED indication of trigger
- Event Length 4-30 seconds (suggested 8 seconds)
- Event Type Speed (based on trigger threshold) and Super Speed (based on higher trigger threshold)
Notes:
- Minimum lowest speed is 40MPH and can be modified by Idrive Support upon request
- Speed is registered in MPH and can be modified to register KM/H by the user; see Settings>My Settings
<br\>
Note: Always click Save or Save and Return from the function Buttons below before changing to the next tab or exiting
<br\><br\><br\><br\><br\><br\>
Remote Panic Event
This is a Legacy Device operated by a wireless Panic Button, no longer provided or supported
- Select left LED RED (checked) during event or unchecked for NO LED indication of trigger
- Event Length 4-30 seconds (suggested 25 seconds)
<br\>
Note: Always click Save or Save and Return from the function Buttons below before changing to the next tab or exiting
End of Section
<br\><br\><br\><br\>
Access Point Settings
This section helps monitor and control the wireless access that make up your Idrive Wireless Network.
When a device connects to the Base Station via WiFi the access point that is used has its MAC Address is registered and displayed in the Router Settings list.
When a router connects the first time Status will show "IP not defined"
Enter a name for the router such as "Lot 1" to define the location.
Once a router has registered in the list it can be given a name as well as have the status tracked.
- - The router name is replacing the mac address in all Transfer Activities lists.
- - IP address: The status of each router (online/offline) is now verified by Sync Service every 6 hours.
- - “Find IP by Mac” option trays to automatically get the IP address.
The status column will show the device as "online" or Offline"
Once a router has registered in the list it can be given a name as well as have the status tracked.
At the beginning, all clients will see the router’s list like first line from the image. They/We have to edit each line and add a proper value for each field.
For status checking to work the IP address of the router must be inserted because the service tries to ping the ip address and write the status in the database.
End of Section
<br\><br\><br\><br\><br\>
Import Detailed
Import Events
The Import View is used to manually transfer event from a device with a USB stick or to restore events to the system that have previously been backed up and deleted.
Select Import to open the Import View
Click on the Import tile to open the navigation pane
Navigate to the location on the system where the event(s)are located and select the desired events.
Select open and the events will load into the Control Center.
Note: To identify the event(s) you wish to import please see the event naming convention Here
<br\><br\><br\><br\>
Prepare the USB Thumb Drive'
- Before Starting the process below, verify that you have a only one file on the USB memory stick having the file “idrive” as a “CERT file” type
- if yes proceed to the step 4
- If the file is missing or you believe it to be corrupt:
- - Delete the file from the memory stick
- - Save the file attached to this email and write it to the memory stick in its place
Download via USB from X Device Cameras
- With the X1 Camera OFF (ignition OFF)
- Place the USB thumb drive with the “gold fingers” toward the windshield into the left side of the camera (assuming the camera is still mounted to the windshield mount)
- Turn the Ignition ON and wait for the LEDS to go Green - Green
- Wait for 1 minute (this allows the X1 Camera time to “hand shake” with the thumb drive and verify the CERT file on the thumb drive is authentic
- Turn the ignition off and the X1 Camera LEDs will change to solid Amber (Yellow) – Green (then the Amber will flicker very fast)
- After the transfer is complete (fast flicker on left LED will go out – right LED may still be Green or out) remove the thumb drive and take back to the Base Station
- - (this is a 8GB storage stick and can download from 2 full cameras having 4GB storage or many cameras having minimal events totaling under 8GB)
NOTES: If the Amber LED begins to flash slowly, the USB stick or the CERT file was not recognized and the Camera is now looking for the WiFi Access Point
- If that happens, turn the ignition back ON and wait for the Green Green LEDs
- Remove the thumb drive verify you had the contacts facing the windshield
- Now start at step 1 (make sure the USB Thumb drive is inserted a full ½ inch)
Steps to IMPORT Events into the idrive Base Station
IMPORTANT: to IMPORT from a USB thumb drive, you must be physically at one of the idrive Base Stations (not remotely operated)
- At the Base Station insert the USB into the drive computer
- At the idrive Control Center select Import
- Select X1 Events and Data
- Next window select Import now
- Using your mouse OPEN the drive location that the USB thumb drive appears as (e.g. Drive E. or F. etc)
- Select all files (click one file to select it, then hold CTRL+A to select all)
- Select OPEN; the software will upload all recognized events to the Base Station
- Close import window and go to Play and Review and verify Imported files
- After verifying Import, delete all files (except the idrive CERT file) from the USB Thumb Drive using Windows to navigate to the drive
End of Section
or
Files Naming Conventions Detailed Discussion
<br\><br\><br\><br\><br\>
Best Practices Managing the volume of event data
The Idrive system is not a crash recorder; it is a driver behavior modification system. To get the full benefit of your Idrive system events should be regularly reviewed so that the performance of your drivers can be monitored. This will allow for behavior modification measures to be taken to improve safety of your fleet. If there are too many false events this task can becomes much more difficult. Settings are available to help make sure that the cameras are only collecting events that you really want to review. There are several settings available to help control the number and size of events
Event Video Resolution – Use the lowest setting you require. This will make for faster downloads as well as few issues with system space
Download only desired event types – Do not download them if they are not being reviewed. If you need a specific event it will still be on the device up to 7 days base on your settings Here.
Event Lengths - excessive event length results in larger files which take longer to transfer and review
Recommended Event Lengths
| Event Type | Suggested Length |
|---|---|
| Shock event length | 14 Seconds |
| Door open event length | 10 seconds |
| Alarm event length | 20 seconds |
| Wired Panic event length | 20 seconds |
| Periodic Event Length | 8 seconds |
| Speed Event Length | 8 seconds |
| Panic event length | 20 seconds |
G-Force settings - set the correct trigger level for each type of vehicle and driving condition to avoid generating excessive Shock Events. Start with the Vehicle Class as shown in table below and fine tune it from these values based on loading of the vehicles, road conditions etc.
It is recommended that the G-Force setting for all of the vehicles be set very high initially until the correct setting for each type of vehicle has been determined. Once this determination has been made the rest of the vehicles of similar type can then be set to the proper setting.
Select one vehicle of each type and lower the G-force for this vehicle only. Observe the number of events that are captured over the course of the vehicles operation interval and adjust the G-Force level accordingly. Once satisfied with the setting for the test vehicle apply the setting to all the vehicles of that type.
Typical G-Force settings based on vehicle Weight
| Vehicle Type | Weight Range | G-Force |
|---|---|---|
| Very Light Vehicle | Under 2,000 pounds | 0.4 |
| Compact car | 2,000 - 3,000 pounds | .5 |
| Midsize car | 3,000 – 3,500 pounds | .55 |
| Large car | 3,500 - 4,500 pounds | .6 |
| Compact truck & SUV | 4,500 - 5,500 pounds | .65 |
| Midsize truck | 5,500 – 7,000 pounds | .7 |
| Large truck | 7,000 – 8,500 pounds | .75 |
| Very Heavy Vehicle | Over 8,500 pounds | .8 |
Delete and Auto Delete Events. Using the Control Center software, the best and most effective measure of protecting your data is maintaining a healthy data storage system. Routinely view and manually or automatically delete events from the Idrive Control Center with a recommended backup solution. This will prevent your Base Station from filling up and missing event downloads.
End of Section
<br\><br\><br\><br\><br\>
Files and Naming Conventions
Files downloaded from an Idrive device are one of two types:
GPS tracker files
These files contain the minute by minute GPS coordinates of the vehicle as well as ignition ON/Off actions - an example name is 00127B4B5F81.gps
Event Files
Each Event file contains the video, audio, GPS coordinates and G-Force information for one event. When searching for an event in a backup location you will need to understand the naming convention for the files.
Take for example a this file name 017040000025^180914^111213.2
Idrive Event File Naming Convention
| Serial Number | Event Date | Event Time (GMT) | Event type |
|---|---|---|---|
| 017040000025 | 18 Sept 2014 | 11:12:13 GMT | 2 |
| Serial Number | Day/Month/Year | Hour/Minute/Seconds | See below |
Event Types
- 1= Door
- 2= Shock
- 4= Power Off (Obsolete)
- 8 =Panic
- 16 =Wired Panic
- 32= Alarm
- 130= Periodic
- 131= Speed
- 132= Super Speed
D4 DVR Event Naming Convention
In order to find a video file from a specific date and time you must understand the file naming convention. A video file name has the following format:
[X]_YYYYMMDD-hhmmss_[ZZZZZZ]_[serial_number].avi
[X] represents a digit used for an internal representation in the DVR firmware
YYYYMMDD represents the start date of the video (4 digits for the year, 2 digits for the month and 2 digits for the day)
hhmmss represents the start time of the video (2 digits for the hour, 2 digits for the minute and 2 digits for the second)
[ZZZZZZ] represents 6 digits used for an internal representation in the DVR firmware.
[serial_number] represents the serial number of the D4 device.
Example: 1_20120419-135053_f001p4_2222D3333V.avi
End of Section
<br\><br\><br\><br\><br\>
Global Center
The Idrive Global Center is a temporary copy of a clients most recent events, condensed and placed on the Idrive Cloud servers for 1 1/2 to 2 months depending on the quantity. The origianl files are on the clients Base Station and are owned by the client. These are simply a replica temporarily located here for remote Viewing and Reviewing of Events and GPS.
A User signs into the Global Center from any PC with an internet connection at;
- Type into your Internet Browser address line - "globalcenter.idriveglobal.com"
- Sign in using your email address and password that you use to sign into the Idrive Control Center Software
- Each user will have the same privileges on the Global Center that they had on the Control Center Software
- If a user signs into the Global Center and performs any views and reviews of events, then his/her Login History can be seen on the Control Center; Settings> Login History
Dashboard - Synced data from the Control Center shows recent data uploaded from the Control Center to the Global Center
- If a client has more than one location, each location can be viewed under events and the location tab
Events - Clicking on Events will yield the last history of 3 days, 7 days or you can place an interval search
There is an advanced search tab on top that drops down to reveal search features such as:
- Search by Vehicle Name
- Search by Driver Name
- Search by event type, etc...
Clicking on any dual camera image will open the video to play in the browser
Clicking on the Pyramid Icon with the tree bars will allow you to Place comments and Review then save the Event.
Every 12 minutes all data is synced back with the Base Station Control Center Software and vise versa
GPS - Click on the top tab for GPS and you can view a reduced coordinate version of the Control Center software (so it will load faster)
You must know the date and vehicle to search for as the browser cannot load all the data the Control Center maintains
End of Section
