Difference between revisions of "Fleet Manager"
Jump to navigation
Jump to search
m |
|||
| Line 122: | Line 122: | ||
*'''Face Profiles to Assign''' will take you to the old Face Recognition Driver Assignment Interface: | *'''Face Profiles to Assign''' will take you to the old Face Recognition Driver Assignment Interface: | ||
| − | 16poza | + | 16poza poza poza poza ----- ----------------------------------- |
==Personnel (Add/Edit/Delete)== | ==Personnel (Add/Edit/Delete)== | ||
Revision as of 11:44, 27 August 2019
Vehicles and Personnel
Concept Description
- A cloud-based platform that let you manage your fleet and configure idrive system;
- A Control Center on cloud, that perfectly synchronizes with Control Center from desktop;
- It contains these modules: Vehicles and Personnel.
Technical Development
To get to Fleet Manager (for now, on staging) just go to Configure Face Recognition You can:
- Add vehicles and personnel in the system;
- Assign device to a vehicle and configure the settings;
- See for each driver the Assigned Face Recognition Profiles (if the client has Face Recognition feature).
Vehicles List
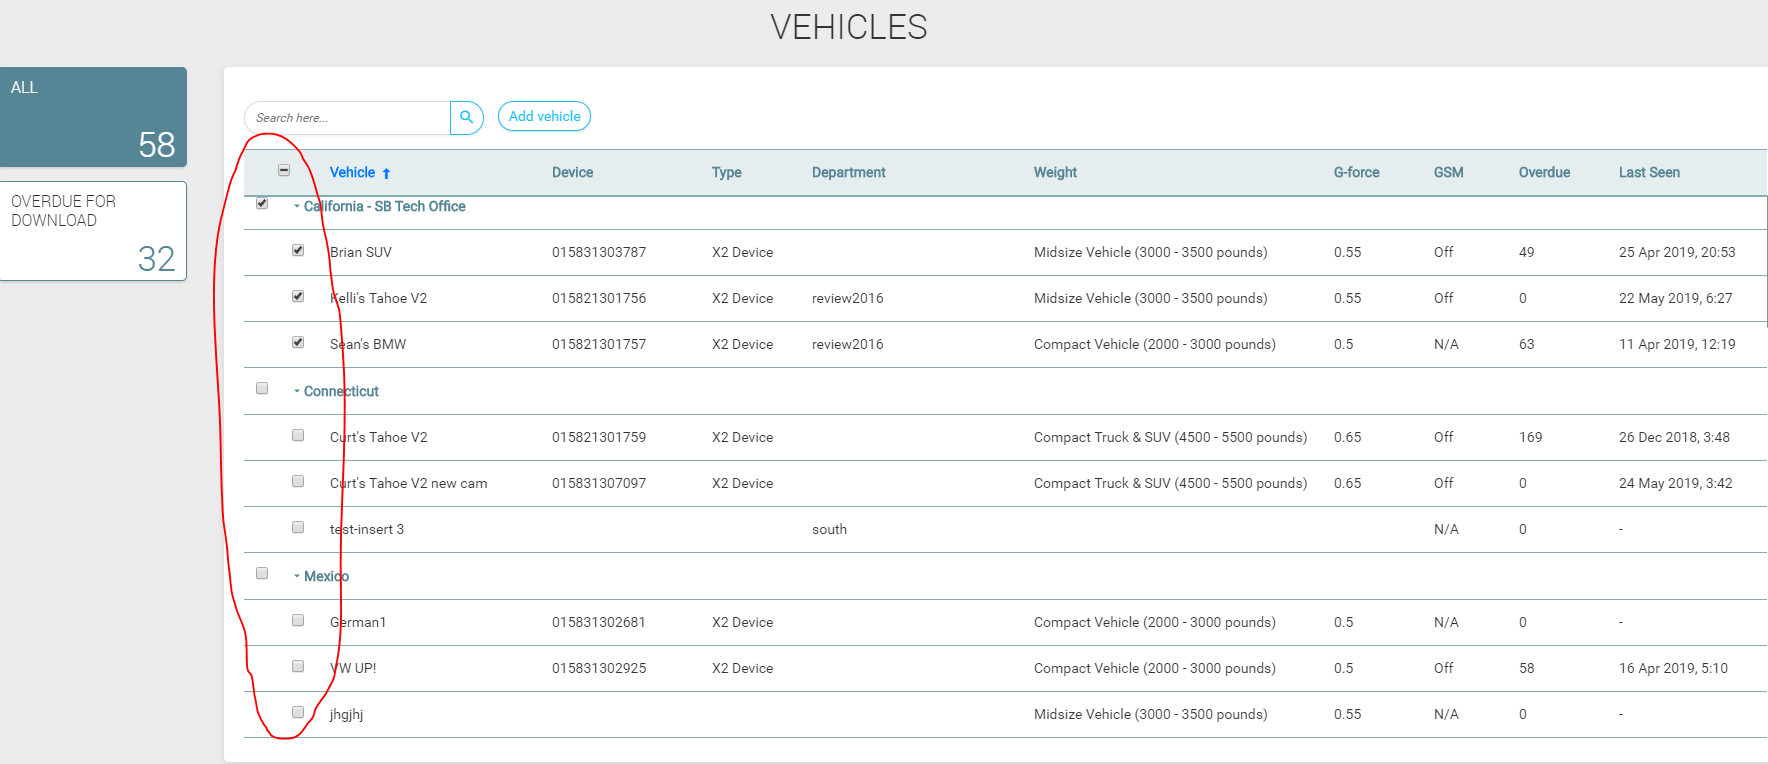
- You can see that vehicles are grouped by locations;
- The list is ordered descended by last connection – last seen column (the last time the device connected to server), but you can eventually sort the list by every column;
- The checkboxes are not functionable yet. They can be usable when we will implement Mass Edit feature – so we can edit multiple vehicles (details, settings etc.);
- Search bar can be used to search by any column;
- You can add a new vehicle by clicking ‘Add vehicle’ button;
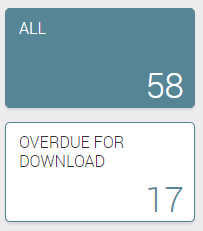
- There are, for now, just 2 filters for the list: All and Overdue for Download.
Vehicles (Add/Edit/Delete)
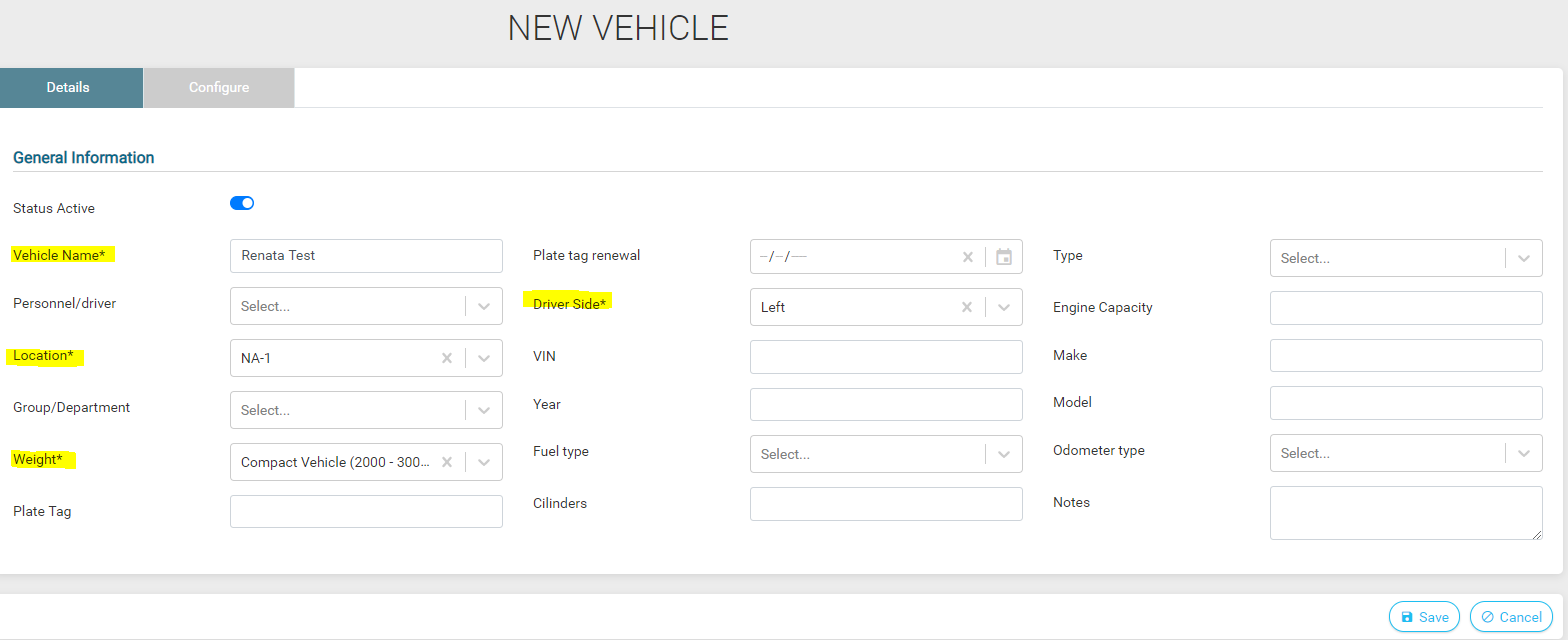
- We split vehicle’s profile into 2 parts: DETAILS (in which you can add general information about the vehicle: name, location, vehicle’s specifications etc.) and CONFIGURE (in which you can configure all the settings).
Details
- To create a new vehicle, you need to fill in 4 mandatory fields: Vehicle Name, Location, Weight and Driver Side. After you click save, it will get you to the second part -> Configure;
- Vehicle’s status: Active / Inactive (Inactive = Out of service). If you delete a vehicle, it won’t appear anymore in the list;
- Create new group / department by starting to type a new name in the dropdown;
- Or you just select from the drop-down if there are any departments created;
- If you delete a vehicle, it will not appear in the lists anymore;
- It can be assigned only 1 driver to a vehicle;
Configure
- There will be no Devices List page -> all devices settings (events settings, g-force thresholds will be configurable from vehicle’s page and assigned per vehicle). So, the assigned device will have the same settings as the vehicle, not otherwise;
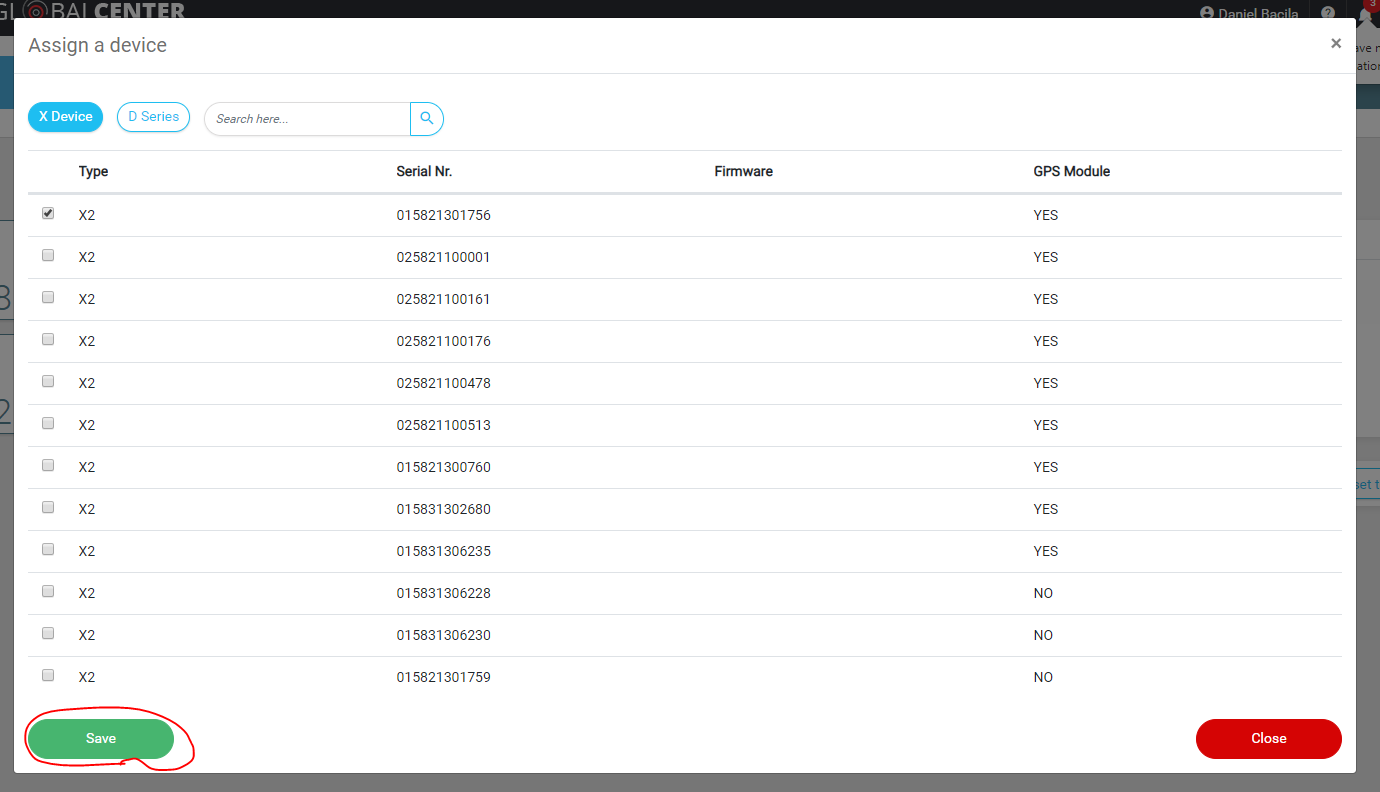
- If you created a new vehicle and you want to assign a device, go to Configure tab and click Edit;
- The page will be empty if you don’t have any device assigned -> there are no settings to show;
- Click Assign device and it will appear a pop-up with a list of available (unassigned) X devices and D series (if necessary). Select a device and click Save;
- After that, in the interface will appear a DEFAULT set / profile of settings (with optimal thresholds and settings for the vehicle’s category);
Major Sections
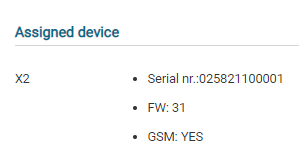
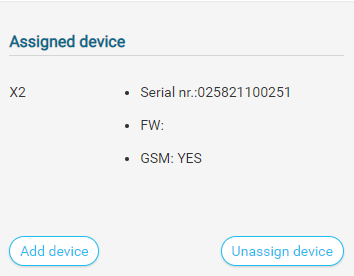
Assigned Device
General info about the assigned device - it cannot be modified.
- If you want to unassign a device, click ‘Edit’ button and then ‘Unassign device’. Or you can add another device, but it will be possible just DVRs, if you already have assigned an X Device.
General Setup
- Transfer threshold period will be the same for cellular only devices. If a client has cellular only, his vehicles will be overdue ‘after 7 days’, only if he doesn’t modify otherwise.
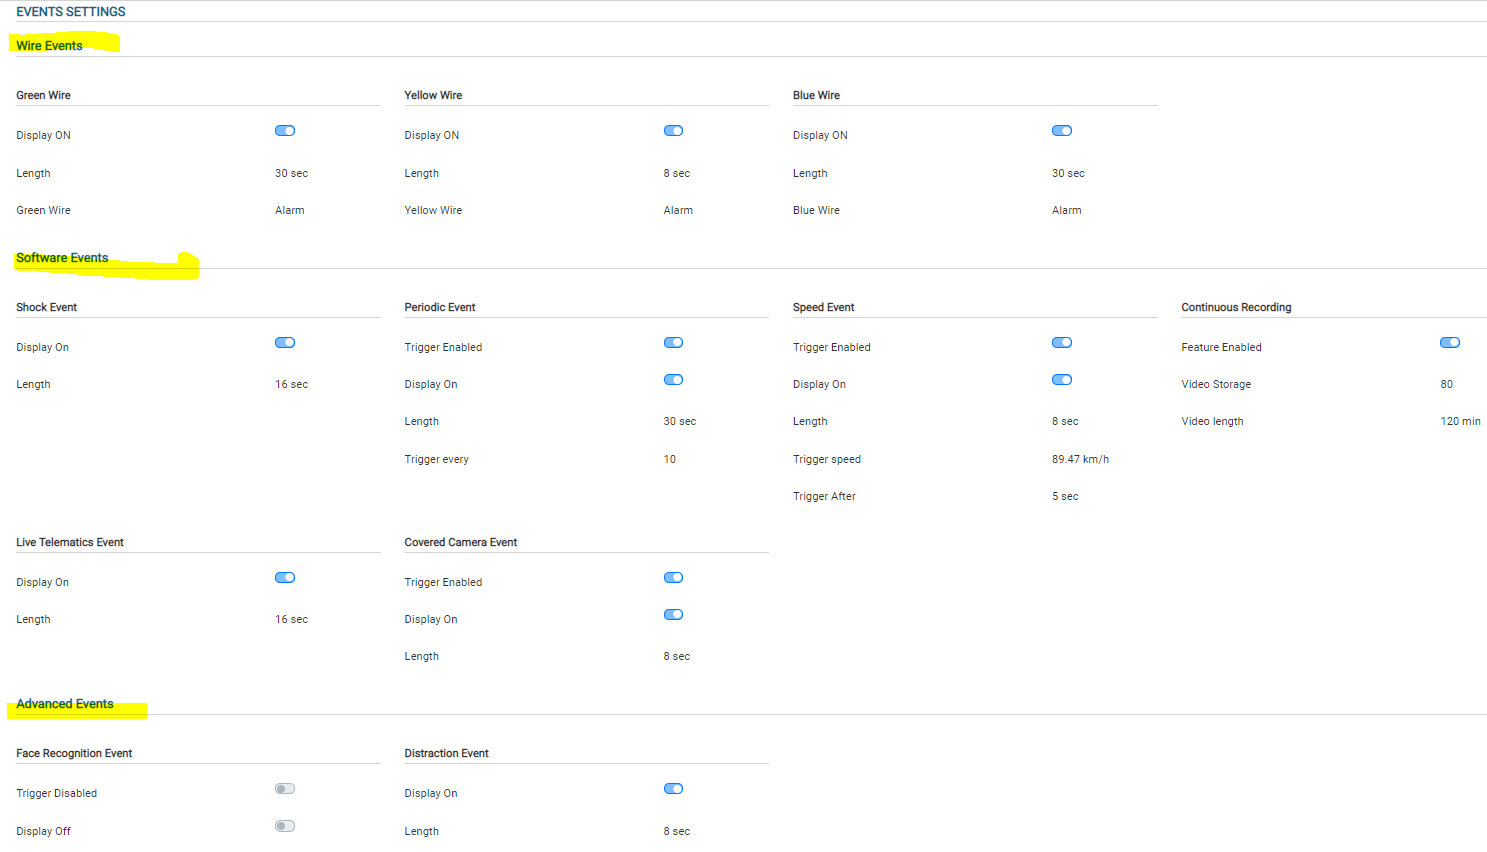
Events Settings
We grouped this section in 3 parts: wire events, software events and advanced events -> licensed based events: face recognition ev, distraction ev, sdw etc.).
- Display ON/OFF has a double function: Led ON/OFF for X2 devices and Display ON/OFF for X3 devices;
- Once you click save, the device will take over the vehicle’s settings;
- Whenever you Unassign a device, the settings you already configured will still be saved on the vehicle -> if you assign another device on the same vehicle, that device will take over the last settings configured on that vehicle;
- Advanced Events – this section will appear only if you have a license assigned on vehicle (face recognition / sdw / dad / seat belt license);
- When you edit a vehicle, there is also a ‘Reset to Default Settings’ button, that you can use to erase all your changes and show the default settings for that vehicle’s category:
Default Settings will be:
- General setup: No sleep period, sound enabled, inside camera enabled, G-force Threshold Optimal, Overdue for more than 7 days;
- Events Settings Length: 8 seconds for almost all the events, except for: shock – 16 seconds, continuous recording – 2 minutes, blue wire / panic – 20 seconds;
- Events Settings Display ON for almost all the events, except for: periodic, speed and face recognition;
- Continuous recording: video storage - 20%, video length – 2 minutes and it cannot be changed
- Periodic: trigger every 60 minutes;
- Face recognition: trigger disabled;
- Speed: Trigger after - 20 seconds, trigger speed – 55 mi/h, trigger super speed – 81 mi/h.
Personnel List
- The list is ordered alphabetically, first by location and then by Driver’s First Name (but you can also sort by each column);
- When a driver doesn’t have a location assigned, it will appear in a ‘No Location’ drop-down, at the bottom of the list.
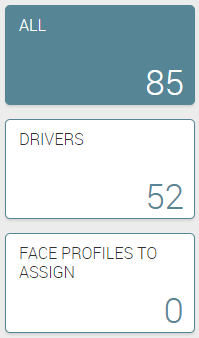
- There are only 2 filters for Personnel list: All, Drivers. The last one, Face Profiles to Assign are just for those clients that have Face Recognition feature;
- Face Profiles to Assign will take you to the old Face Recognition Driver Assignment Interface:
16poza poza poza poza ----- -----------------------------------
Personnel (Add/Edit/Delete)
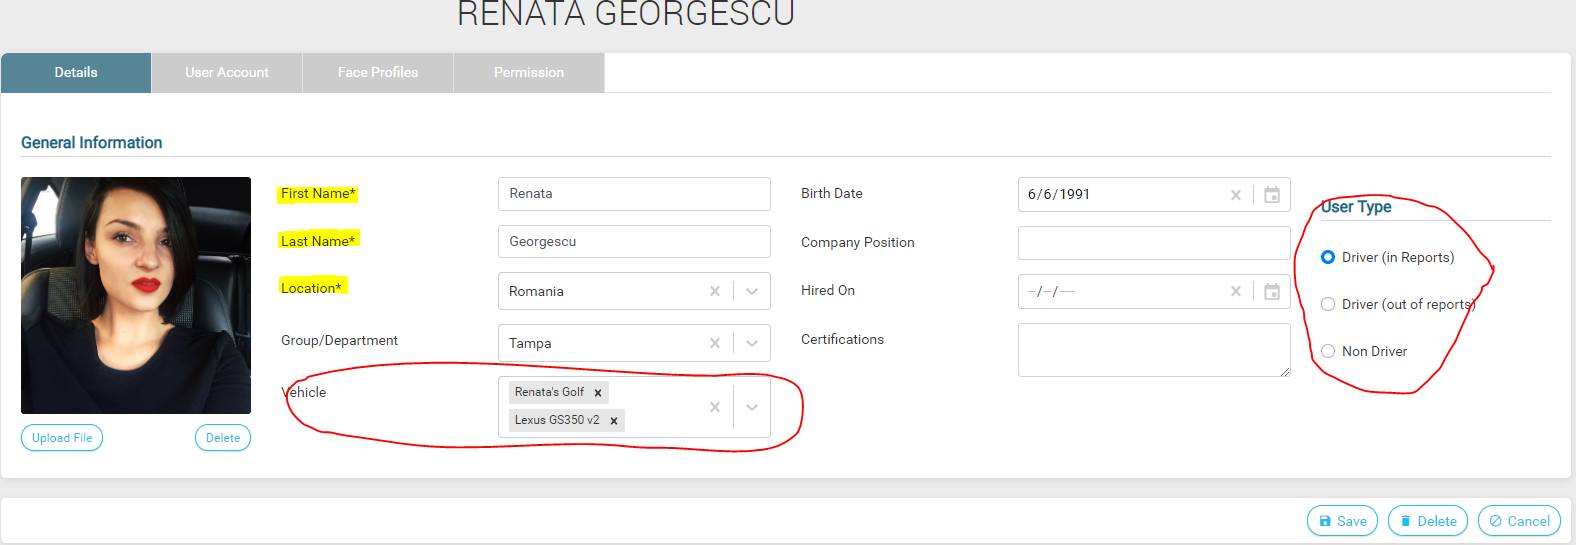
- We grouped Personnel’s profile into 3 sections: DETAILS (in which you can add general information about the driver/ personnel), USER ACCOUNT (in which you can create a user for the personnel and define the user’s account type);
- In DETAILS, there are 3 mandatory types of input: First Name, Last Name and Location. After you click ‘Save’, it will get you to next section, ‘User Account’;
- You can assign multiple vehicles on a driver;
- User Type section you can choose for your driver to be analyzed in reports or not;
- In USER ACCOUNT you can establish the type of account the user will have, therefore his / her permissions;
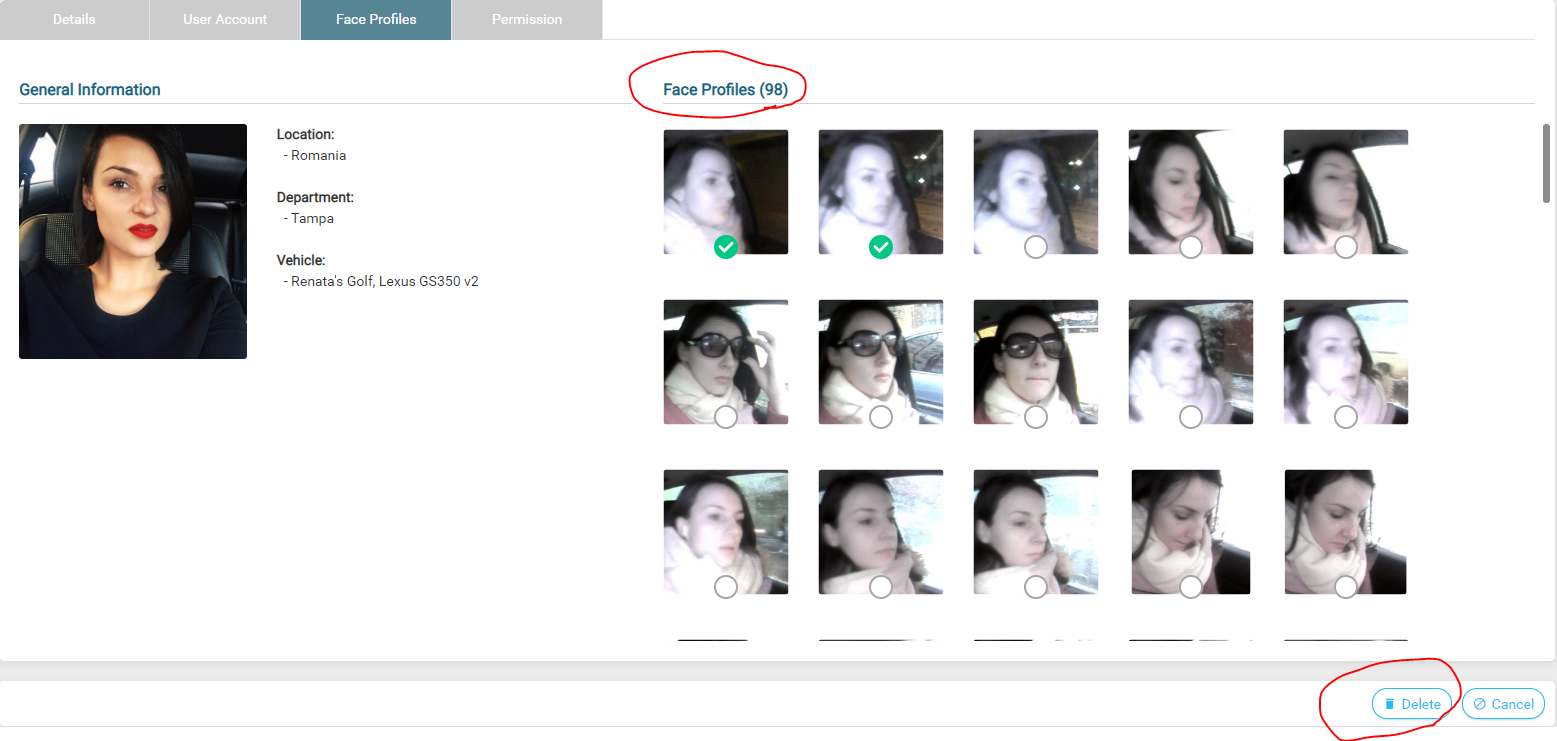
- In Face PROFILES, you can see those Face Recognition Profiles that where already assigned for this driver;
- You can see the total number of the profiles and you can delete them you have permission to write.
